Celebrate the season with this FREE simple snowflake embroidery pattern! December is here, and for many people, that means the beginning of the snowy season. While the cold, fluffy white stuff isn’t always fun to shovel, it is fun to create snowflake art — preferably in front of a roaring fire while sipping a cup of hot chocolate. Whether you want to add a bit of whimsy to your favorite skirt, tea towel or scarf, or simply create a stand-alone work of art, snowflake embroidery is a fun and simple project.
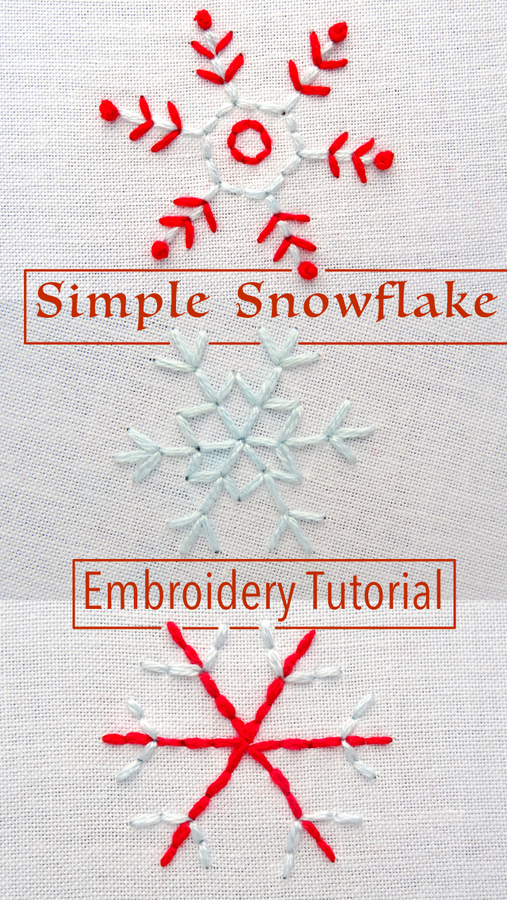
This set of three unique snowflake patterns are designed with simplicity in mind. Using only two stitches – back and french knot – these basic snowflakes can easily be stitched in large or small sizes.
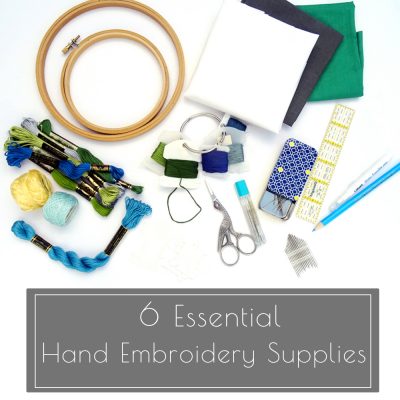
You Will Need…
- Embroidery Hoop
- Fabric big enough to fit the hoop for a stand-alone project, or the item you wish to embroider.
- Embroidery Floss in the color of your choice. If you are embroidering your snowflakes on dark fabric choose a bright white or pale blue. If you are using white fabric like in the photos shown here, try a light blue or silver floss instead. Don’t be afraid to use more than one color in your snowflakes. Pro tip: metallic floss makes for fun & festive embroidery snowflakes!
- Free Snowflake Embroidery Pattern: Download and resize however you like. Pattern transfer instructions are included in the PDF.
- Sewing Scissors, a Water Soluble Marking Pen and maybe a Small Ruler to keep your stitches straight.
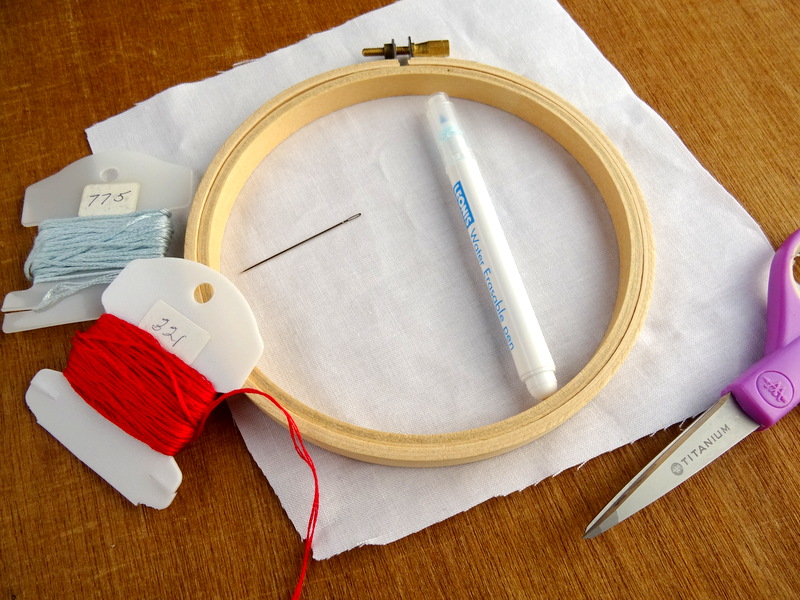
Snowflake Embroidery Pattern FREE PDF
For this project, I’ve created a free downloadable pattern featuring three simple snowflakes. You can download it HERE, or by clicking the title above. I’ve also included instructions for transferring the pattern to fabric in the PDF. Once you have your pattern on the fabric come back here for further instructions.
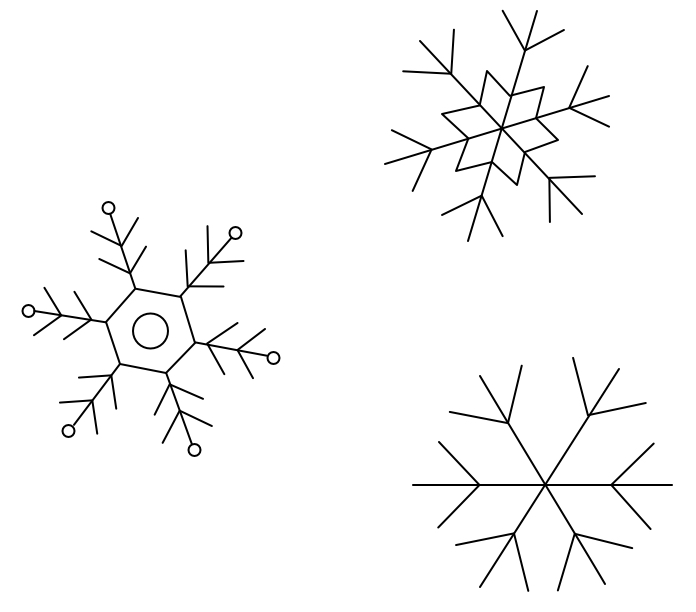
Snowflake Embroidery Pattern #1
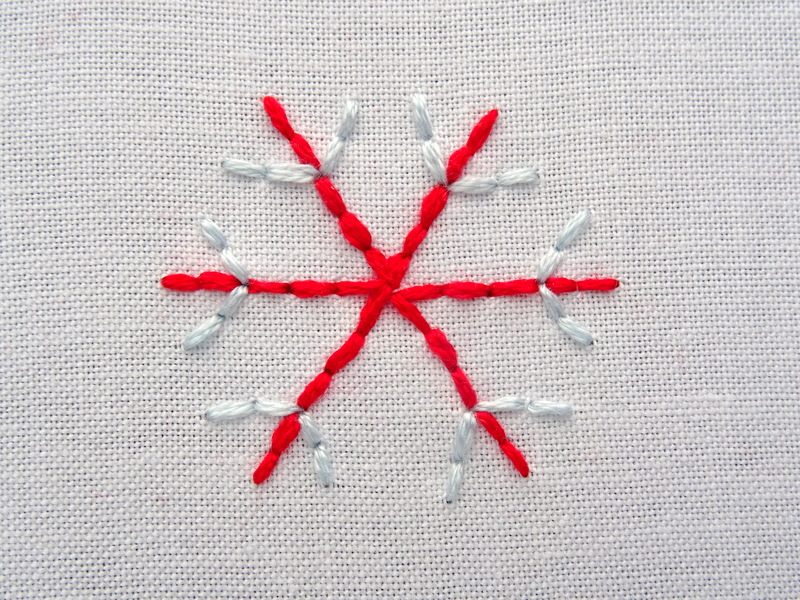
Let’s start with the most basic snowflake. I designed this one to be simple and easily stitchable in even the smallest size. The only stitch required is back stitch. If you are not familiar with this stitch, or you need a refresher, be sure to visit my Basic Embroidery Stitches tutorial. For this snowflake, I’ve chosen to use two contrasting colors of embroidery floss. The bright red (DMC 321) will create the long lines while the pale blue (DMC 775) is used for the short, diagonal lines.
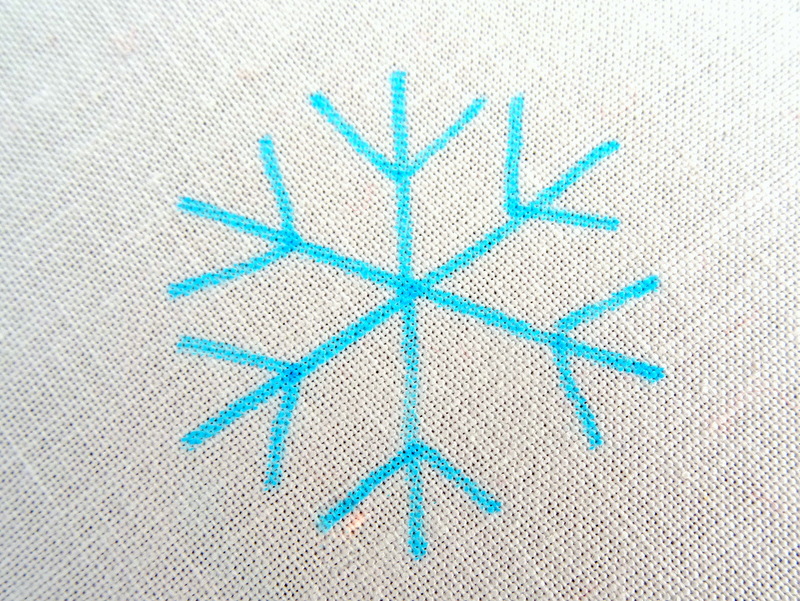
Thread your needle with floss. For this size snowflake, I’m using 4 strands of DMC floss. Using back stitch, make a single stitch along the first line. Continue stitching until you reach the end of the line.
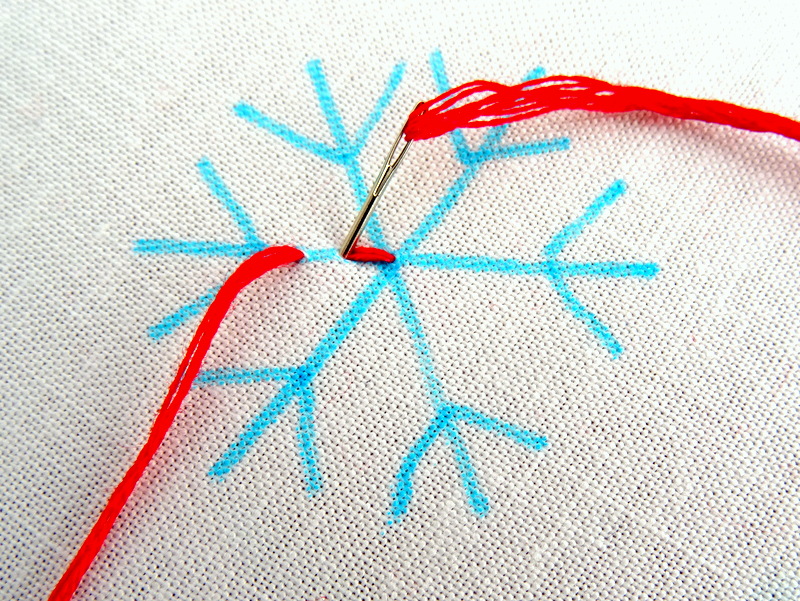
For this size snowflake, I am using five stitches on each line – three below the slanted V and two above. Depending on the size snowflake you are stitching you might want to adjust the stitch count and length. This is also where the mini ruler comes in. If you’re a stickler for details and want to be sure each stitch is even, measure and mark the fabric ahead of time. Or, if you’re like me and don’t mind a few imperfections, go ahead and eyeball it.
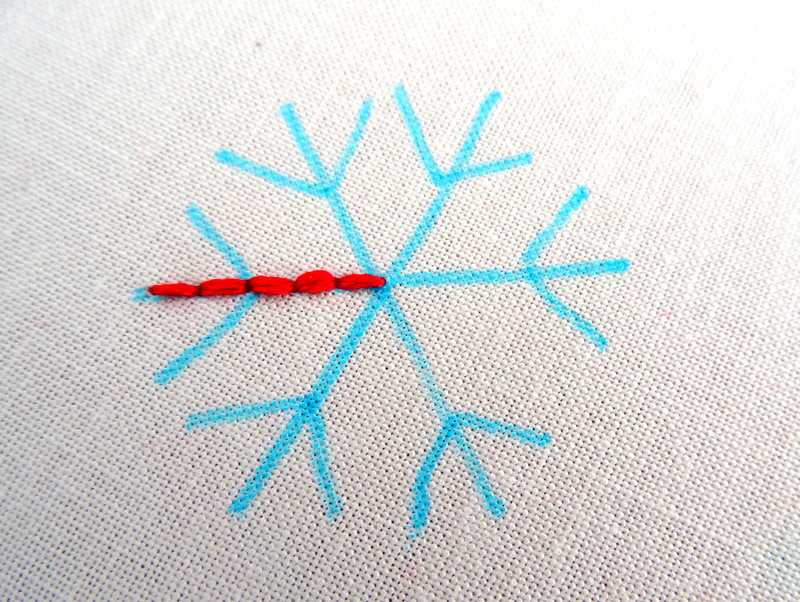
Once you’ve completed the first line, flip the fabric over and weave your thread down to the middle of the snowflake. Come back up on the next line and stitch to the end. Continue this process until all the long lines are filled in.
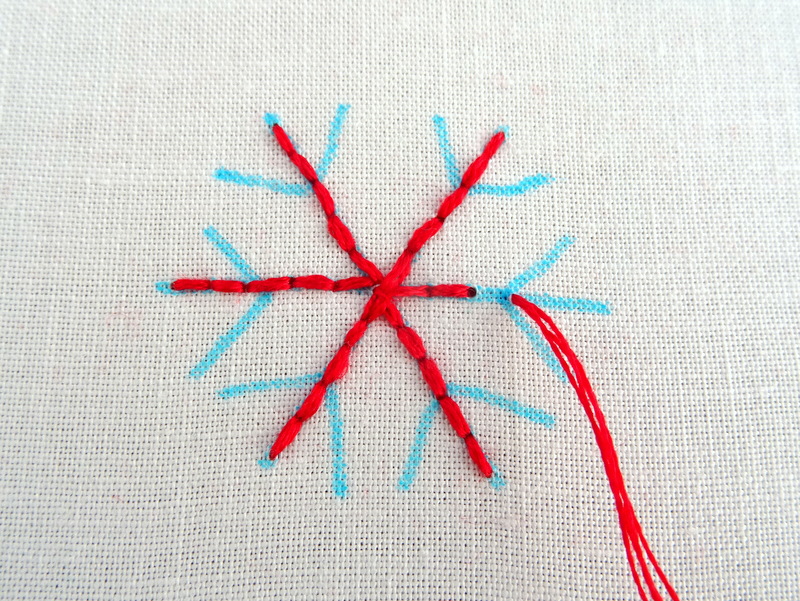
If you are using a second color, end the first floss on the back and re-thread the needle. I am using four strands of DMC floss in pale blue (DMC 775). Start in the middle of one of the short diagonal lines and fill in with two stitches on each line. End the first stitch in the middle of the third and fourth stitch of the long line. Again, depending on the size of your snowflakes you might need to adjust the stitch count and size.
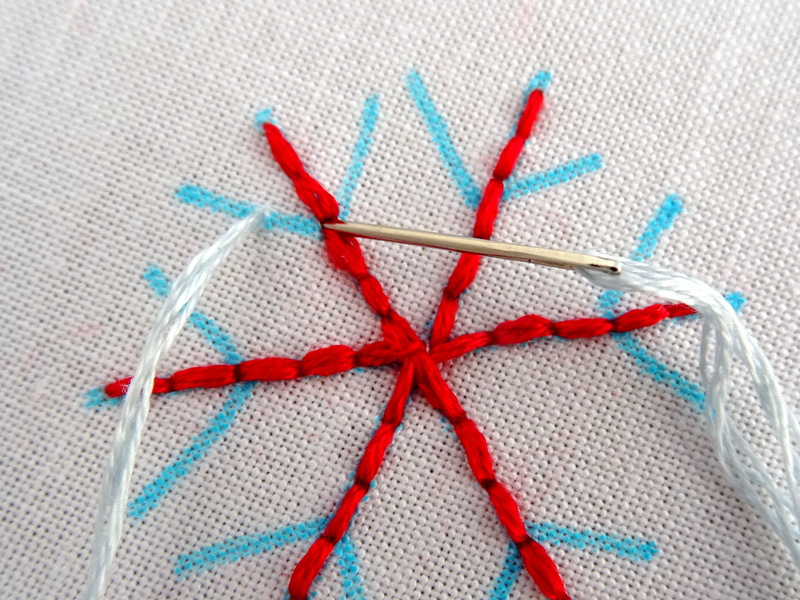
Move over to the adjacent diagonal line and repeat.
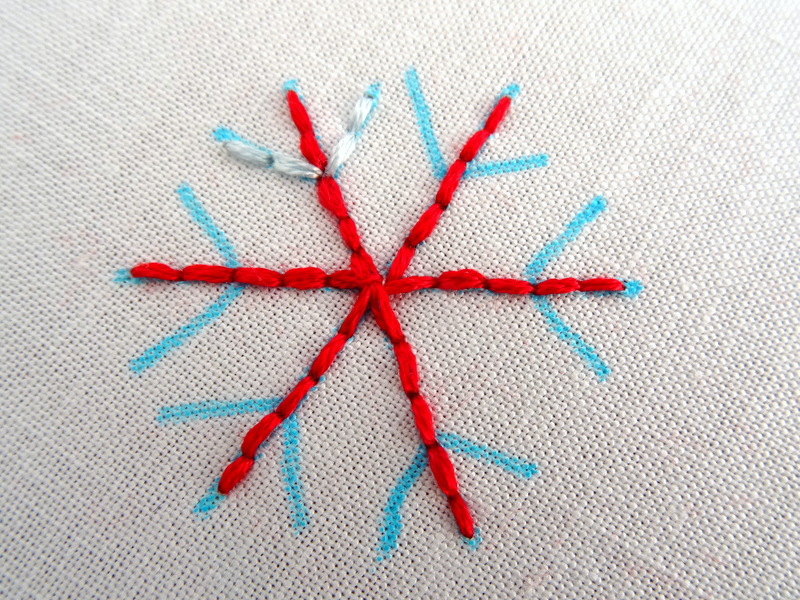
Continue around the snowflake until all the lines are stitched and you have a beautiful snowflake!

Snowflake Embroidery Pattern #2
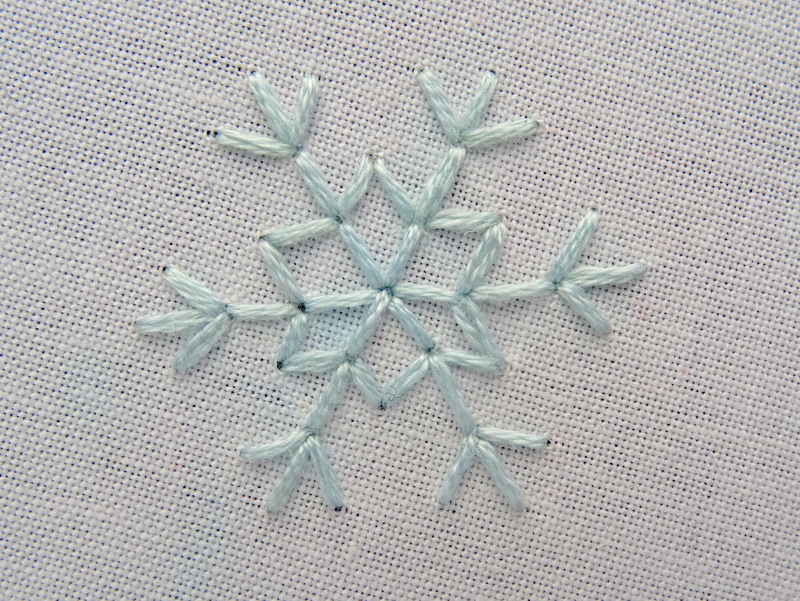
Now that we’ve learned the basics, let’s move on to the second snowflake pattern. For this one, I am using four strands of a single color floss (DMC 775). Feel free to add more colors to your liking. Once again, the only stitch required is back stitch. Begin by making a single back stitch at the end of one of the long lines. Start the stitch at the intersection of the two short diagonal lines and end it at the top of the long line.
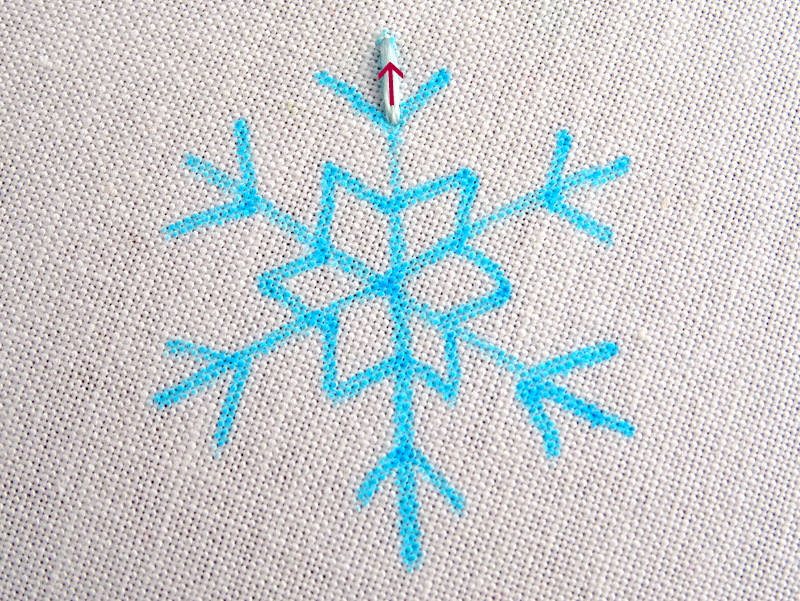
Make three more stitches to complete the section. Start in the middle and stitch outward.
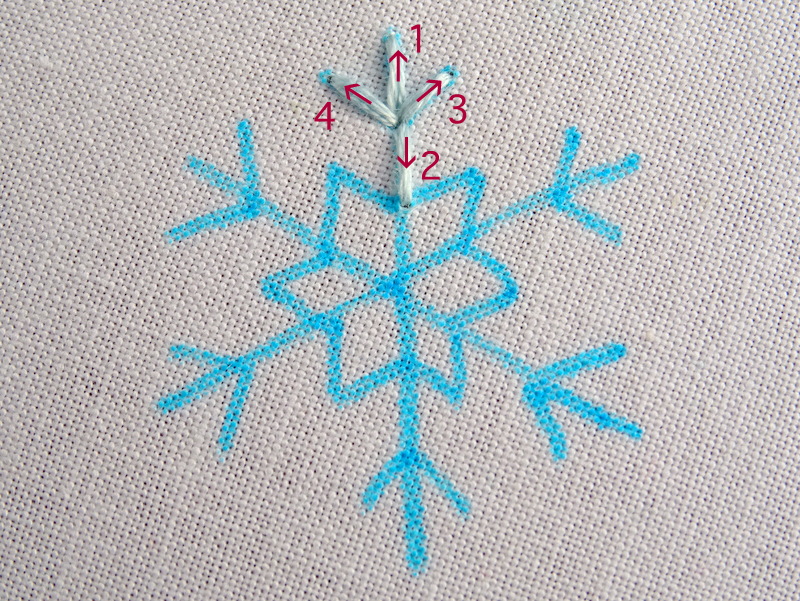
Flip your work over, weave the floss through until it reaches the bottom of the #2 stitch. Take the floss back up through the fabric at the middle point to the right. Make a single back stitch.
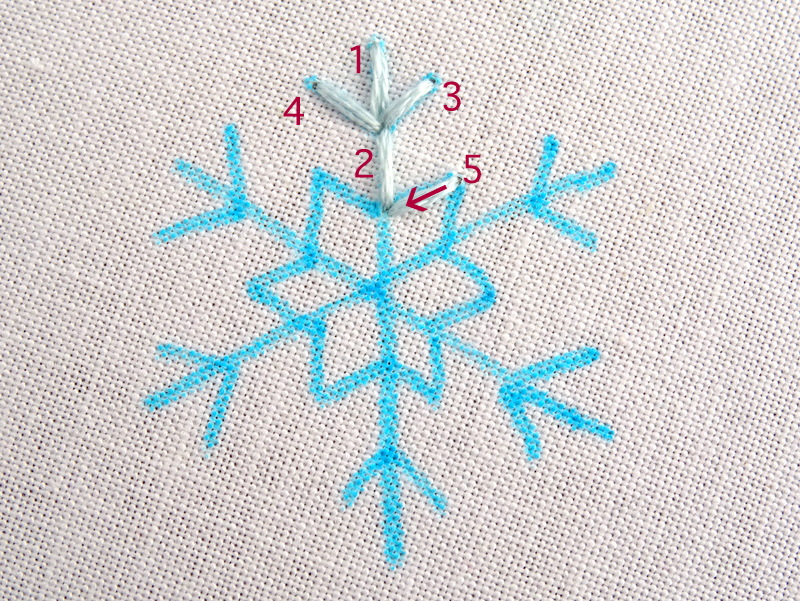
Now, simply continue around the snowflake in the same fashion making sure that each stitch begins where the last one ends.
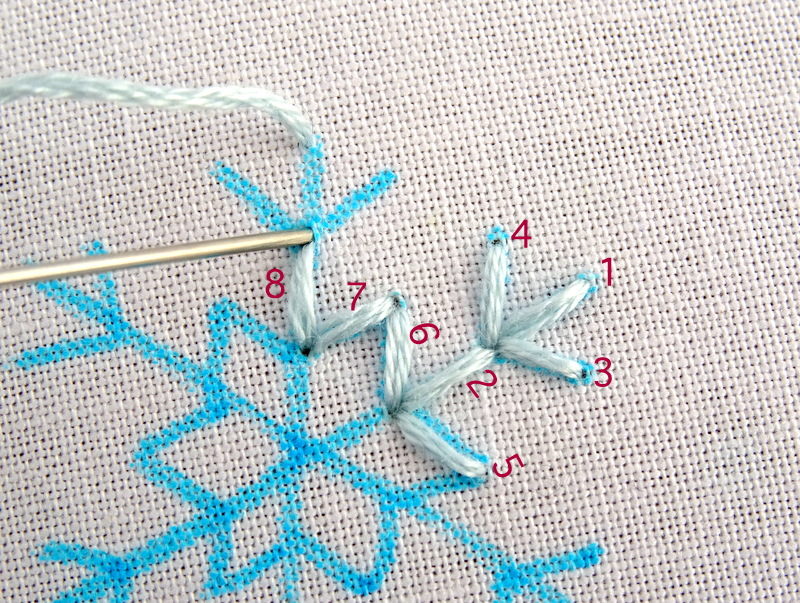
Finish off the snowflake by filling in the center spokes with single back stitches.
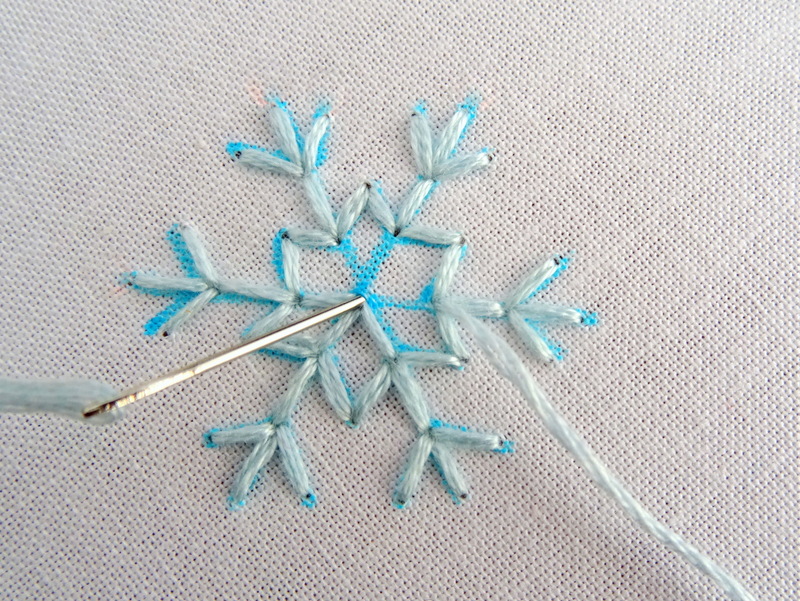
Tada! Look at that beauty!

Snowflake Embroidery Pattern #3
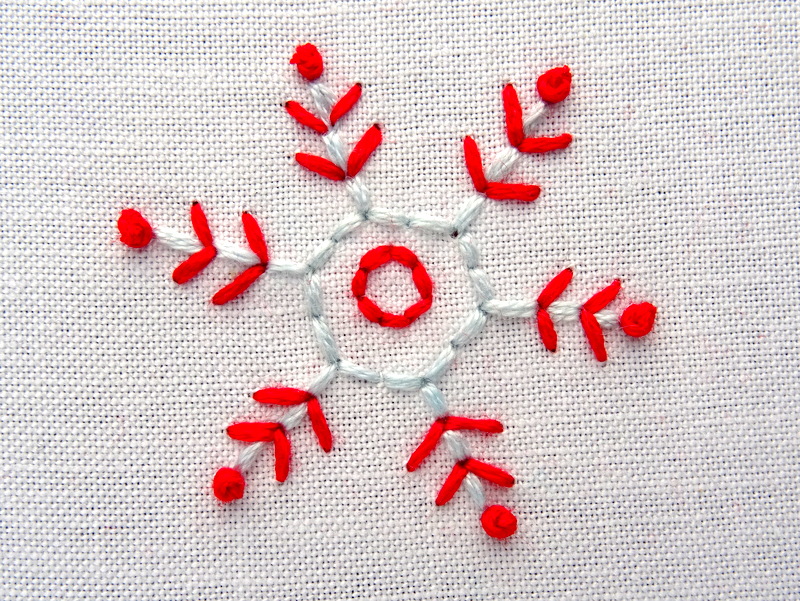
The third and final snowflake embroidery pattern is the most detailed. While it looks complicated it’s actually quite easy and only requires one additional stitch along with back stitch. For this snowflake, I’ve used 4 strands each of light blue (DMC 775) and bright red (DMC 321). Feel free to use a single color or go wild and choose three or four!
Starting with the light blue floss, back stitch around the inner hexagon shape. For this size snowflake, I’m using two stitches per side. Adjust as necessary according to the size of your snowflake.
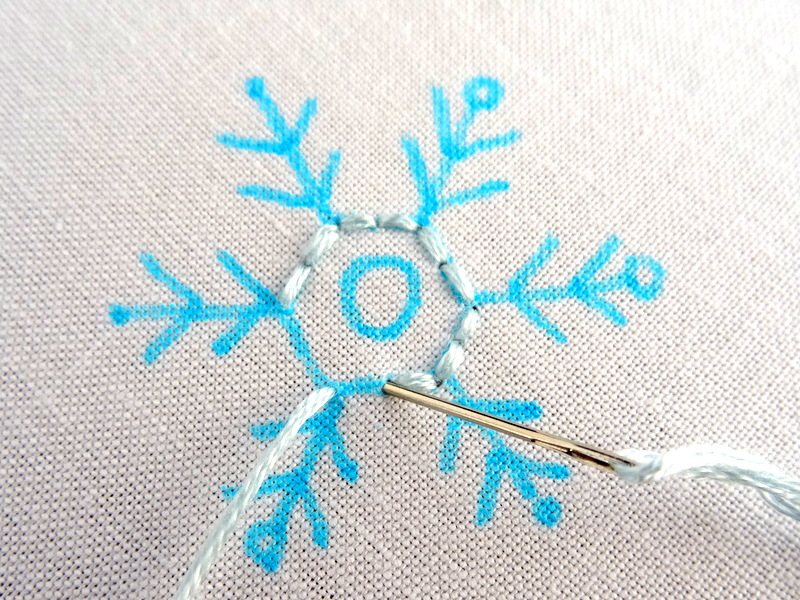
After completing the middle, back stitch up each long line. Remember to weave the floss through the back before starting each line. This is especially important if you are stitching with a dark floss on a light fabric.
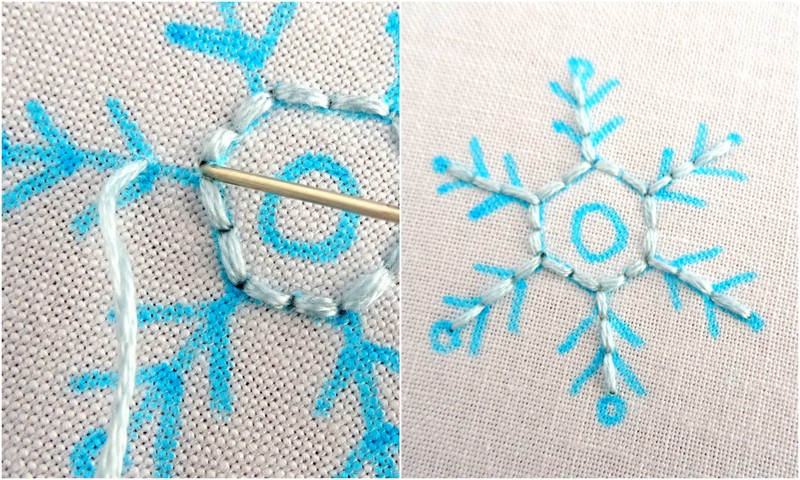
If you are using a second color floss, end the first color on the back and thread the needle with the new color. Starting at the bottom of a long line, work your way back and forth on the diagonal lines with single back stitches.
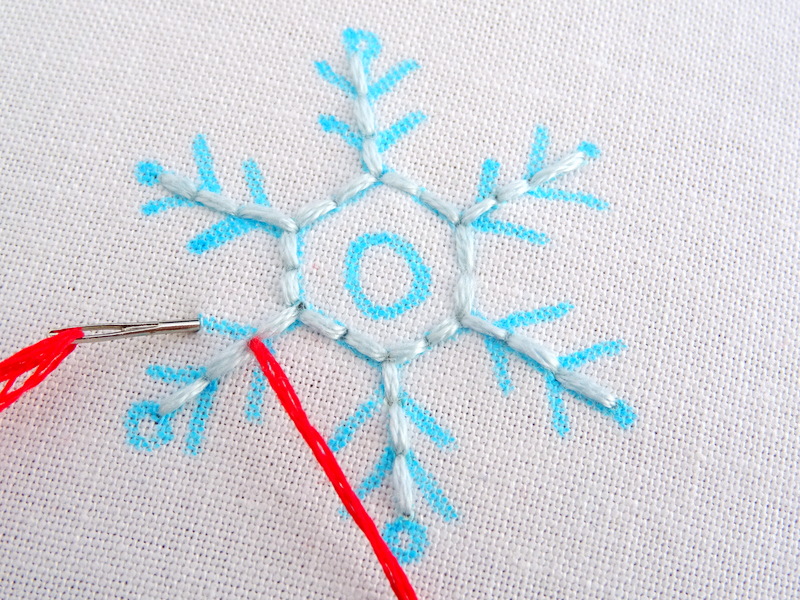
At the top of the line make a single french knot. Bring the needle to the front of the fabric and wrap the thread once or twice around the needle. Holding the thread with one hand, push the needle back through the fabric directly next to the where you came out. Gently pull the needle through to form a complete knot. For more detailed instructions, take a look at my French Knot Embroidery Tutorial.
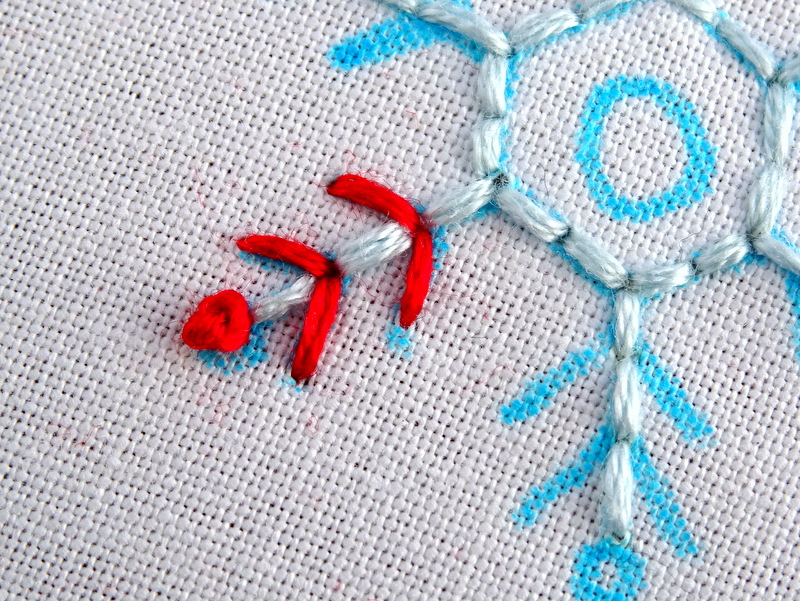
Work all the way around the snowflake, filling in the short diagonal lines with back stitch and adding a small french knot to the end of each long line.
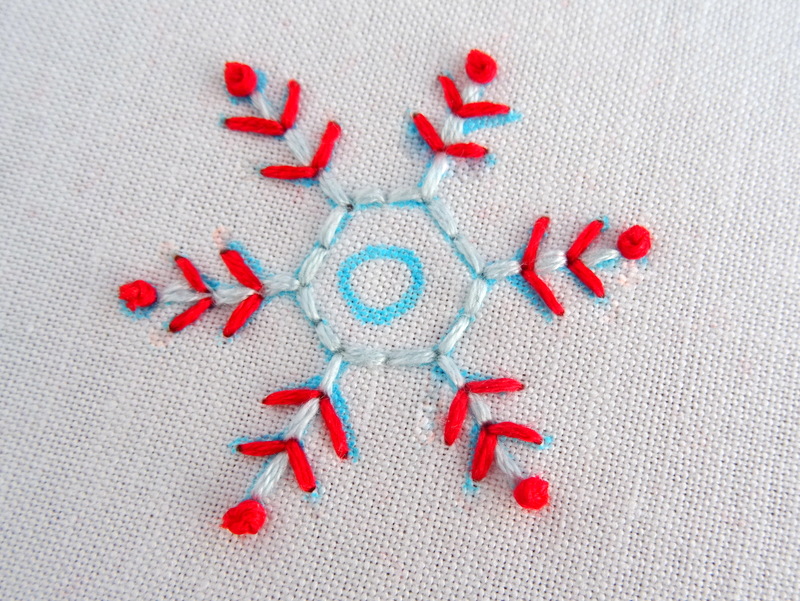
Finally, stitch the inner circle. You could fill it in with a cluster of french knots, or follow my lead and simply stitch around the edge with back stitch.

Put Your Snowflake Embroidery Skills to Use!
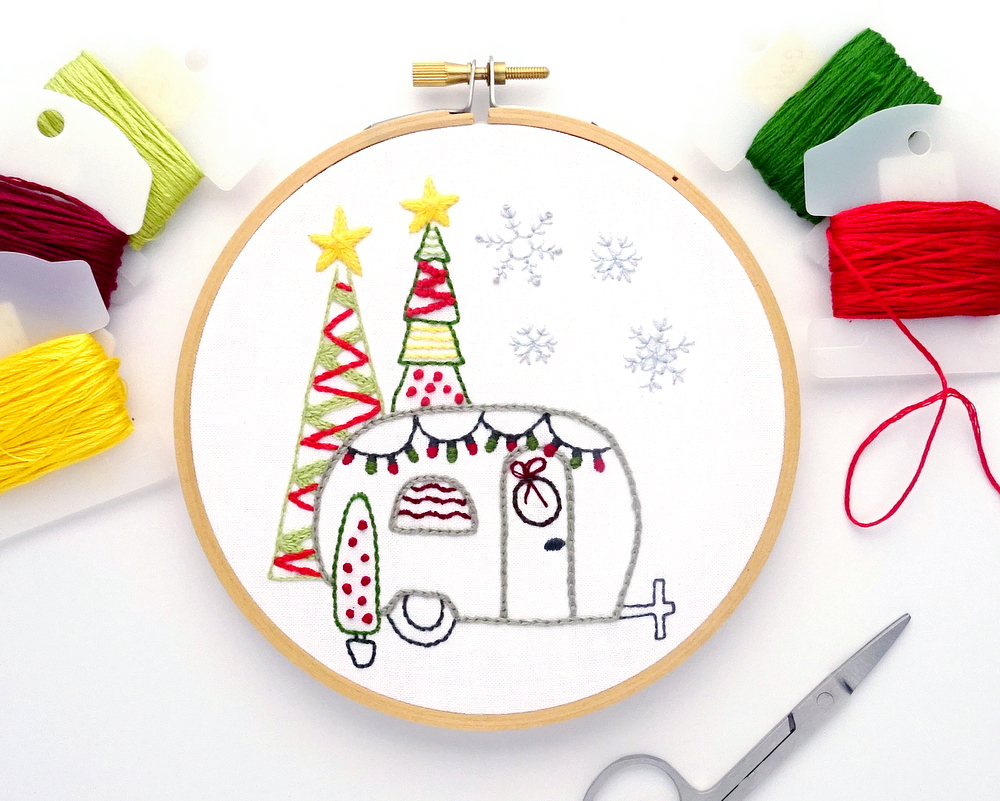
If you’re looking for a project to put your new snowflake embroidery skills to good use, look no farther than my Vintage Trailer Happy Holidays Pattern. This PDF pattern features a vintage trailer all decked out for the holidays. With bright lights, colorful trees and snowflakes falling all around, it’s sure to put you in a festive mood. Visit the Vintage Trailer Happy Holiday listing in my shop to purchase the pattern.

Lori McGowan
Just adorable for a beginner like myself, thank you!!
Free Christmas Patterns for Hand Embroidery Gifts | myEmbroideryPassions
[…] This is a step by step tutorial on how to create perfect snowflake from Wandering Threads Embroidery – you can find the tutorial HERE. […]
Mary
So helpful. Thanks.