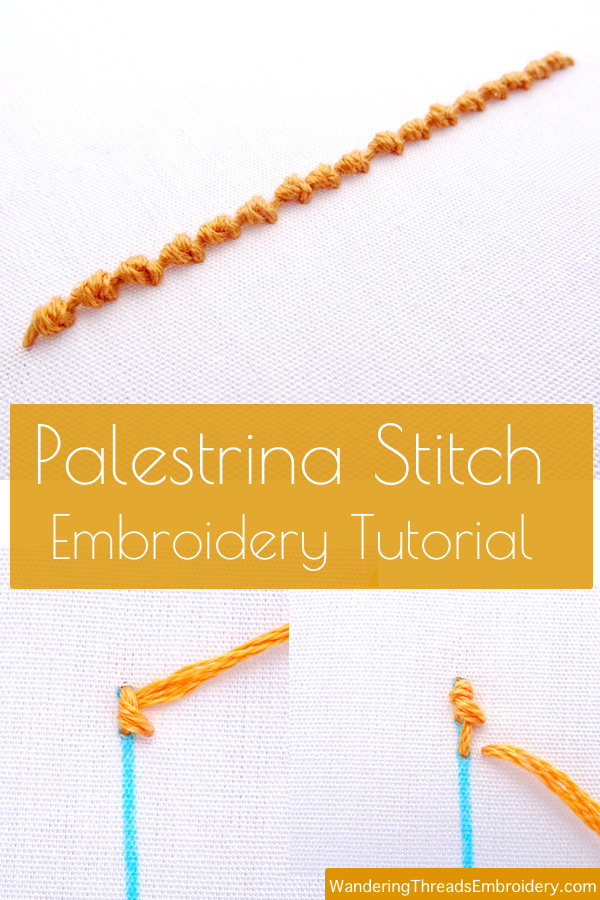
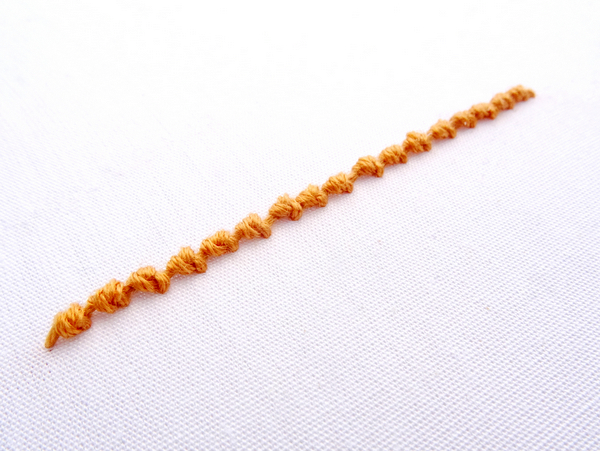
Whether you call it Palestrina, double knot, English knot, tied coral, or twilling stitch, there is no doubt that this is one fabulous embroidery stitch!
Commonly used for outlines and borders, Palestrina stitch creates a row of bumpy raised knots. It’s fairly easy to learn and once you get the hang of it, this just might become one of your favorite stitches!
Palestrina Stitch Step-by-Step Instructions
You can use any type of embroidery thread for Palestrina stitch, but I find that a thicker thread such as a Pearle cotton or all 6 strands of a multi-strand floss is best for creating the thick bumpy textured knots. The below example uses 6 strands of DMC #977.
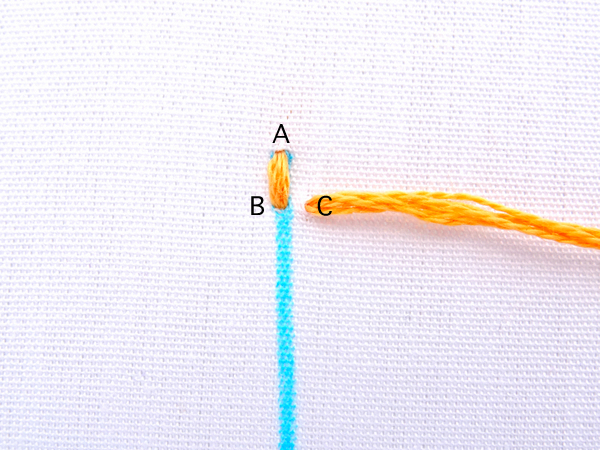
This stitch can be worked on a straight or curved line and from left to right or top to bottom. For ease of learning, let’s start by drawing a single straight line to use as a guide and work from top to bottom. Make a small straight stitch from top (point A) to bottom (point B). Pull the thread all the way through and then come up again just to the right of the line at the bottom of the stitch (point C).
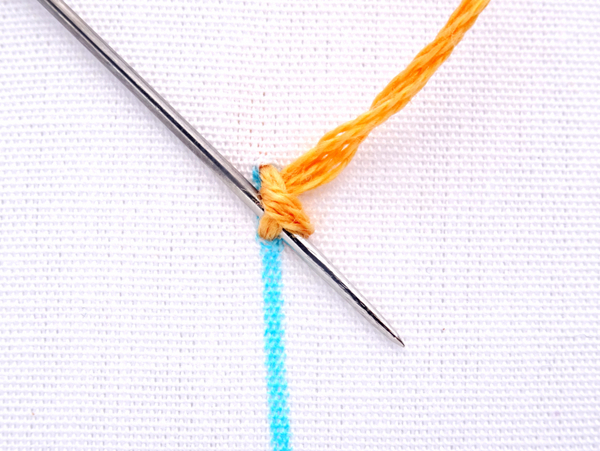
Next, slide your needle under the first stitch from left to right without going through the fabric.
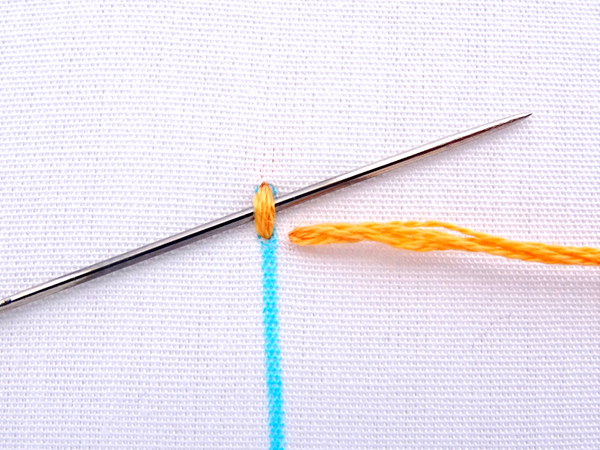
Pull the thread all the way through to create single twist.
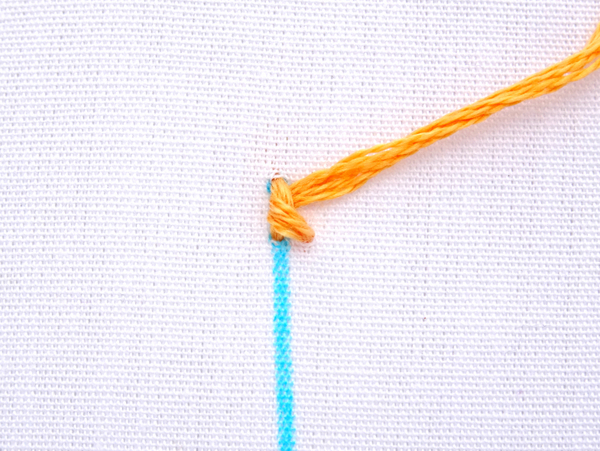
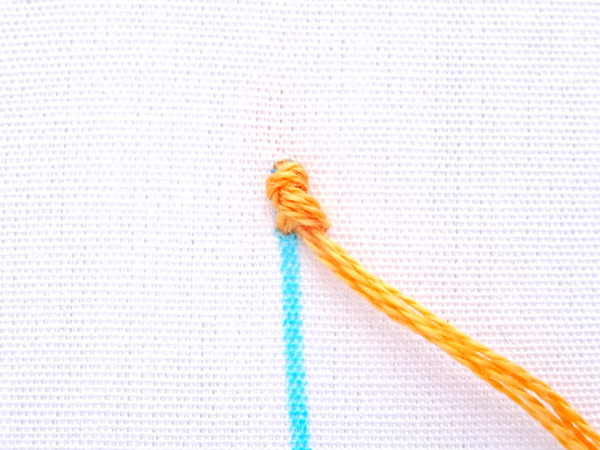
Complete the knot by again sliding the needle under the first stitch from left to right. This time, place the needle below the first twist and angle it down to the left.
Pull the thread all the way through and congratulate yourself for creating a lovely little bumpy knot.
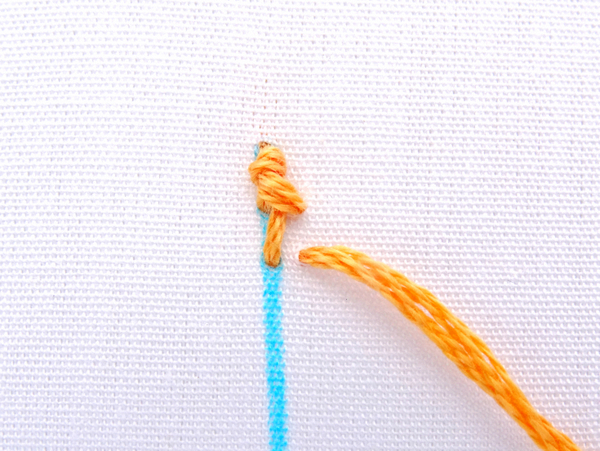
The second stitch is done exactly the same as the first. Make a small straight stitch starting at the bottom of the knot and then come back up a little to the right of the line. The key to success with this stitch is to place your knots fairly close together and keep them evenly spaced. This may take some practice as you figure out how much space each knot needs and how far apart they need to be placed. The length of the straight stitch will determine how far or close the knots lie on the line.
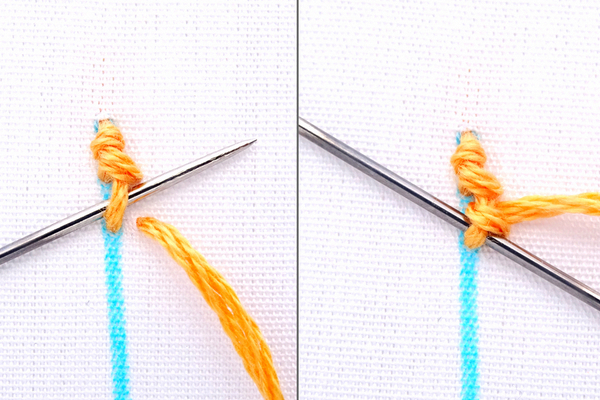
Create the second knot by following the same steps as above. First, slide the needle under and up the right, then pull through. Next, slide the needle under and down to the right, then pull through.
Continue stitching until you reach the desired length. End the stitch by bringing the needle and thread down at the bottom of the last knot.
Jack
This was so helpful! I have an embroidery kit and the instructions are generally pretty good but this one I just could not get from the diagrams that came with it. Your walk-through really made it clear and now I’ve got it!
Cindy
Thank you so much for the Palestrina stitch- tutorial. I love the look of this stitch and have tried several tutorials and just couldn’t get it. Your tutorial is the best I’ve ever tried and I finally did it. I am so happy. The oyster stitch however………. Lol.
DeAnna Pelzek
I am so awkward, but love to embroidery so much – heck, I even mess up basic blanket stitches – but this one I think I may be able to do. I normally cannot follow written instructions and have to play and replay YT videos over and over until I get it – but your instructions were simple to follow – THANKS!
Amanda
You got this! I love Palestrina stitch because the end result makes it looks much more difficult than it is.