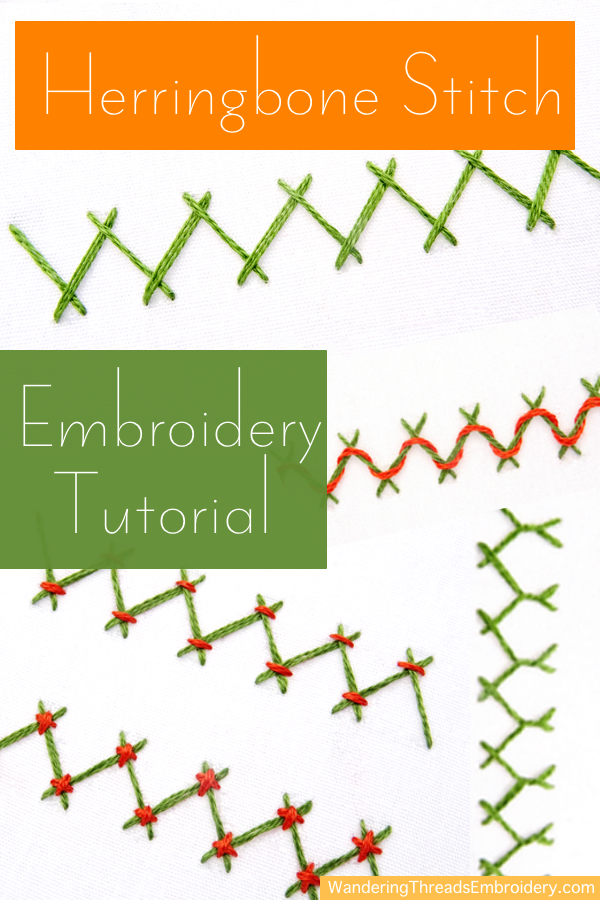
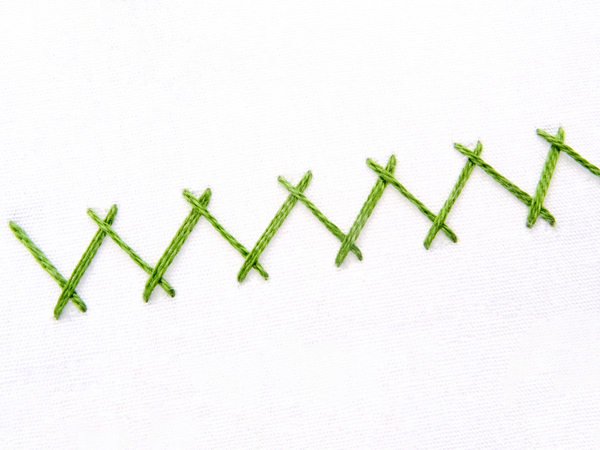
Herringbone Stitch is made up of a series of parallel diagonal lines that cross at the top and bottom. As the name suggests, it resembles a row of crossed fishbones. This simple stitch is easy to learn and versatile in use. There are numerous variations beyond the basic stitch – several of the most popular are covered in this tutorial.
Herringbone Stitch Step-By-Step
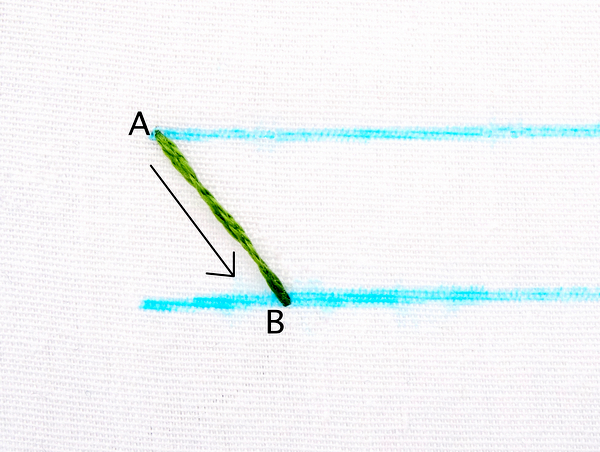
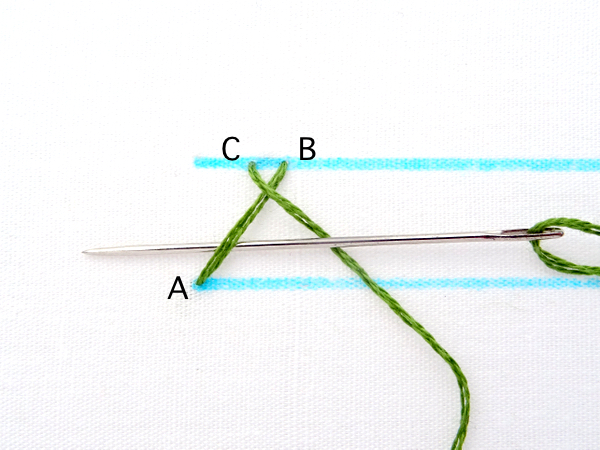
Herringbone stitch is worked from left to right. Start by marking two parallel lines a short distance from each other. For this example, the marked lines are 3/8″ apart. While I find this to be a good distance of measurement for practice, herringbone is easily adaptable to longer or shorter stitches.
Starting on the right side of the line, make the first stitch from top to bottom at a diagonal slant.
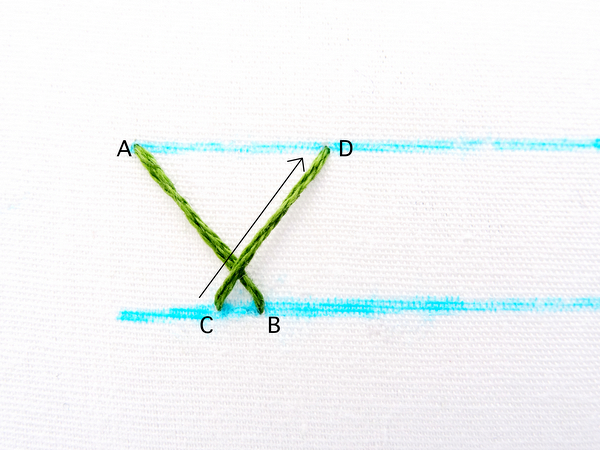
Bring the needle back up at point C, a short distance from where the last stitch ended (point B) and make another diagonal line up to point D.
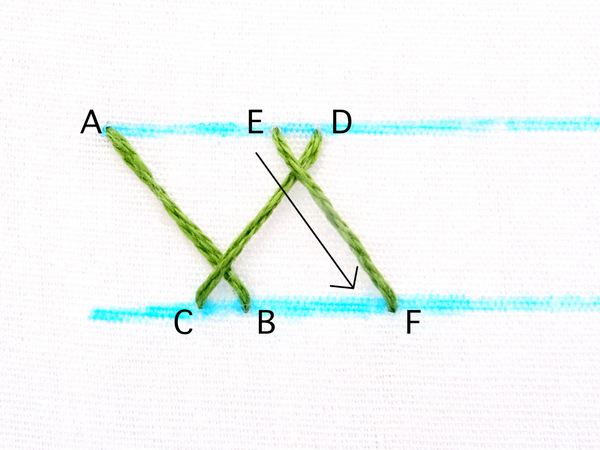
The third stitch starts at the top (point E) and makes another diagonal line down to point F. Note that the lines from A to B and E to F are parallel to each other and the diagonal angles match.
Notes about Placement & Measurements
While there are no set rules for the angle of the stitches or the distance between lines, it can be useful to have some guidelines to follow when learning a new stitch.
- Three-Quarter Rule:
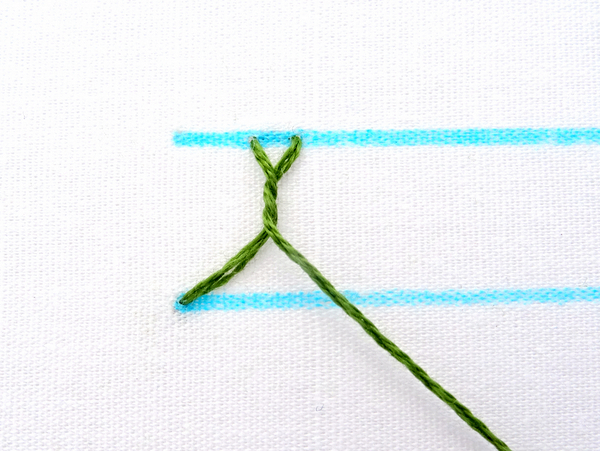
The placement of point C is determined by taking the distance between the start of the marked line and point B, dividing it into quarters, and placing point C at the 3/4 mark. The same rule applies to point E which lies at the 3/4 mark between point A and point D. While measuring the exact distance between each stitch is unnecessary, keeping the 3/4 rule in mind will help ensure an even line of stitches. - Parallel Lines:
The angle of the first diagonal stitch is the basis by which all the other stitches are formed. The exact angle is not as important as keeping the angle of the stitches the same. The easiest way to accomplish this is by making sure the lines of stitches are parallel to each other. I like to stretch the thread across the fabric to ensure I have the correct placement before inserting the needle.

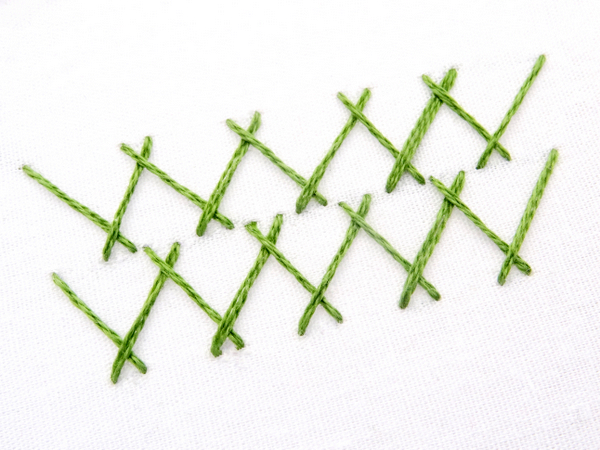
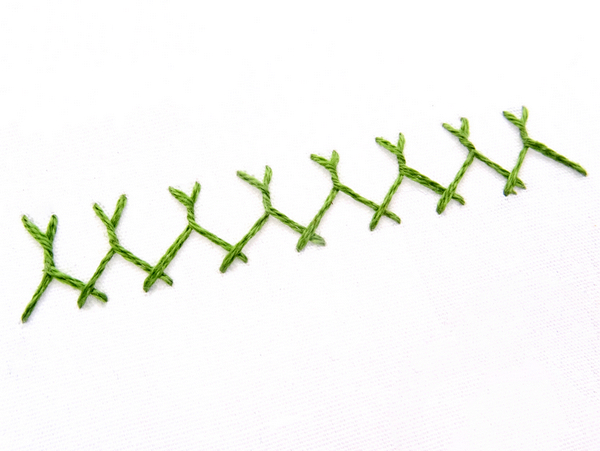
Following the above guidelines, continue stitching until you reach the end of the line.
While herringbone stitch is most often used a border, it can also be stitched in rows and used to fill shapes. Simply draw several parallel lines and stitch the rows on top of each other.
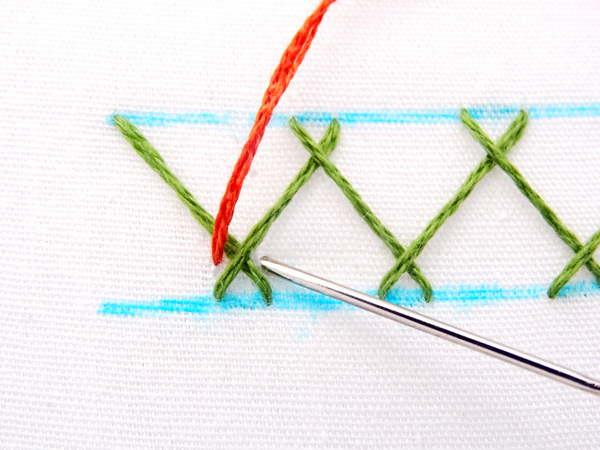
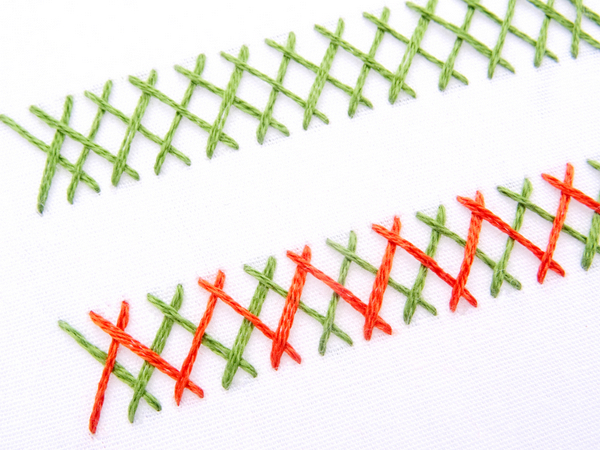
Tacked or Tied Herringbone Stitch
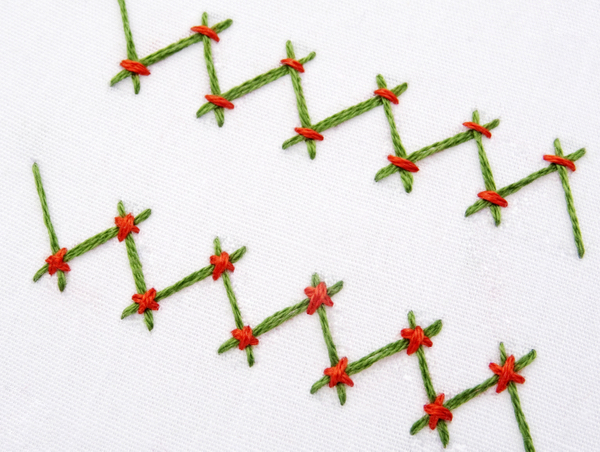
There are many variations of the basic herringbone stitch. One of the easiest is tied or tacked herringbone. This variation can be made using the same color, or a contrasting color thread.
Start with a line of herringbone and bring the needle up next to the first spot where two threads cross. Come back down on the other side to complete a small horizontal stitch. Continue adding small stitches to all the areas where the lines of thread cross.
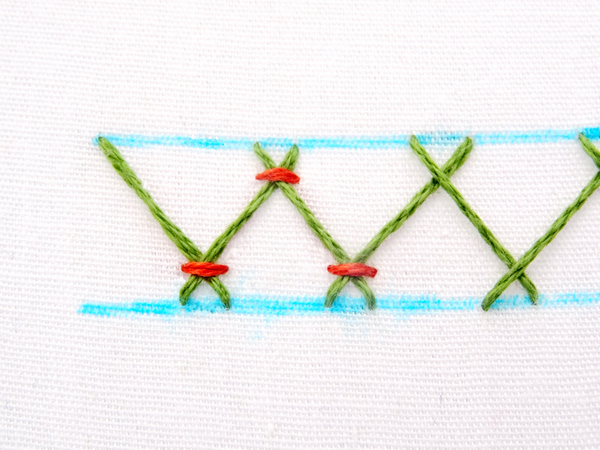
Take this variation one step farther by adding an additional vertical stitch to make a t-shape.
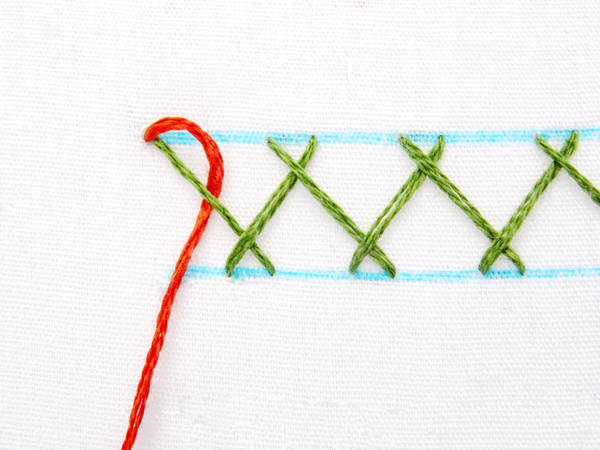
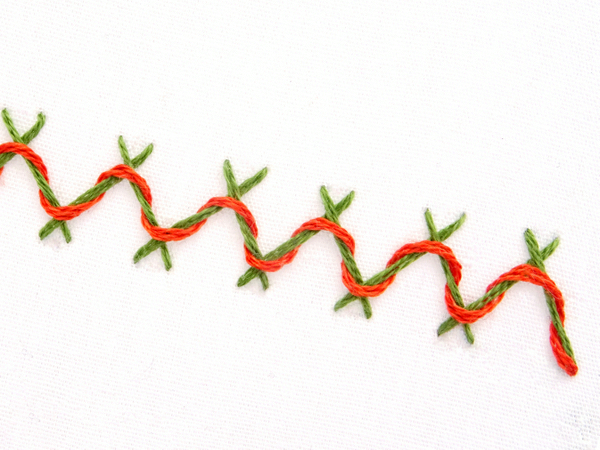
Threaded Herringbone Stitch
Another easy yet eye catching variation is called threaded herringbone. This one looks best with a contrasting color thread.
Once again, start with a row of basic herringbone. Bring a needle and contrasting color thread up at the start of the line of stitches. Without going through fabric, thread the needle under the first stitch from right to left.
Twist the thread over the top of the first crossed section, then back under the next diagonal stitch. Be careful not to pull too tight.
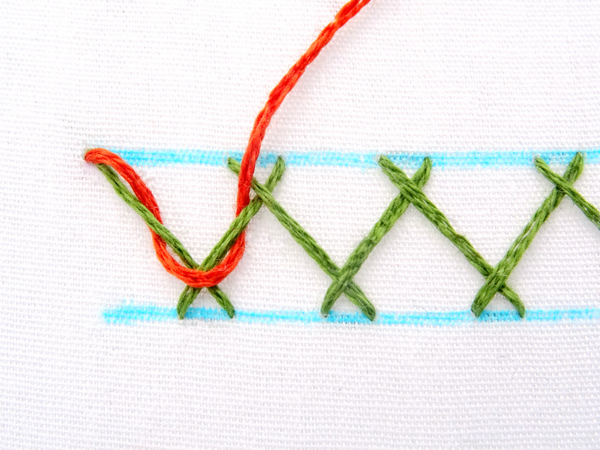
Continue weaving under the diagonal lines and over the crossed sections, until you reach the end of the line. End the threading by bringing the needle down and through the fabric at the bottom of the last herringbone stitch.
Twisted Herringbone (Breton Stitch)
This variation creates a twisted version of the herringbone stitch. It can be easily modified with longer or shorter stitches, and looks nice stitched around curves or in a circle.
Start with a single diagonal stitch from point A to B. Bring the needle back up at point C like you would for the traditional herringbone stitch. Instead of making another diagonal stitch, pass the thread under the first stitch from right to left without going through the fabric.
Pull the thread tight to create a twist.
Bring the needle back down at point D. Repeat these steps for the next stitch. Starting at point E, make a stitch up to point F, come back out at point G, and pass the needle under the stitch before pulling it tight to create the twist.

Continue following this stitching pattern until you reach the end of the line.
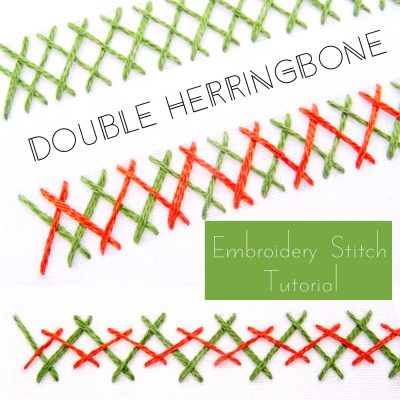
Double Herringbone Stitch
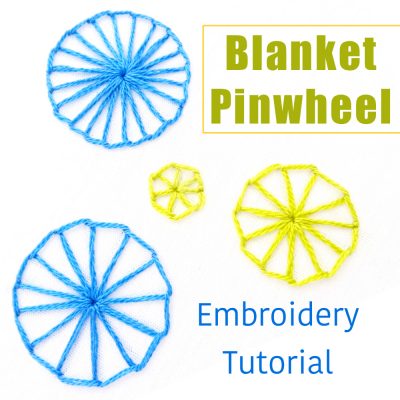
Want to learn more herringbone stitch variations? Check out the Double Herringbone Stitch Tutorial.
Herringbone Patterns
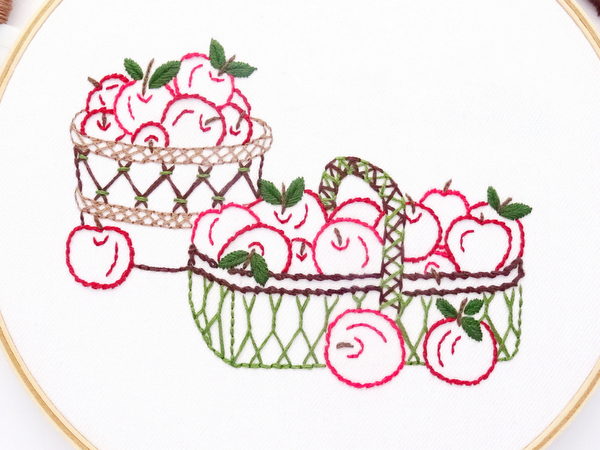
Looking for a project to put your newfound stitching skills to use? The Apple Baskets Embroidery Pattern features piles of shiny red apples spilling out of two baskets beautifully decorated with herringbone stitch. Using both the basic stitch along with the twisted and tacked versions, this is a great pattern for practicing and mastering herringbone stitch.
Deb S
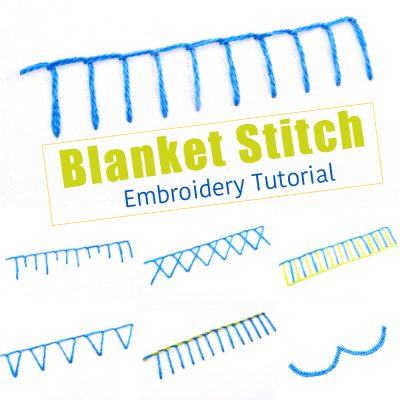
Hi there, I just found your site via pinterest and am very happy! I can learn from your tutorials much better than the too-quick videos on youtube. Question for you: Ive ripped my thick bath towels down the center lengthwise, to make two long narrow towels. I am planning on using the blanket stitches to bind the fraying edges. Do you think that is sufficient in terms of holding off the fraying in the washer/dryer? Or should I bind them with edge binder using sewing machine, then maybe stitch over that for decoration… Thanks in advance
Amanda
So happy to hear that you find my tutorials helpful! I think if you make the blanket stitches close together, you will reduce the problem of fraying. However, since these are towels that will be washed and dried often, using an edge binder with the sewing machine is probably a safer option.
Titilayo
Ma’am I just come across your page on Pinterest today and the Lord has use you to bless my life by you cheering and impacting us free knowledge may God reward you abundantly.Amen
Bernadette Donehue
Thank you. I was pleasantly surprised at the easy instructions and diagrams for the Herringbone stitch, which I used to neaten some seams. I look forward to trying the variations of it.