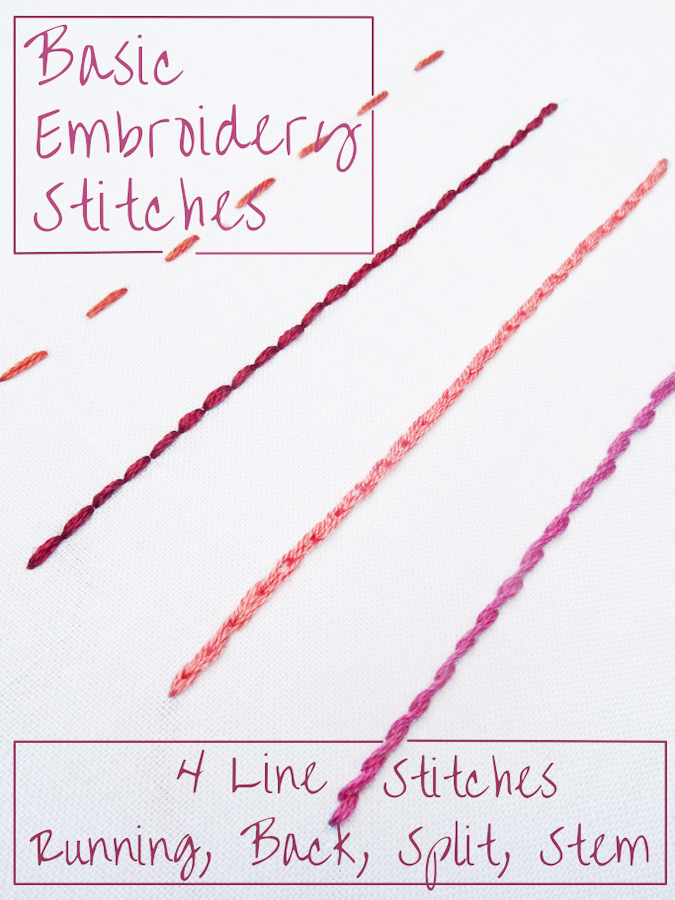
Basic embroidery stitches are the backbone of all embroidery stitches. Once you master the basics, the rest is easy. The most basic of the stitches are called line stitches. They are – you guessed it – worked along a line! The line can be straight, curved, angular, or just about any other shape.
Basic line stitches are nearly universally present in all embroidery patterns. Whether you’re working on a simple or elaborate pattern, chances are, at least one basic line stitch will be present. Fortunately, line stitches are easy to learn and simple to master. Let’s start with the four most common basic embroidery stitches.
Running Stitch
Of all the basic embroidery stitches, running stitch is the easiest to master. This quick stitch is perfect for borders and outlines. You can change the look by lengthening or shortening the stitches.
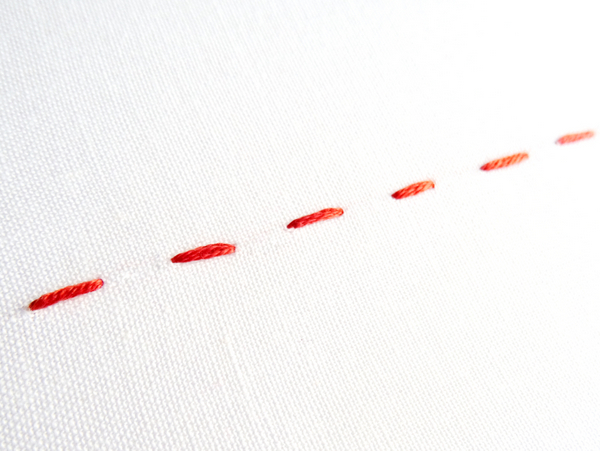
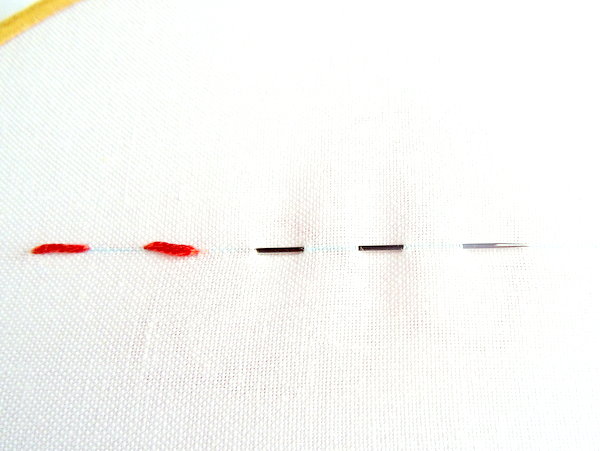
Start by making a single stitch. Next, move the needle one stitch length away and make another stitch. Try to keep the spaces the same length as the stitch. Follow this pattern until you have a line of stitches with spaces between.

You can also create running stitch with an alternate method that is reminiscent of hand sewing. Instead of making each stitch separately, weave the needle in and out of the fabric several times before pulling it all the way through. This method is much quicker, but it can sometimes be harder to make uniform stitches. Try both and see which you prefer.
Back Stitch
Back stitch is similar to running stitch except it creates a solid line. Depending on what kind of thread you use, it can make delicate or heavy lines. Back stitch is commonly used for outlines and borders but it’s also great for embroidering text or filling in small spaces.
Begin by bringing the thread up through the fabric one stitch length away from the starting point. Now, go back and bring the needle down at the beginning. Think of it as stitching in reverse.
The next stitch is made in the same manner. Come up one stitch length away from the previous stitch and bring the needle down at the end of the previous stitch. Once you get the hang of it this stitch becomes almost like second nature.
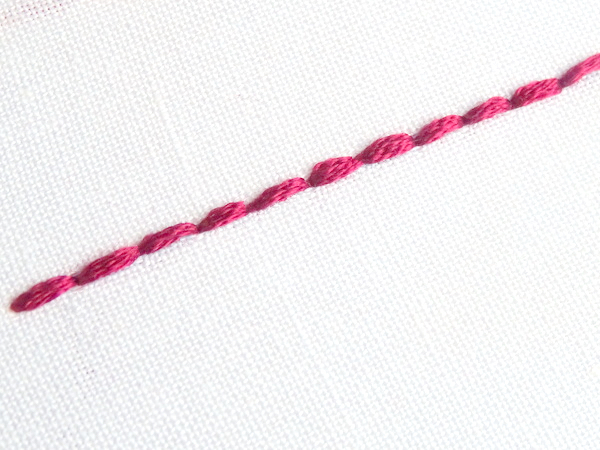
Split Stitch
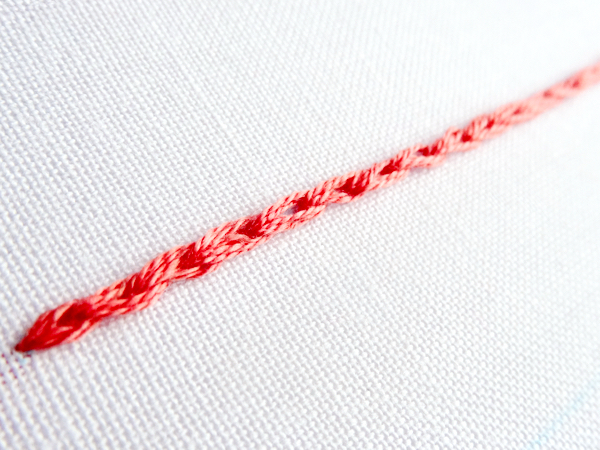
Split stitch also creates a solid line, but with a bit of added texture. I use split stitch when I want a to add something extra to my outlines. Trees, leaves, flower petals, and anything else that could benefit from extra texture look great with split stitch. Varying the stitch length will result in different looks. Small stitches give a nubby texture while long stitches look more like a braid.
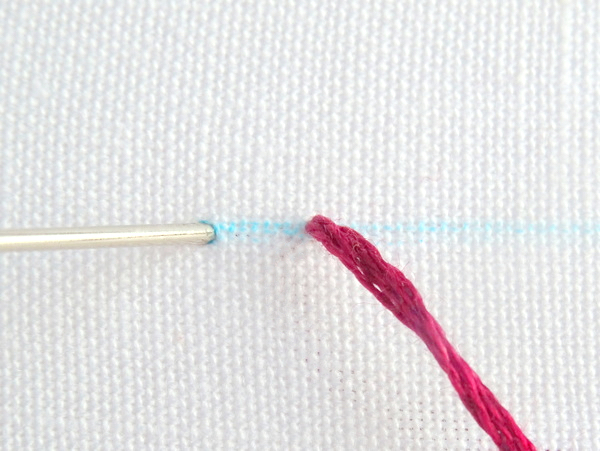
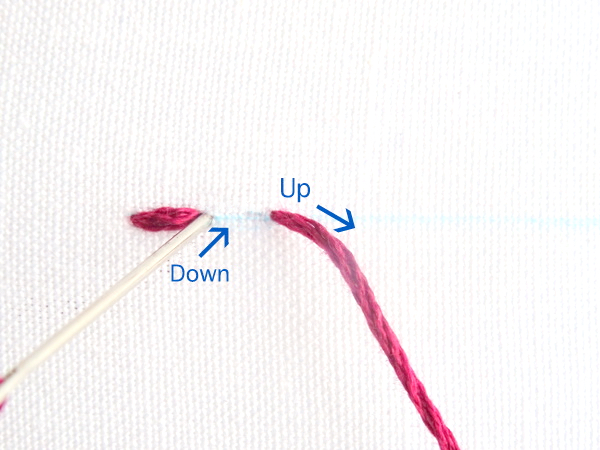
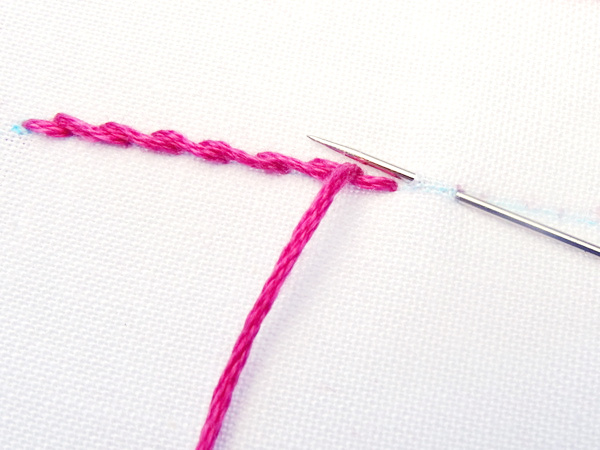
Begin by making a single stitch. Now, bring the thread up in the middle of the stitch you just made.
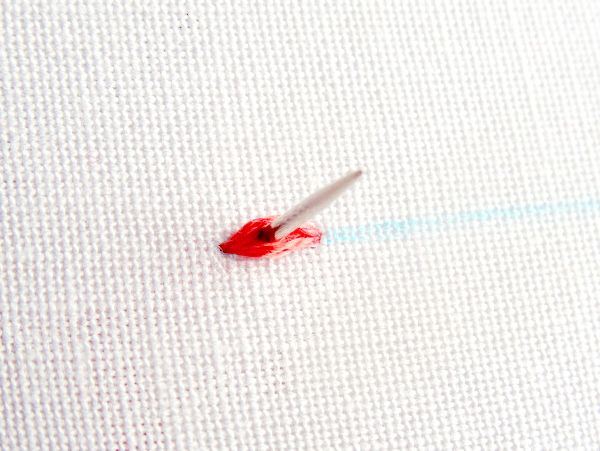
Pull the thread all the way through and make another stitch. Once again, bring the needle up in the middle of the previous stitch. That’s it!
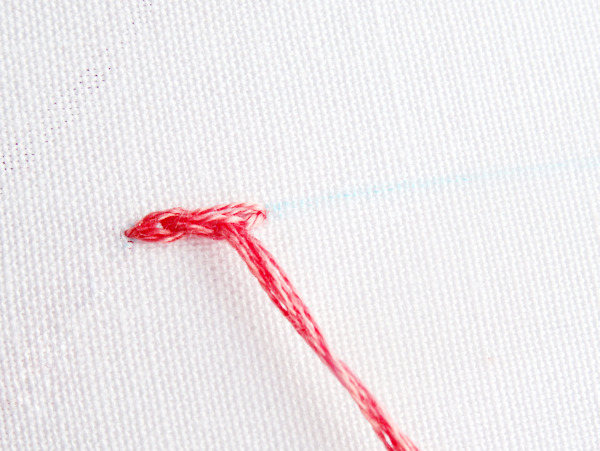
Stem Stitch
Stem stitch is similar to split stitch except instead of coming up in the middle of the stitch, you come up next to it. The result is a twisted stitch that turns corners beautifully and makes excellent lettering. Stem stitch can also be worked in rows or a continuous circular to create an interesting filler.
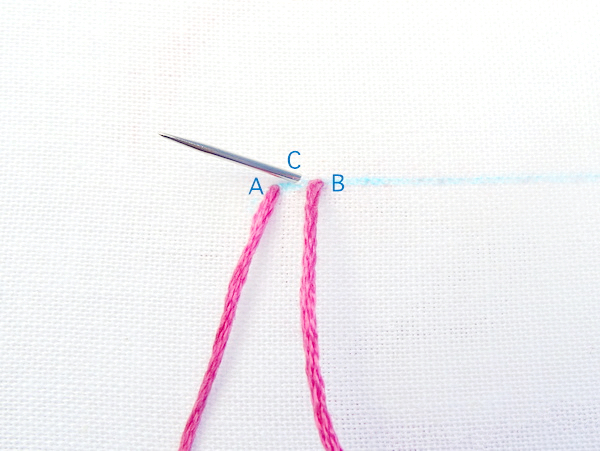
There are two popular ways to work stem stitch. Let’s start with the method that is most similar to split stitch. First, make a single stitch. Without pulling the thread all the way through, bring the needle back up halfway between two points and just above the line. If you’re following the diagram, come up at A, go down at B, and back up at C. Remember that C is just above the line. Be sure to keep the working thread below the line.
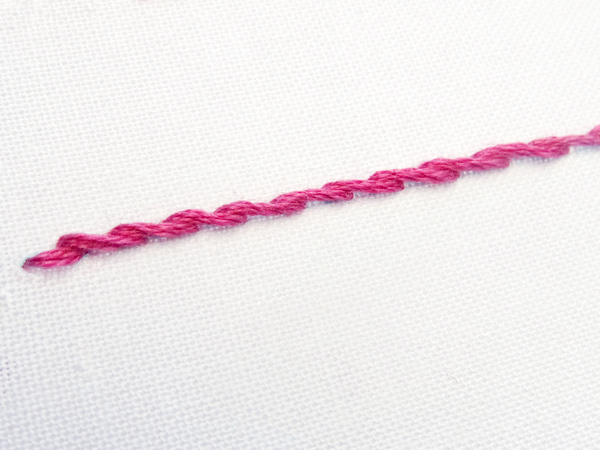
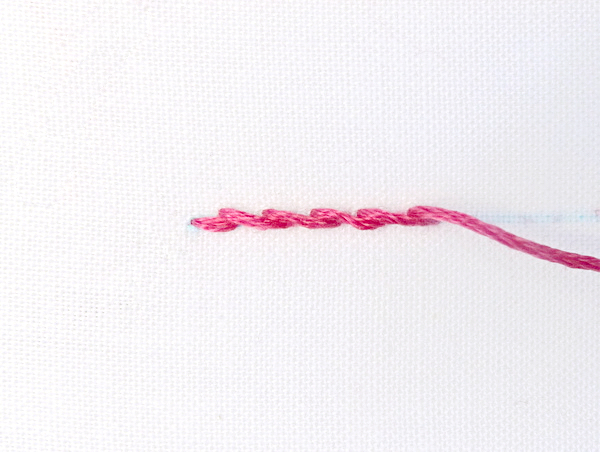
After a few stitches, you will see the twisted line form.
The second method is the sewing method. The first method brings the needle all the way into the fabric and then back up in a different spot. The sewing method has you insert the needle one stitch length away and then angle it backward and bring it back up just above the line. Like with the first method, the needle comes out about halfway between the points and a little above the line.
For most people, one method comes more naturally than the other. I like to use the first method for times when I need small stitches – such as when embroidering letters – and the second method for longer stitches on larger objects. Give both a try and see which one works best for you.
Basic Line Stitch Patterns
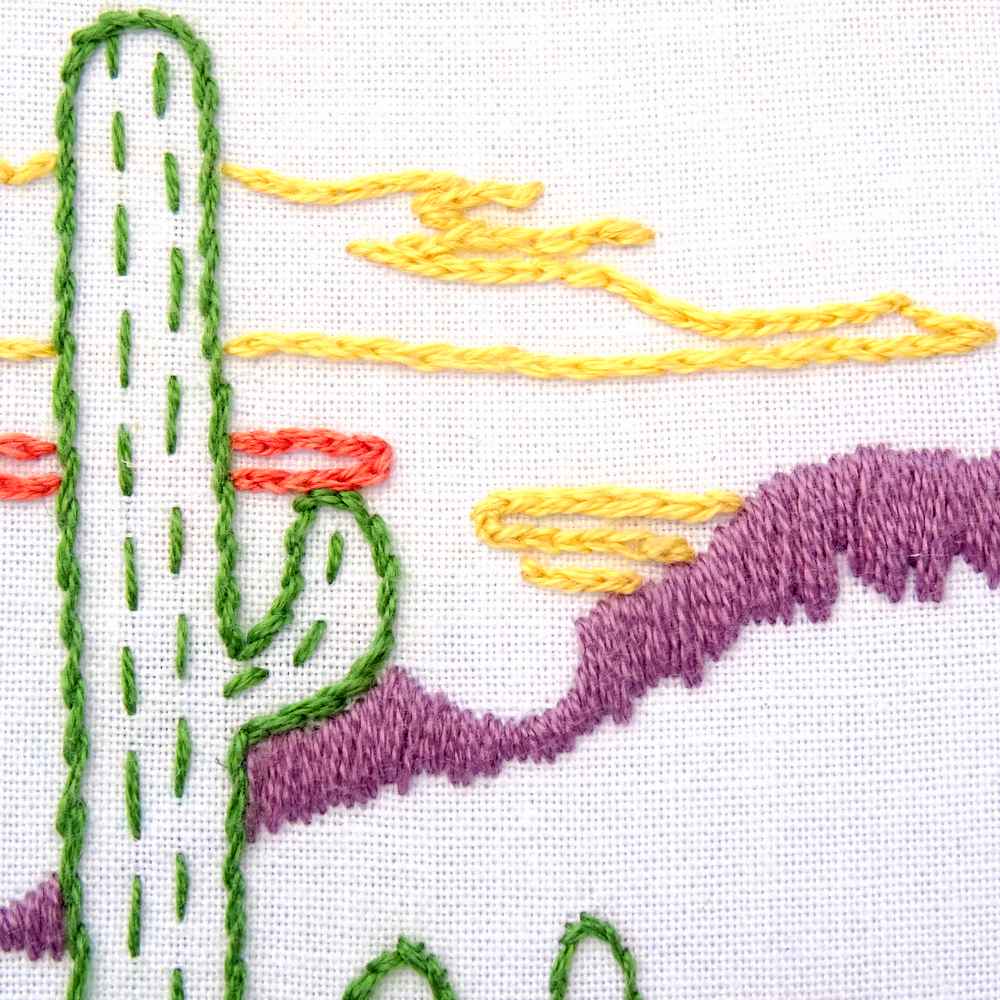
All of the Wandering Threads patterns contain at least one of the basic line stitches. Running Stitch is used to create ribs on the cactus in the Saguaro National Park Pattern.
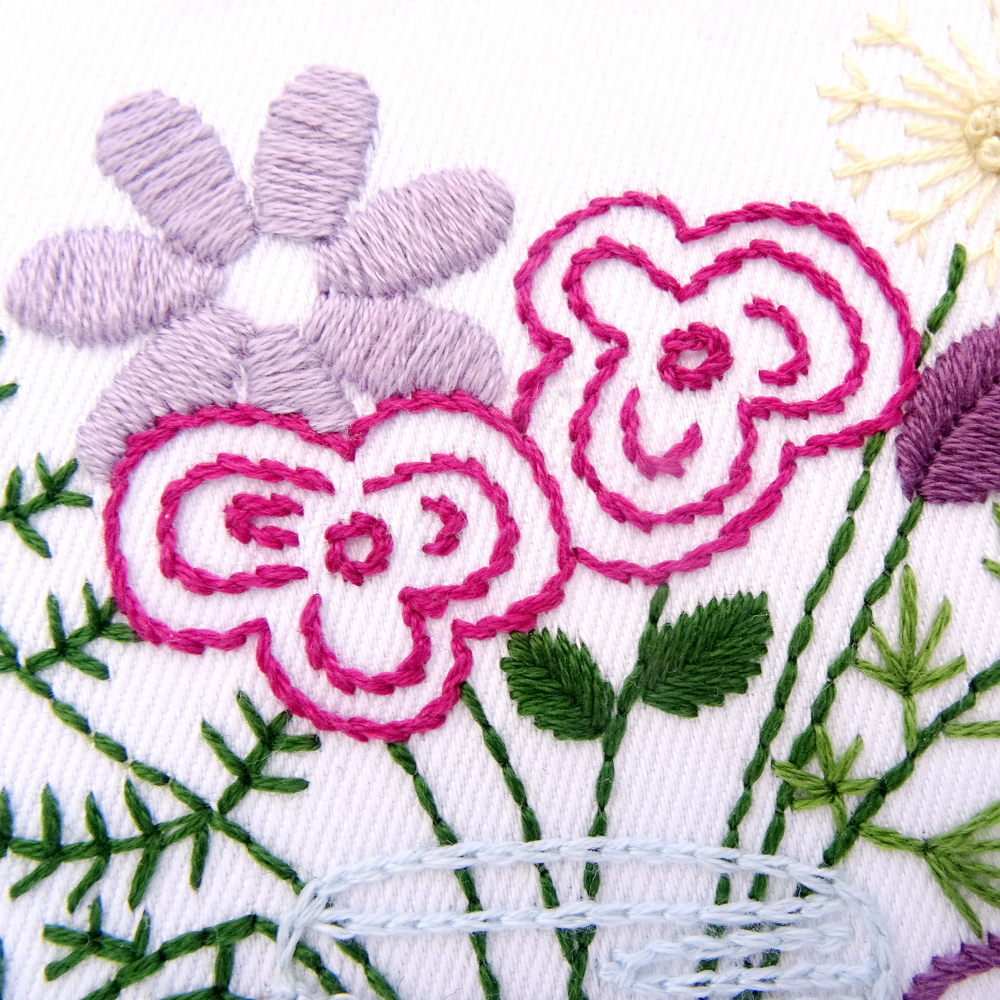
Back stitch is used to outline all the State and State Flower Patterns as well as for some of the letterings in the National Park Patterns. Back stitch is also great for flowers and stems such as the ones found in the Wildflower Bouquet Pattern.
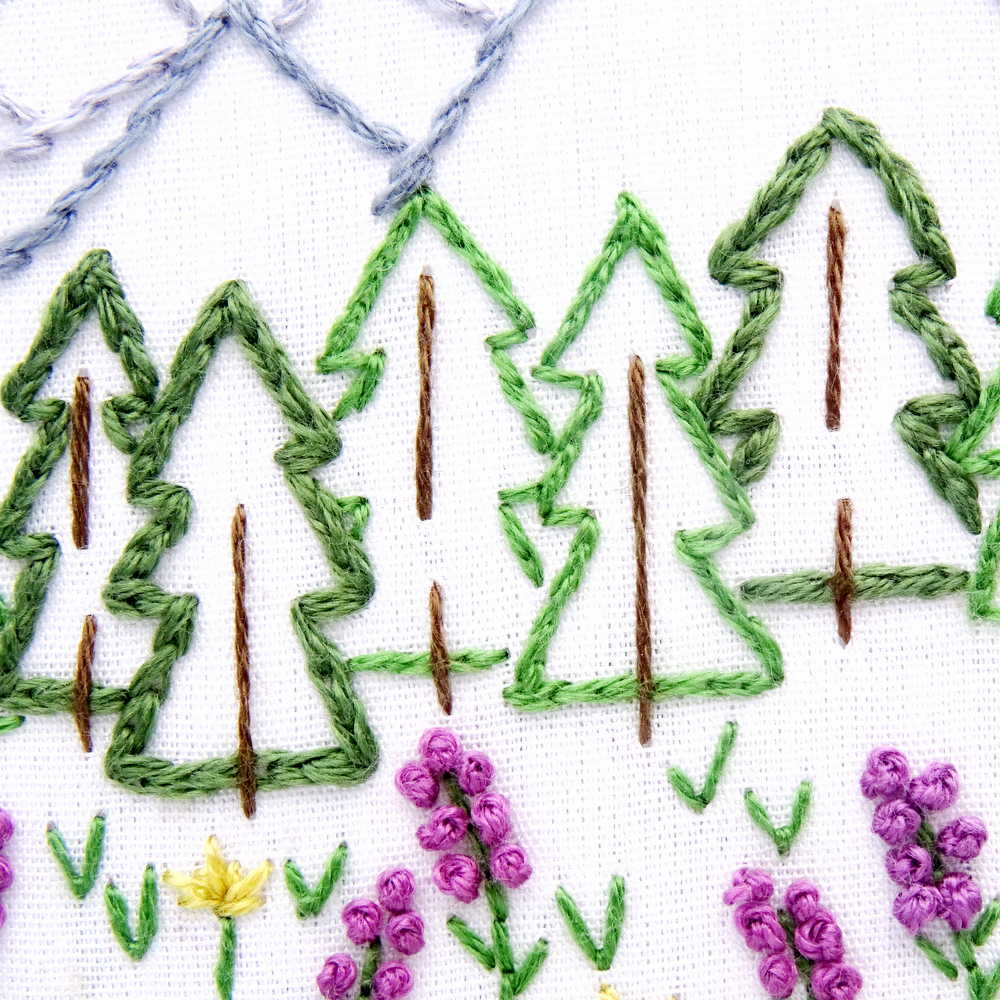
Split Stitch can be found in many of the patterns with trees and leaves. These trees in the Colorado State Pattern are worked with split stitch.
Stem Stitch is one of my favorites for curved lines. In fact, I like it so much that I’ve probably used it at least once in all of the Wandering Threads patterns! Most often stem stitch creates an outline like in the Yellowstone National Park Pattern. In this pattern, stem stitch is used to both outline and create the inner smoke of the Old Faithful Geyser.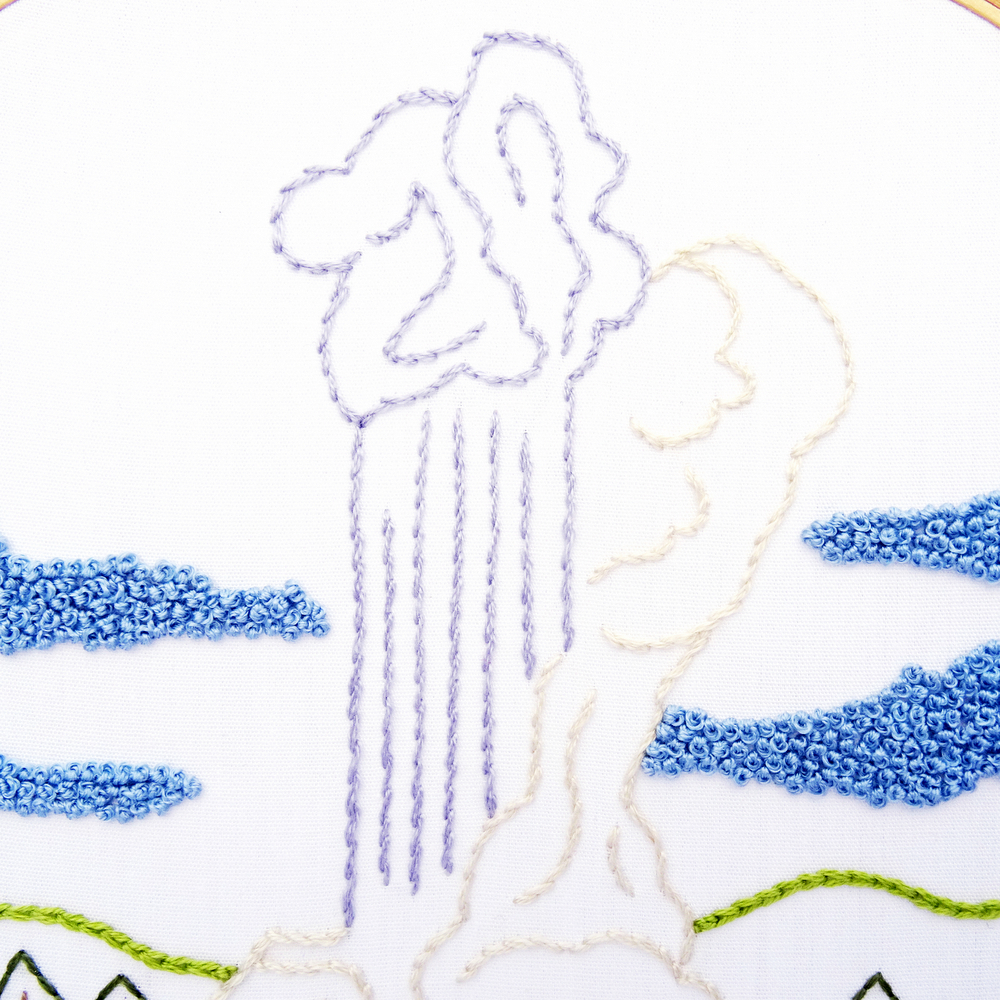
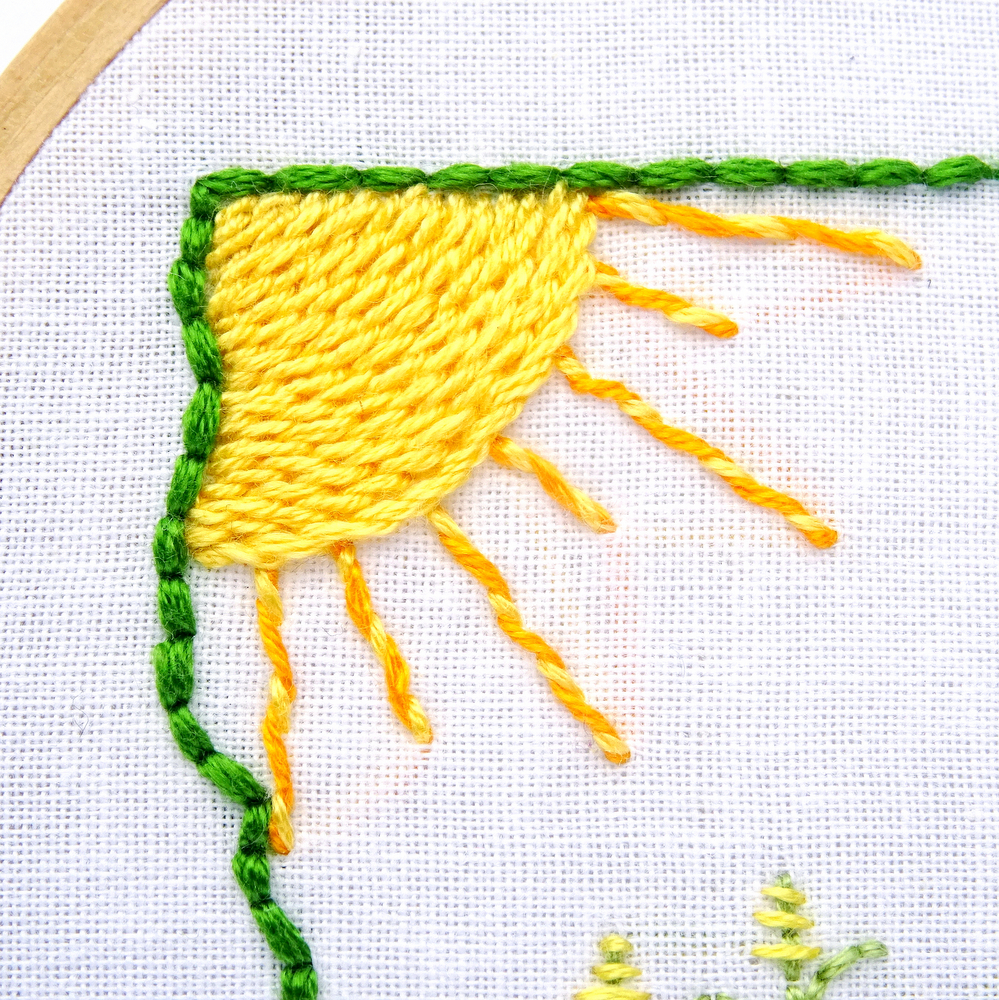
Stem stitch is also an interesting filler stitch for curved shapes. The sun in the Iowa State Pattern features the twisted lines of stem stitch worked in rows.
Noreen Lovett
I love your web site. Thank you.
I am leaving for AZ in March and lookingvto learn how to embroider while there. I think your tutorials will be a big start!
Thanks,
Noreen
Amanda Watson
Thanks so much Noreen! I hope the tutorials are helpful and please feel free to reach out with any questions.
Steph
This is so amazing! Thank you so much for such a thorough tutorial!
Amanda Watson
You are so welcome!
Mark Brook
I agree!
ofitserovi
I love how straight forward your lessons are. Thank you for that! Thank you for sharing !
Kyrie Deslatte
When backstitching, should you enter the stitch in the same hole as the prior stitch ended? Thanks!
Amanda Watson
Yes, enter the second stitch in the same hole that you ended the first stitch. This will ensure an even, unbroken line.
Laura
Your website is amazing! I was looking for inspiration (Great Sand Dune National park for the win) I found on the of making a sand dune on my son’s Christmas stocking and started exploring your content and tutorials! So glad I found this site!
Amanda
Thanks Laura!
Donna
I really like how you show examples of cases when you used this stitch or that. It really helps imagine how it might look when I use it in a certain situation.
Kim
In my instructions it says the name of the stitch and then “four strands.” How will I fit four of those floss strands through that needle? Or am I misunderstanding something?
Amanda
DMC threads are comprised of 6 strands that can be divided as needed. When the directions call fro four strands, simply separate the strands and use as needed.
Melinda Heuertz
Do you have written instructions for these stitches? I am left handed and find if I turn the instructions upside down I can understand them.