Satin Stitch is both a favorite and least favorite stitch for filling in shapes. On one hand, satin stitch can create a smooth block of color with a lovely satin-like finish. On the other hand, satin stitch can be finicky and frustrating with the end result not always as smooth and silky as it should be. Don’t let that stop you from learning satin stitch though! If you follow the steps below, read all the tips, and give yourself time to practice, you’ll soon be satin stitching like a pro.
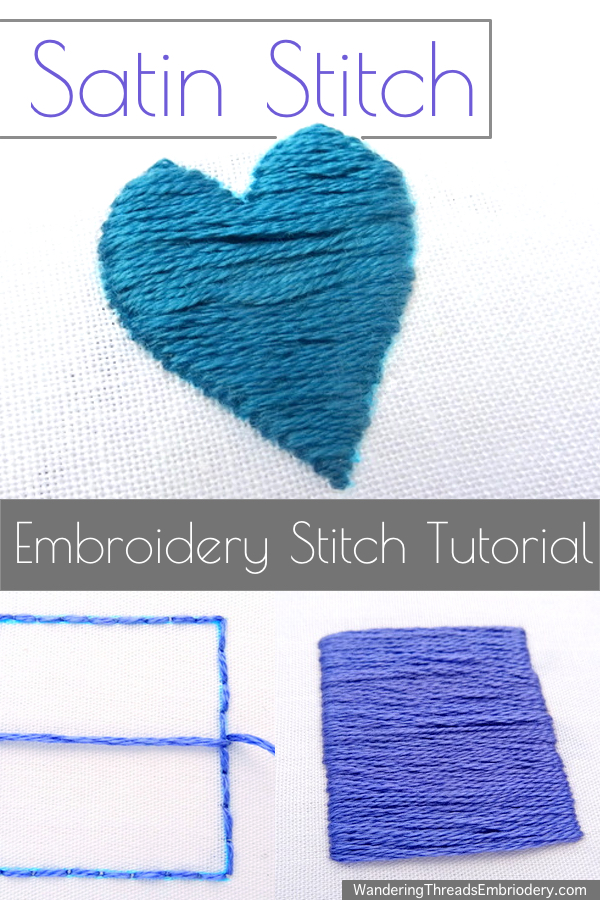
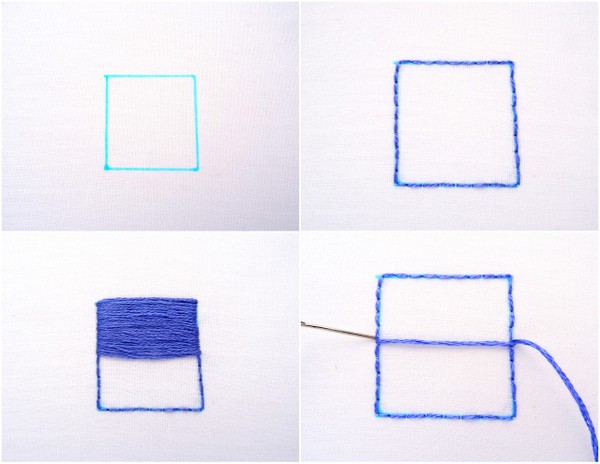
Satin stitch can be used to fill in any shape. For practice purposes, let’s start with something easy like a square. Begin by bringing your needle and thread up on the edge of the square. I always start my satin stitch in the middle of the shape. For uniform shapes such as squares, starting in the middle is not as critical, but when filling non-uniform shapes it helps keep the stitches straight. For this reason, it’s a good general practice to adopt.
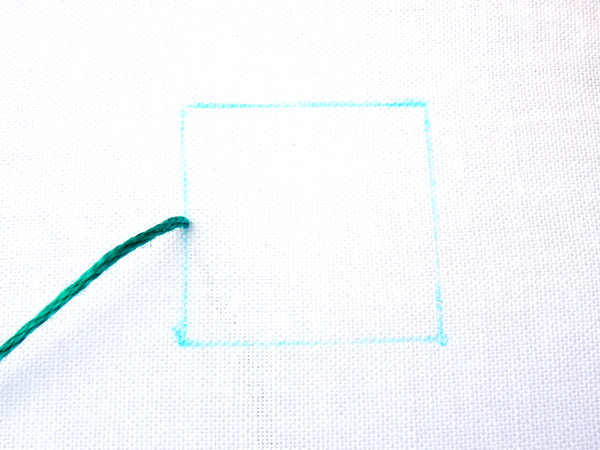
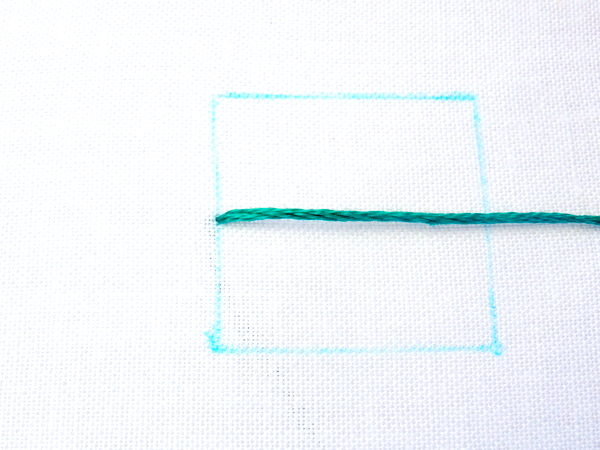
To make the first stitch, bring the needle back down directly across from where it came up. But wait! Before you make that first stitch, be sure it is absolutely straight. This stitch will be the foundation from which all the others are worked and if it’s slanted all the rest of the stitches will be slanted as well. The easiest way to ensure the stitch is straight is to stretch the thread across the shape and adjust it until it’s level before inserting the needle.
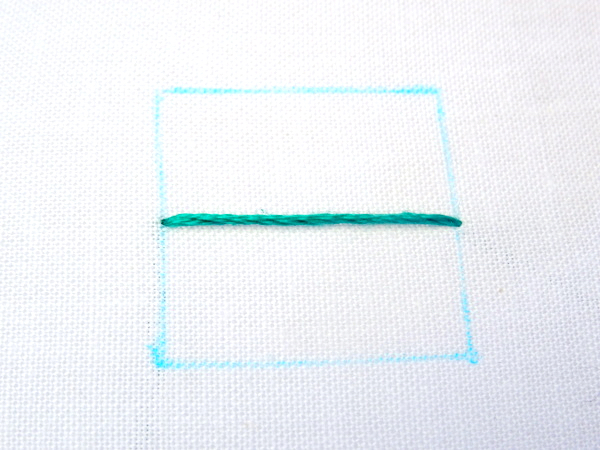
To make the second stitch, bring the needle back up right next to where you started the first stitch. The key to a smooth satin stitch is positioning the stitches close together without overlapping.
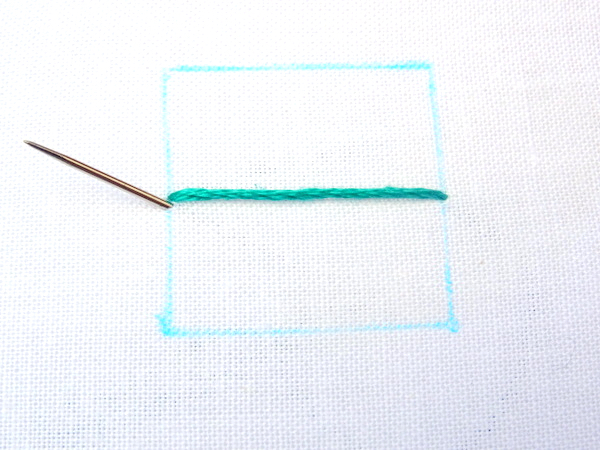
Bring the needle down next to the first stitch.
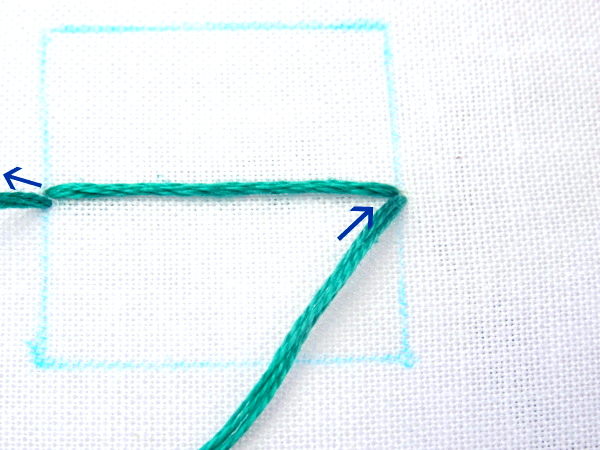
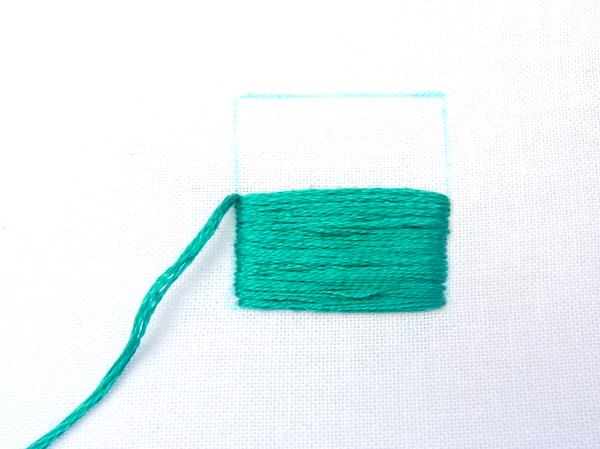
Continue in this fashion until you reach the bottom of the shape. Now, come back up to where you first started and stitch the top half.
A few tips for a successful satin stitch:
- Keep the stitches straight, parallel, and close together, while making sure they don’t overlap.
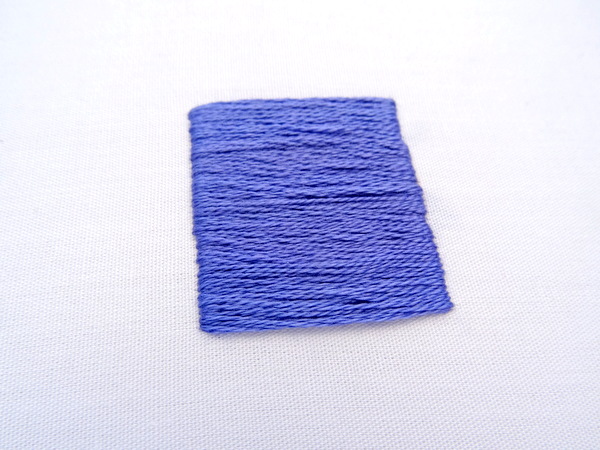
- If you’re working with a multi-strand embroidery floss, be sure to keep the strands smooth and flat and not twisted.
- Be careful not to pull the stitches too tight or the fabric will pucker and the shape will become distorted.
- Always stitch to the outside edge of the drawn line.
- Outline the shape with back or split stitch for a more even edge. *(See below for instructions)
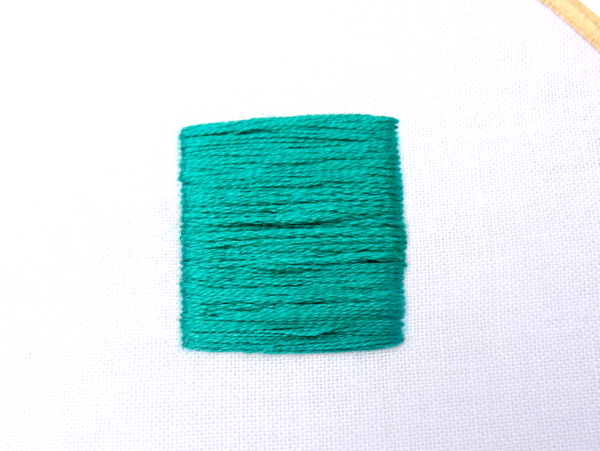
Most important, don’t stress if your satin stitch isn’t perfect. The edges might be a little uneven and the finish not quite as satin-like as you would like. It’s not an easy stitch and as you can see by my example below, even after years of practice, my satin stitch is not even close to perfect. In the end, it’s not really a big deal. Satin stitch is most often used to fill smaller shapes that are part of a bigger pattern and the small imperfections are barely noticeable when all is said and done.
Satin Stitch Outline
A quick trick for creating smooth edges is to outline the shape with back or split stitch and then work the satin stitch over the top of the outline. It’s a little more work, but that few minutes you spend outlining can make a huge difference in the end result. As a general rule, I use half the number of floss strands to outline as to work the satin stitch. The reason for this is so I don’t create a raised edge around the shape.
The example below uses two strands of floss to outline the square in backstitch and four strands to work the satin stitch over the top.
The finished shape is still not perfect but is noticeably more even around the edges. I find this method most helpful when filling in larger shapes or those with jagged or uneven edges.
Satin Stitch for Irregular Shapes
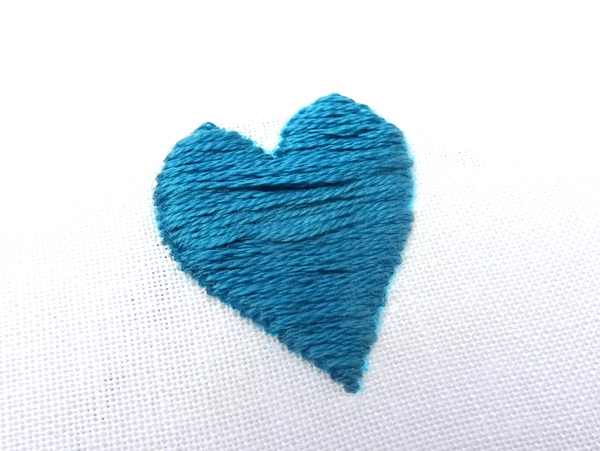
Now that you’ve gotten the basic method down, I’m going to quickly show you how to use satin stitch to fill in a less uniform shape. Many of my State Embroidery Patterns contain a small heart filled with satin stitch, so we’ll try a heart. My heart is hand-drawn which means it’s not perfectly symmetrical. No big deal. Follow the same procedure as above: start in the middle of the shape, work down to the bottom, then come back to the middle and work up until you reach the point where the two bumps meet.
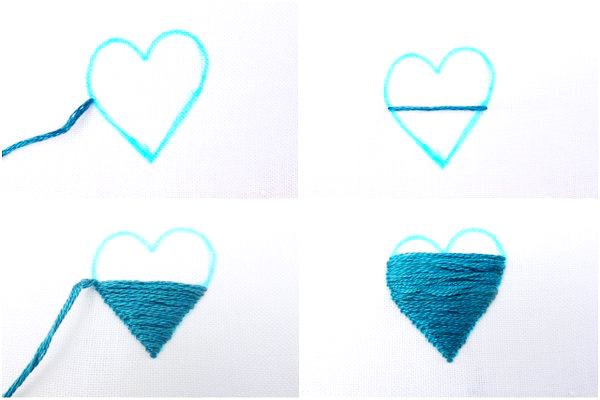
Now, we’re going to fill in the heart bumps one at a time. Start on one side and stitch up the edges of the bump until you reach the top.
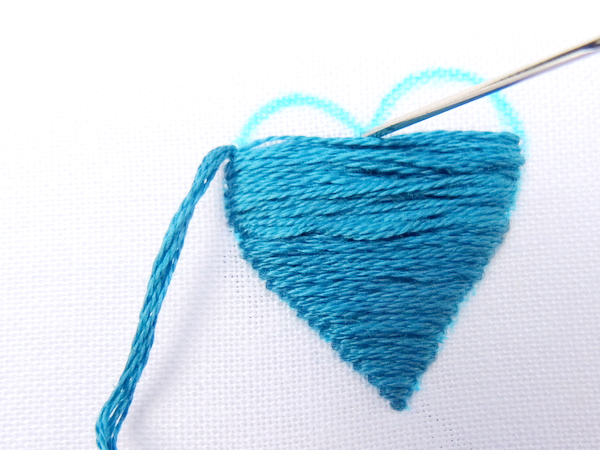
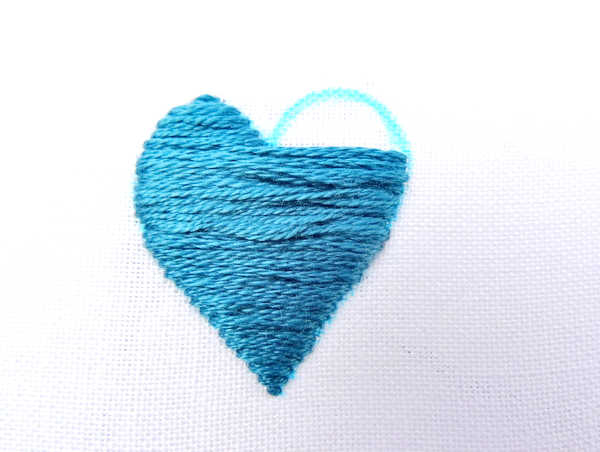
Repeat the procedure on the other side, and you have yourself a heart! As you can see, non-uniform shapes are not really any more difficult than uniform shapes. Sometimes you simply need to break the shape up into sections and work them one at a time.
Satin Stitch Patterns
Satin stitch can be used in so many ways! The Desert Garden Pattern uses it to create a gorgeous multi-colored Aloe plant.

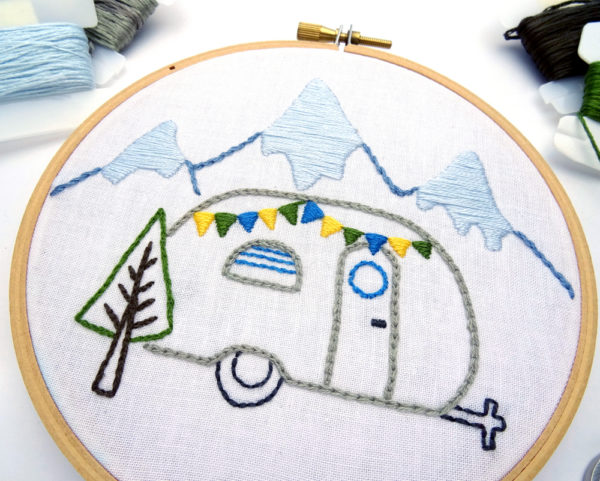
The Vintage Trailer Winter Mountains Pattern uses satin stitch for the layer of snow on the mountains.
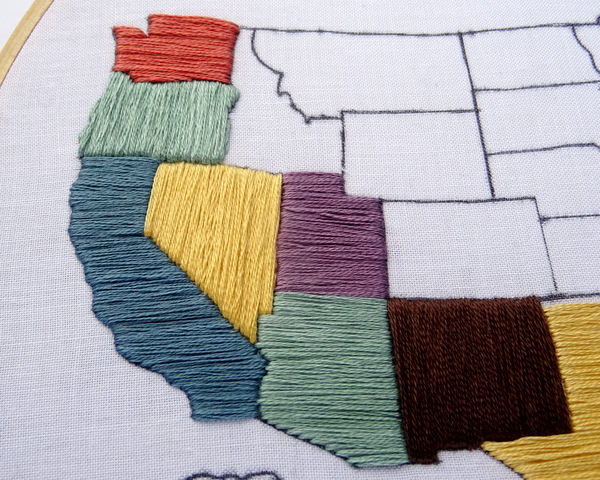
And the US Travel Map utilizes it as the sole stitch for creating a colorful and interesting map. By alternating the direction of the stitches on the map a patchwork of colors emerges.
Ajaya
Great ?????????
Cheryl A Kozlowski
I have never seen satin stitch done this way , no wonder my stitches start one direction , and finish in another . Thanks !!!
Dianne
Thank u!!! Now I’ll be more comfortable doing this
Catherine
Thankyou, so beautifully clear!
Daphne
Your instructions are great, clear and concise. I would love to sign up for your newsletter. Very helpful for a beginner like me. Thank you.
sikiş
Thank you so much!