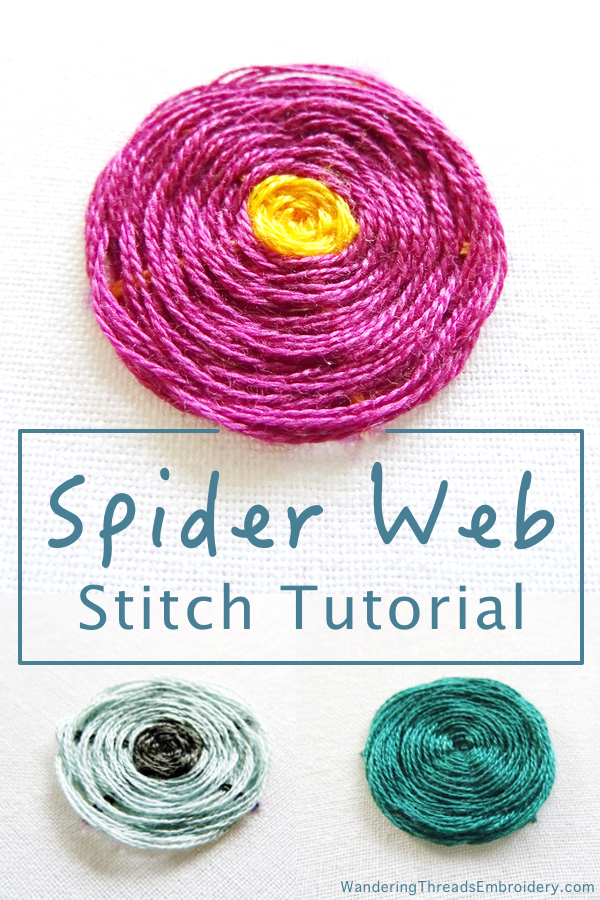
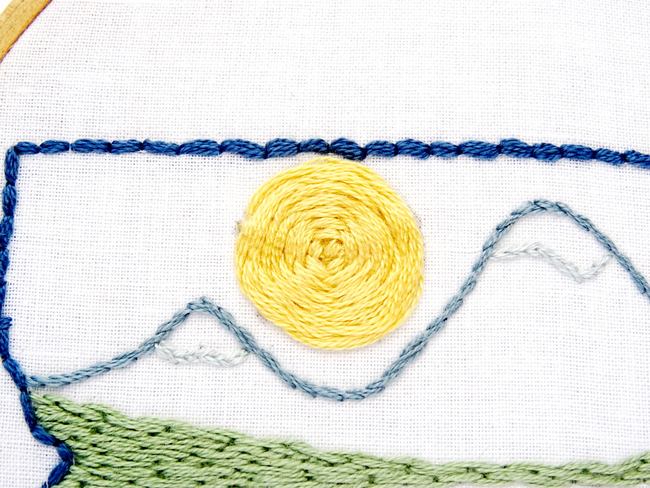
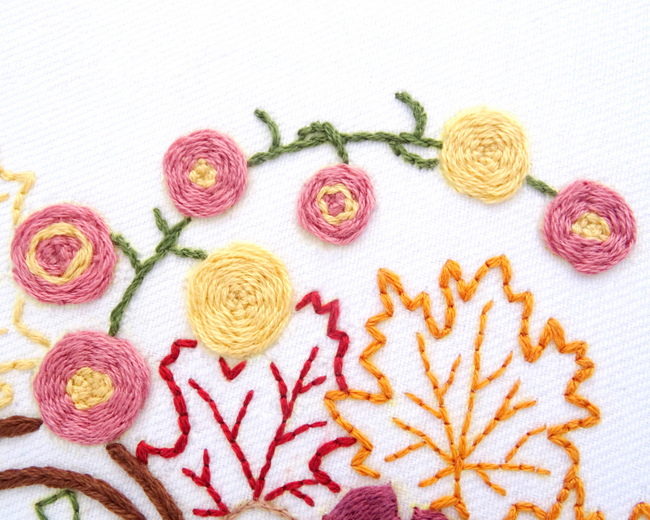
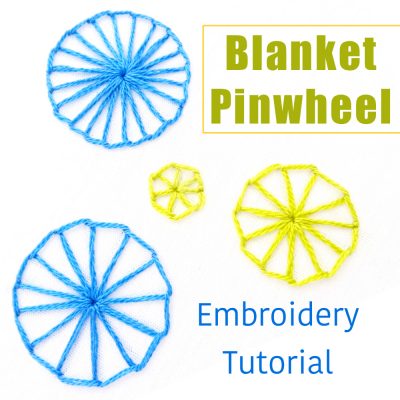
Whether you call it a spider web or a spider wheel, there’s no doubt that this creative stitch is both beautiful and simple to create. I like to use spider web stitch for large circular objects like a moon or sun, but it also makes a great flower, animal eye, or simply an intricate embellishment.
Begin the spider web stitch by drawing a circle on your fabric. For your first attempt start small — my circle is roughly the size of a quarter. Mark 5 dots around the perimeter of the circle. Try to space them evenly, but don’t worry if they are not perfect. Bring your thread up in the middle.

Make 5 straight stitches from the center out to each of the marked points. You should now have something that looks like a wagon wheel. Bring the needle back out through the middle of the spokes.
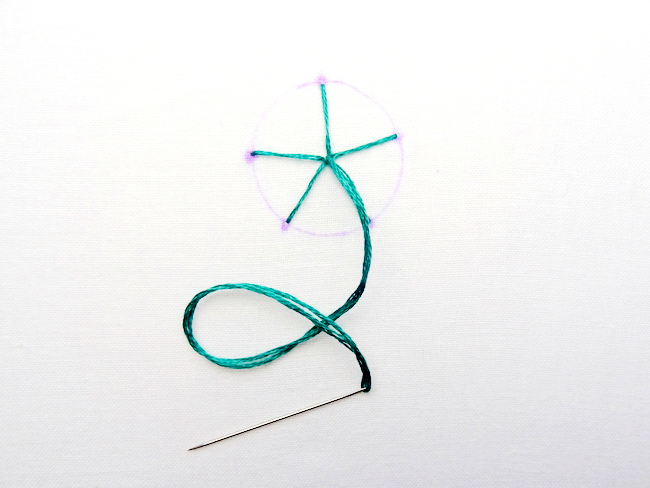
Now is when the fun starts! Weave your needle and thread under and over the spokes without going through the fabric. Take it slow and make sure you alternate under and over.
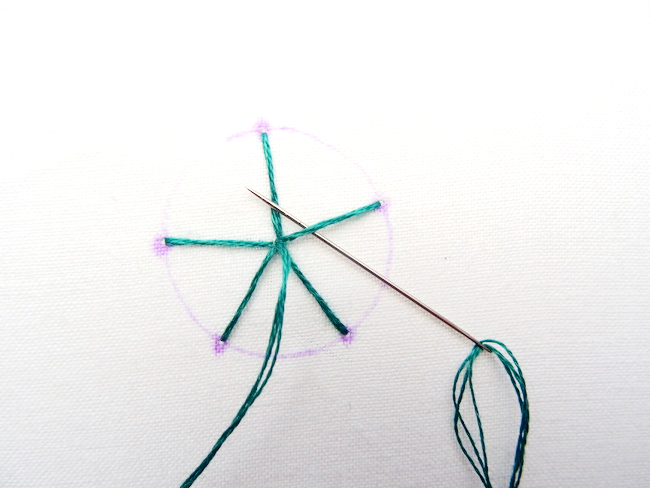
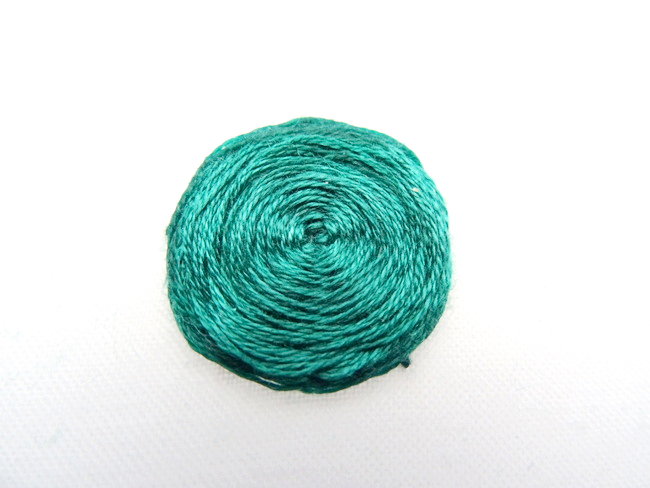
As you weave the thread around the circle a beautiful web begins to form.
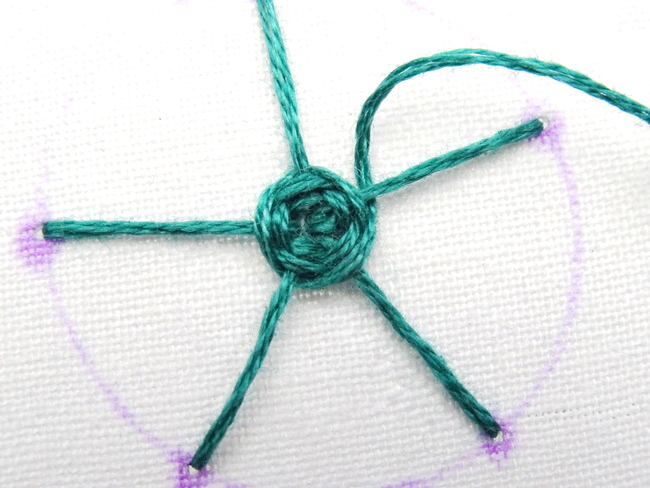
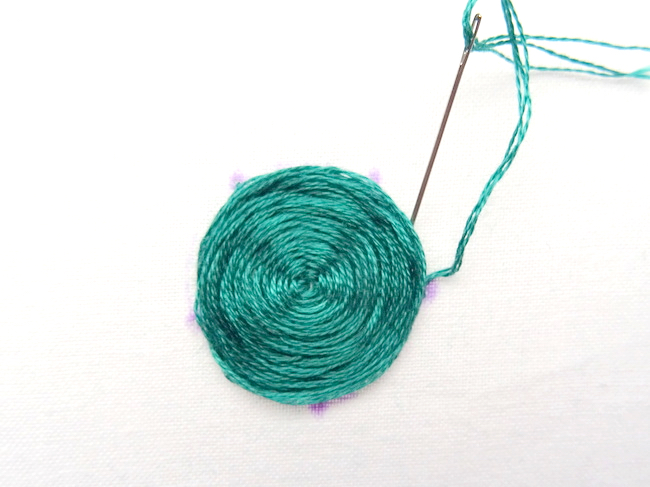
Continue weaving the thread over and under the straight stitches. As you work outward be careful not to pull the thread too tight or the web will become distorted. If you need to, place your thumb over the center to keep the thread in place. Depending on the look you want to achieve, you can leave the spokes visible or weave until all the straight stitches are covered.
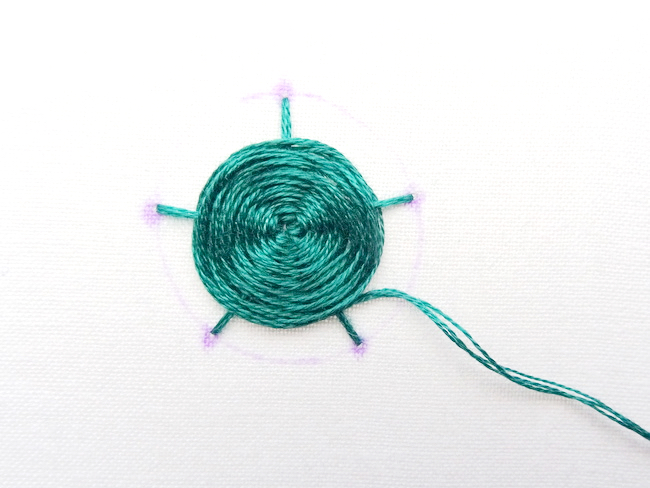
When your web is complete, simply bring the needle down and through the fabric under the very outer edge of the thread and tie off on the back of the fabric.
Look at this amazing spider web!
Spider Web Stitch Variations
The spider web stitch can be altered to create different looks simply by using more than one color thread. Start with one color, weave over and under until you reach the desired thickness. Then bring the thread down through the fabric, tie it off and start a new color thread. Bring this color up next to where the old went down and continue weaving around the web.
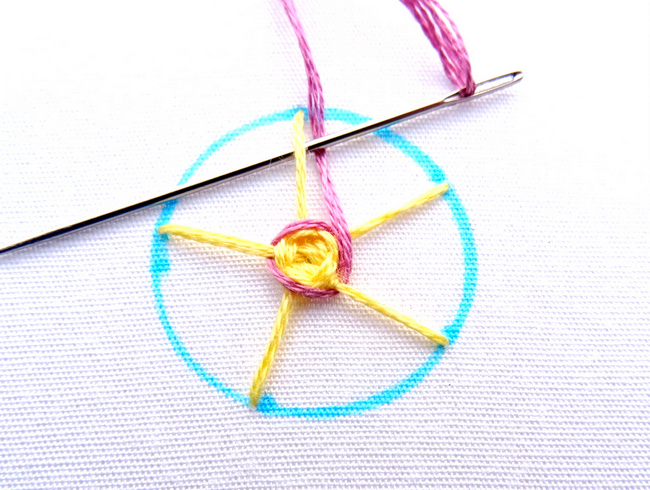
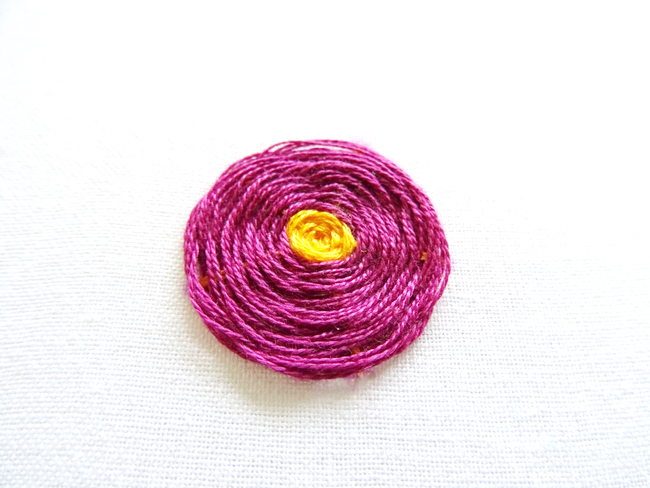
Use yellow in the middle and a fun bright color on the outside to create a pretty flower pattern.
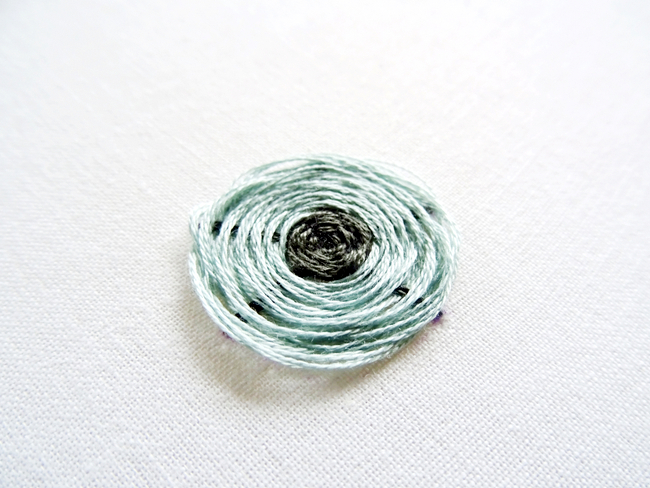
Or try a dark thread in the middle and a lighter color on the outside.
Spider Web Stitch Patterns
A few Wandering Threads patterns for putting your new skills to use:
Spring Wreath Pattern

Montana Embroidery Pattern
Bountiful Cornucopia Pattern
doiki
Hello! I was one of the Tapestry of Scotland stitchers! I am now sewing the Thistle panel on my own, and have a question. The suggested stitch for the stem of the thistle is Spiders Web in 3 Directions. I can t figure this out! Could you explain how to do Spiders Web NOT in a wheel shape, but in three different directions, please?
Jackie Law
I’m sorry there’s been no reply I’m in the same boat !! I’m not much of an embroiderer so thought it was just me!!
Shame no explanation!
Amanda
Doiki & Jackie,
Unfortunately, I am not familiar with a spider web stitch in 3 directions. A search on the web results in no answers or examples for me to learn from. Sorry!