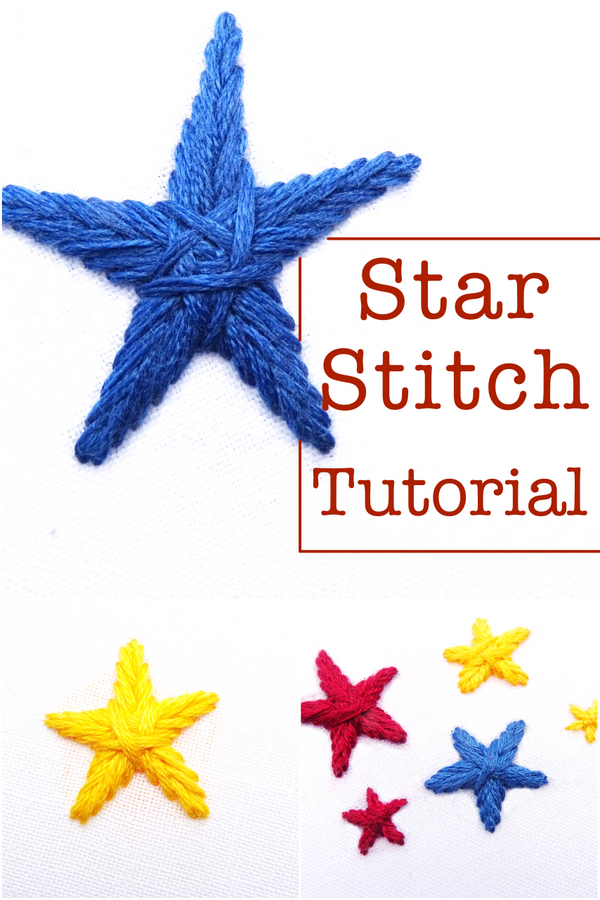
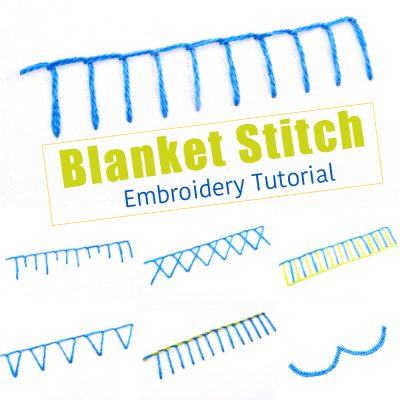
This version of star stitch is only one of the many ways to create an embroidery star. From simple straight stitches arranged in a criss-cross pattern, to complicated star stitches that require math and measurements, the star stitch methods are as varied as their results. For this tutorial, we’re keeping it simple with an easy to learn stitching method that results in a true star shape.
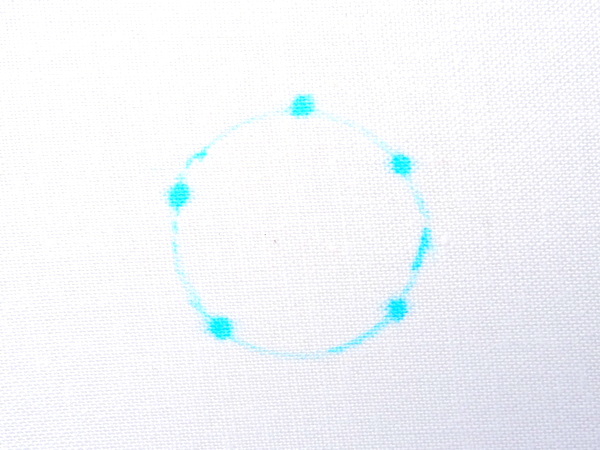
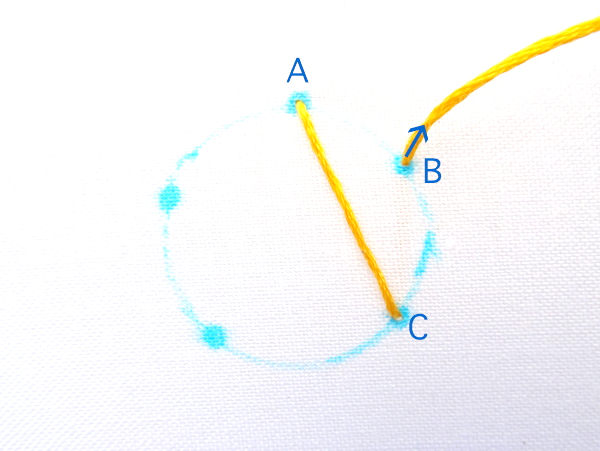
 Start by drawing a circle the size you want your finished star. Mark five even dots around the circle. Try to make your dots even, but don't worry if they are a bit off. I actually prefer my embroidered stars to be a tiny bit off center because I feel it adds character.
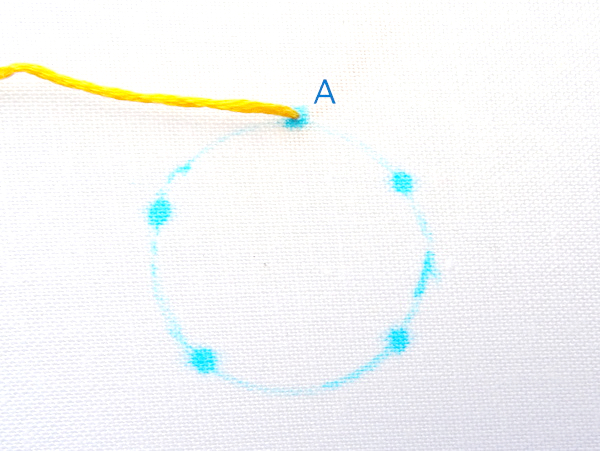
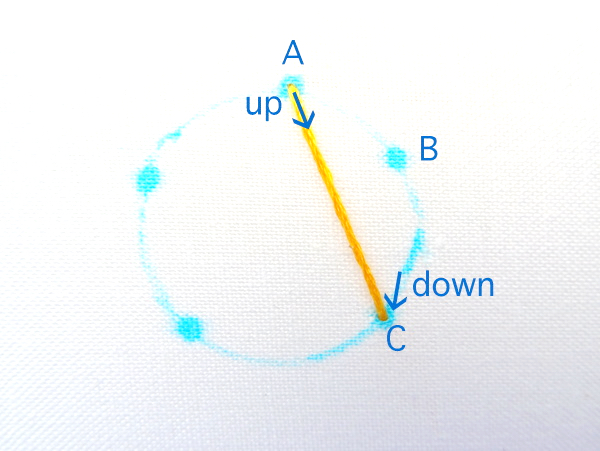
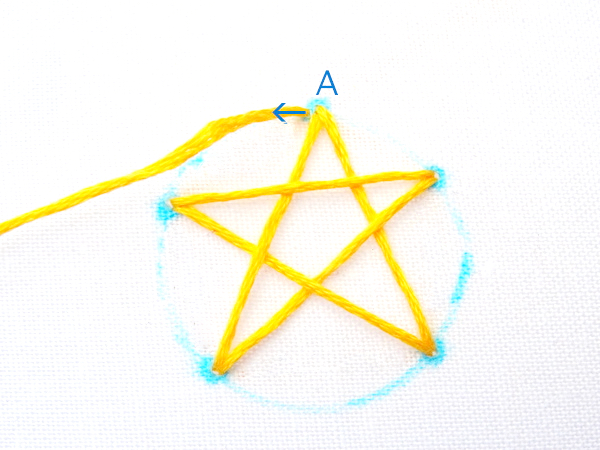
Bring the thread up at one of the dots. Let's call it point A.
Skip over point B and bring the needle down at C creating a single straight stitch that crosses the right side of the circle.
Now, go back to point B and bring the needle up.
Skip point C and bring the thread down at point D.
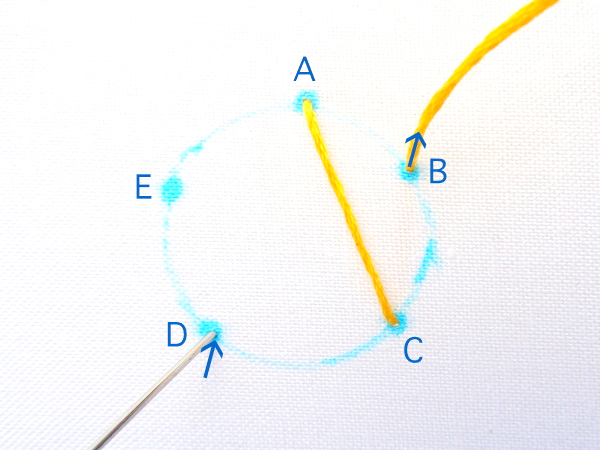
The next stitch will come up at C and go down at E.
Continue this pattern of bringing the thread up at one point, skipping the point between, and then bringing it down at the next point until a star shape forms.
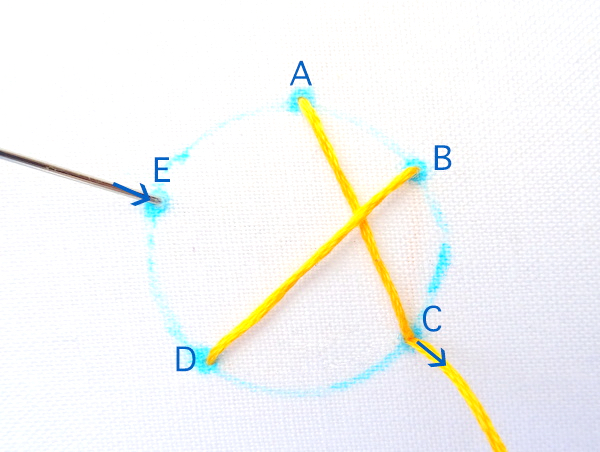
To form the second layer of the star, bring the thread up again at point A. This time come up just a bit to the left of the original stitch.
Following the same pattern as the first time, skip point B and bring the thread down at point C just to the left of where the star point forms.
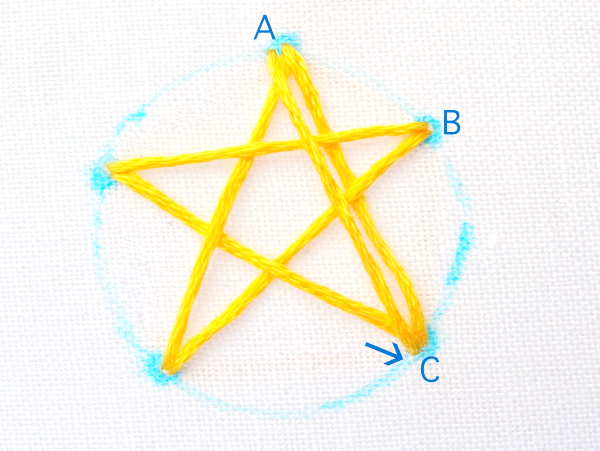
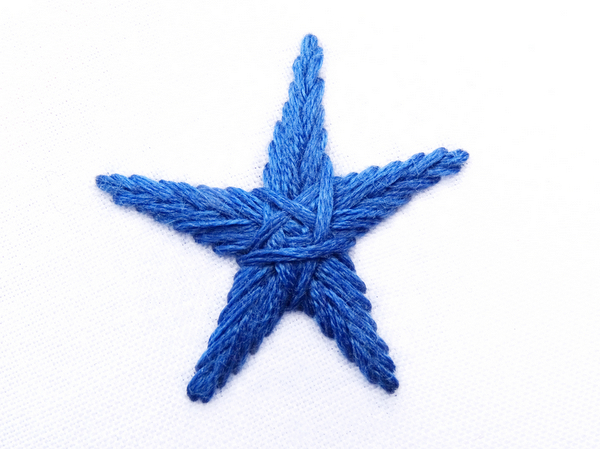
Continue this pattern around the star. Each time you bring the thread up and back down stay on the left side of the point and move down the star points. The second layer will look like this.
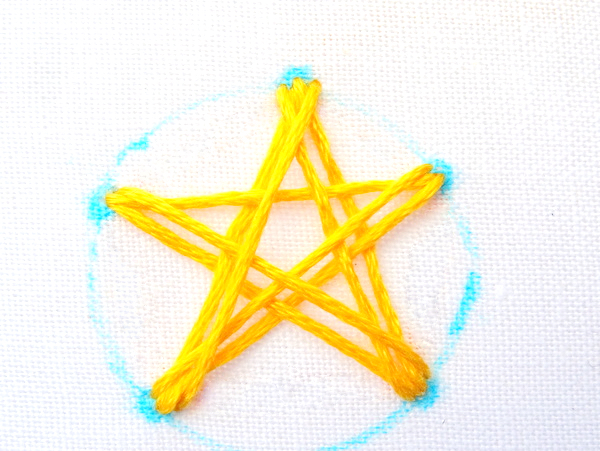
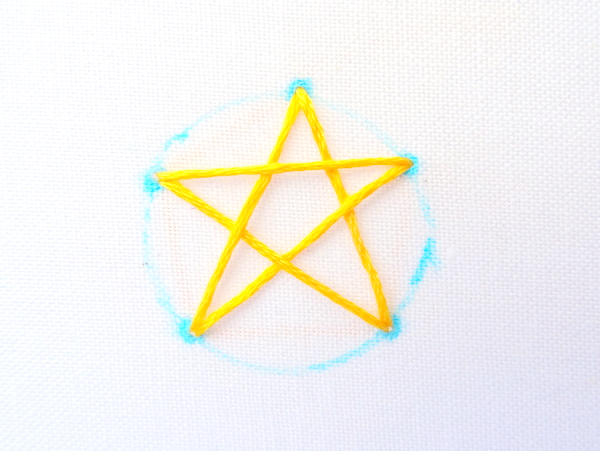
As you stitch around the star and move the thread down the points a tightly woven star begins to form.
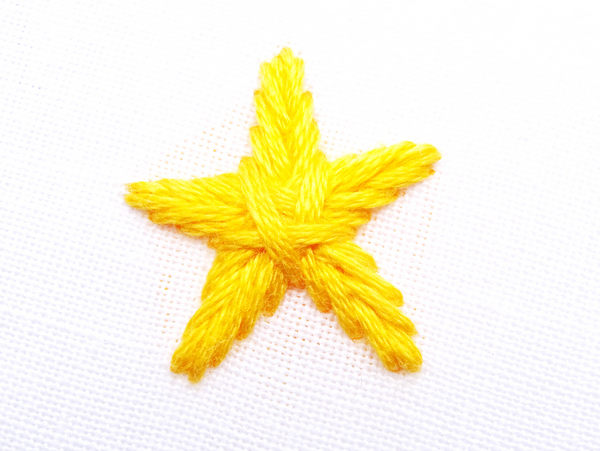
When the thread reaches the center of star, bring it to the back and tie off. You now have a perfect embroidery star!
Star Stitch Variations
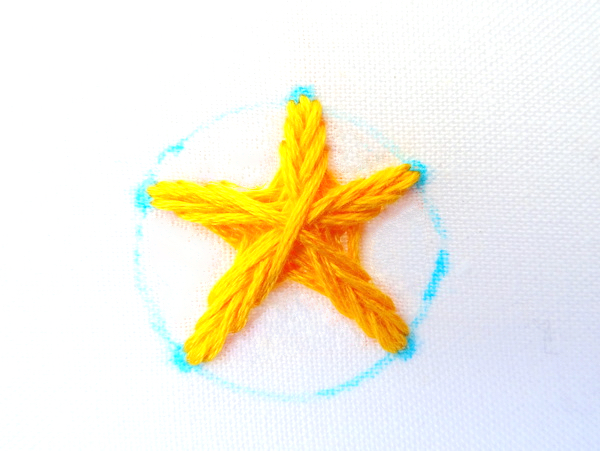
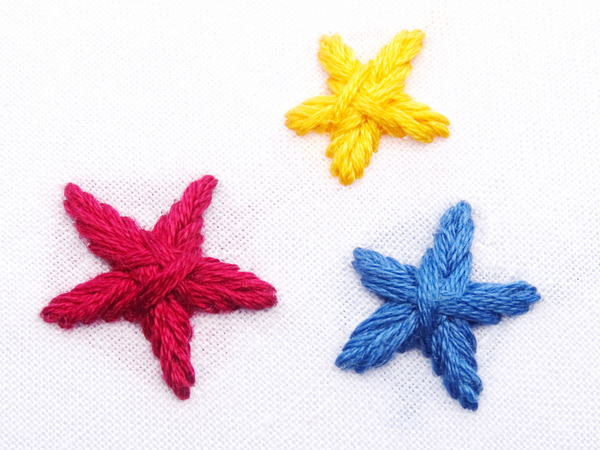
Star stitch can be used to make any size star. A big star will have narrow points like this one.
While small stars will have shorter points.
Star Stitch Patterns
A few patterns for putting your new star stitching skills to use!
Alaska State Embroidery Pattern

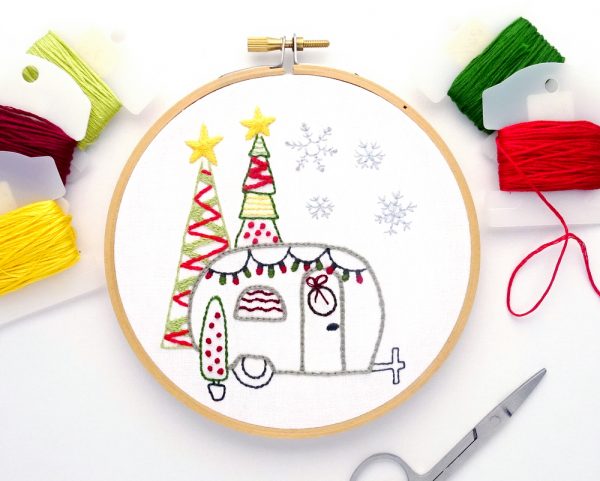
Vintage Trailer Happy Holidays Pattern
ddpej
I wanted to say thank you — I found this super helpful! I wasn’t at all sure how to render the stars on my latest cross-stitch piece until I stumbled across this post, and it worked perfectly for what I needed. I’ve linked the piece as my website if you are interested in seeing it. Thank you so much!
Amanda Watson
Yay! So happy you found it useful 🙂
Kim
Do you have a YouTube channel? I have an easier time understanding a new stitch if I can watch it.
Amanda
I am sorry, but at this time I do not have video tutorials.
Lisa
I also was looking to see it actually stitched. I don’t understand why I’m having so much trouble getting it to look right. I’m definitely making it harder than it needs to be.
IggleStitch December Project: Starry Sky Embroidery – Geek Girl Pen Pals
[…] the larger stars, I used a tutorial from Wandering Threads Embroidery. Notice that my stars did NOT turn out as nicely as they do in her tutorial! I used the full six […]
Patty Eirado
Thanks ?
Cathy
Thanks, this was exactly what I needed and my star has turned out very well.
Debbie
Thank you so much.
Amanda
Thank you *so* much! I’ve been trying to follow videos on this and crying.