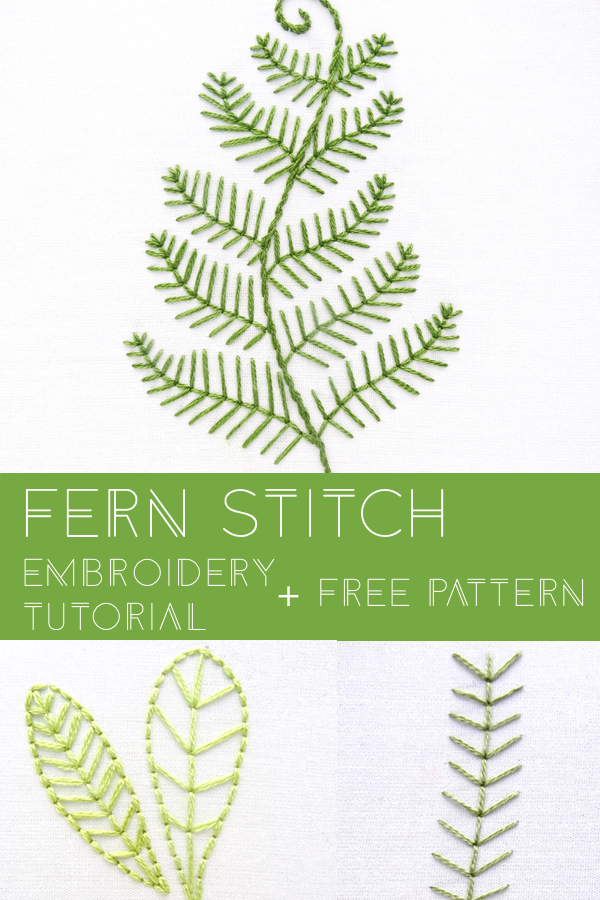
Fern Stitch is a simple, delicate stitch that is easy to learn and quick to execute. It combines three small stitches worked in a group along a vertical or curved line to create an open lacy pattern. Fern stitch is perfect for creating leaves, branches, floral sprays, and all kinds of foliage. It can also be stitched in multiple rows to create a geometric pattern. Fern stitch is useful for all types of embroidery projects and is a snap to learn!
Straight Line Fern Stitch
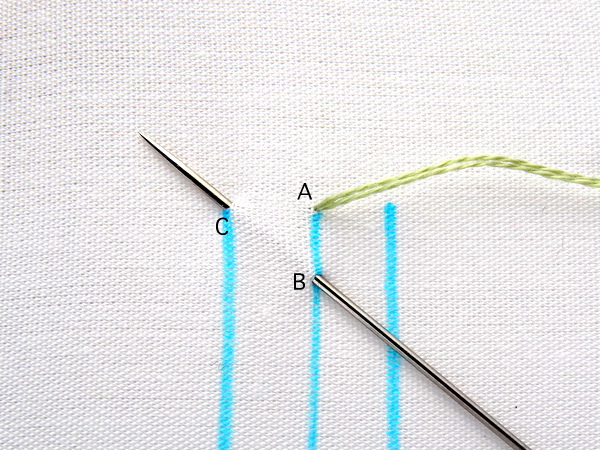
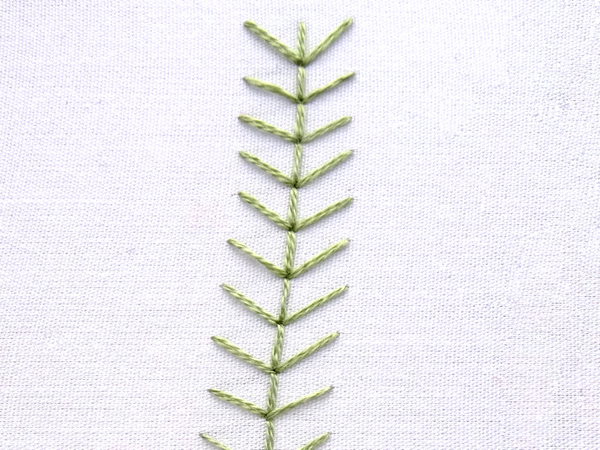
Begin by drawing three parallel lines on your fabric roughly a half-inch apart. Bring the needle up at the top of the middle line (point A) and back down one stitch length below (point B). Instead of pulling the thread all the way through, set up the next stitch by angling the needle in a diagonal fashion and bringing it out at the top of the far-right line (point C).
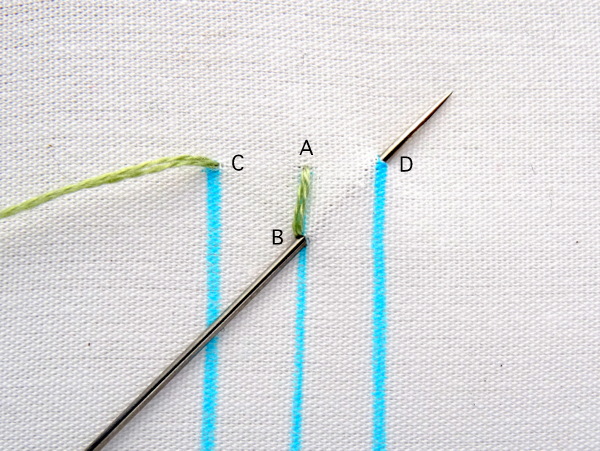
Pull the thread through and then take the needle back down in the same hole where you ended the first stitch (point B). Create the final stitch in the grouping by angling the needle and bringing it out at the top of the left line (point D).
Pull the thread through and you have just created your first grouping of fern stitch.
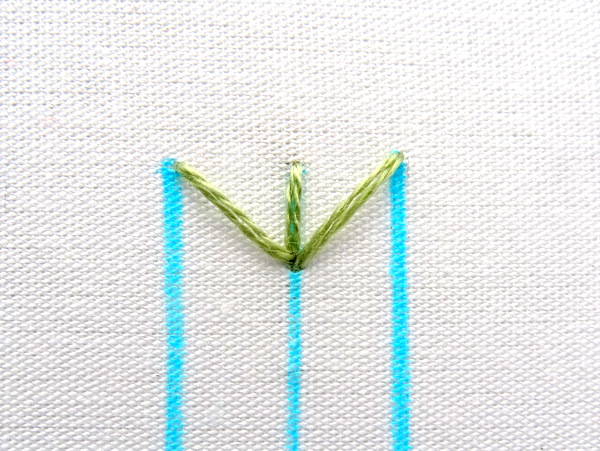
Start the next stitch by coming back up in the middle (Point B), down one stitch length below (Point E), and angling the needle up to Point F.

Continue making this three-stitch grouping with one straight middle stitch and two diagonal side stitches until you reach the end of the line.
Fern Stitch Tips & Variations
Once you learn the basic steps of fern stitch, the variations and possibilities are endless! For a more organic and natural look, try stitching without the outer guidelines and varying the diagonal stitch lengths and angles. Create realistic foliage and underwater seaweed by branching several lines off each other. Add small french knots on the end and you have a simple floral spray.
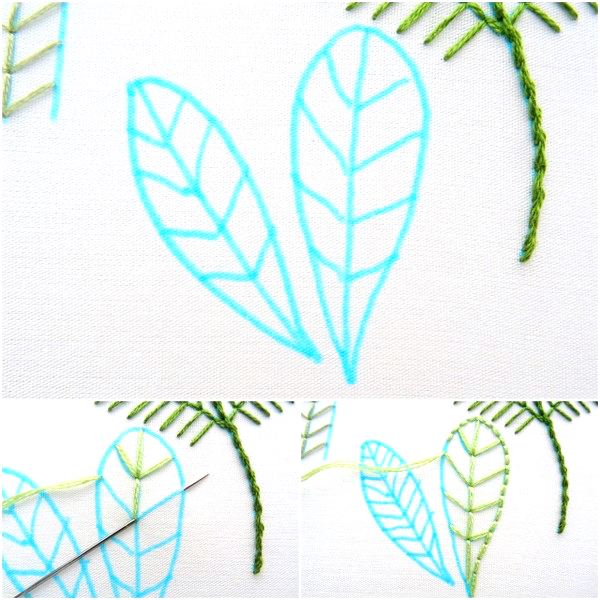
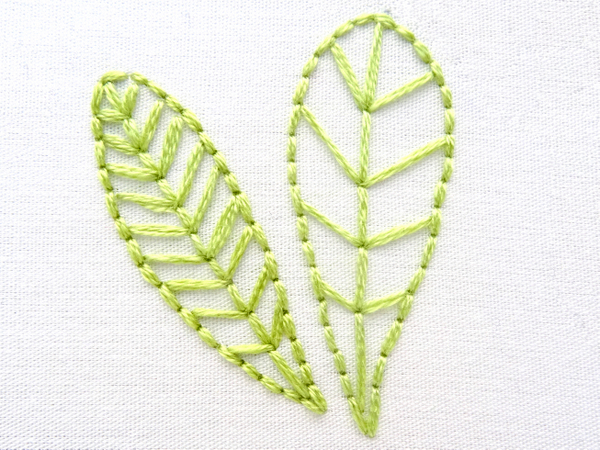
Fern stitch also looks beautiful worked along a curved line or made into a circular shape. You can even outline your fern stitch shapes with backstitch to create unique geometric filled shapes. One of my favorite way to embroider leaves is with a single row of fern stitch outlined with small back stitches.
Free Fern Pattern!
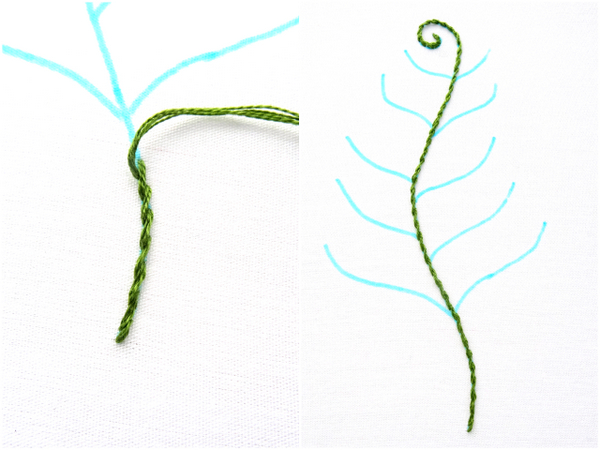
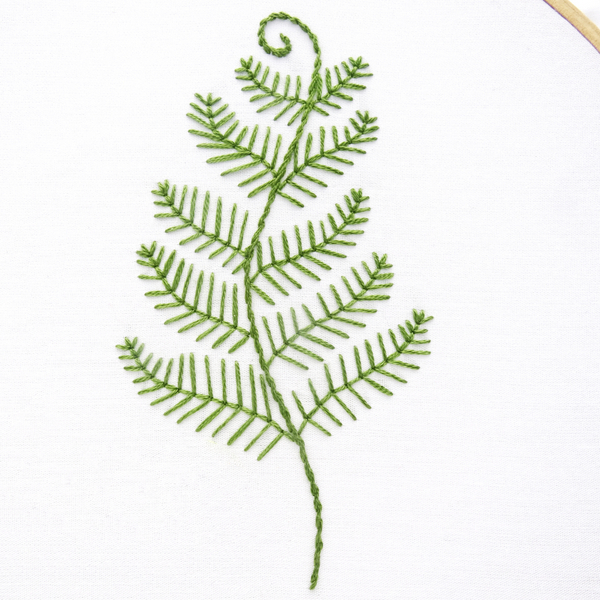
Do you know what else fern stitch is good for? Making ferns! Fill in the branches of this simple fern pattern with varying lengths of fern stitch to create a and whimsical embroidered fern. Click HERE to view and download the free pattern.
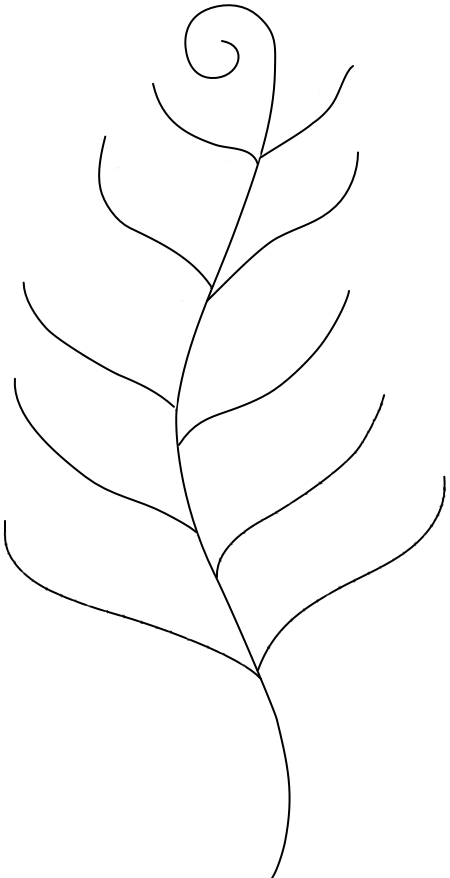
Start by stitching the center of the fern with stem stitch.
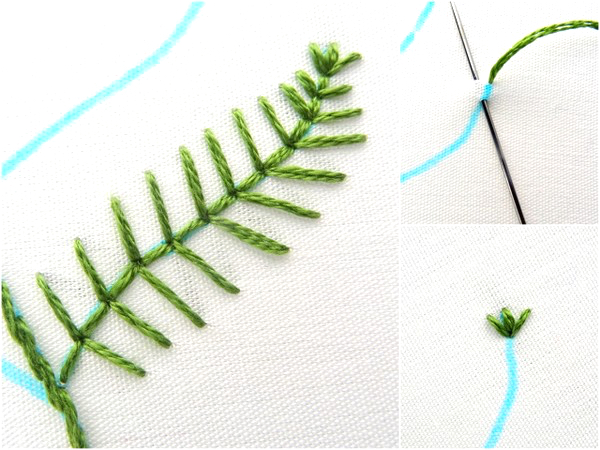
Next, fill in the branches with fern stitch. Starting at the far end of each branch, create a grouping of small stitches. Continue down the branch, increasing the size of the stitches as you go. Don’t worry about making the stitches uniform in shape or perfectly tapering them along the branch. Your fern will be more realistic if the stitches are imperfect, just like a fern frond found in nature.
Fern Stitch Patterns
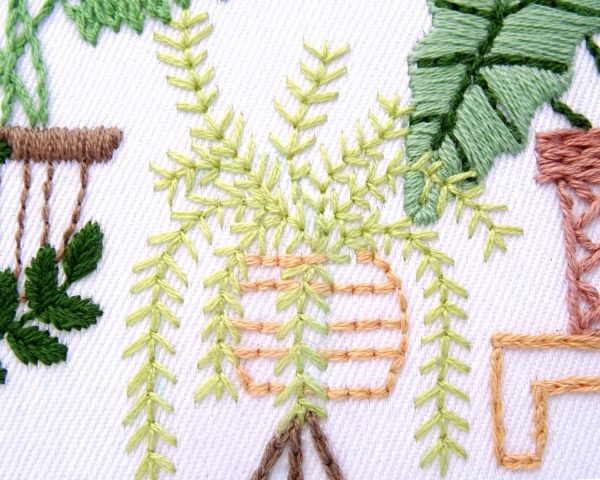
Want to put your stitching skills to use? Check out the Tropical Leaves Houseplant Pattern where fern stitch plays the star in creating a delicate hanging plant.
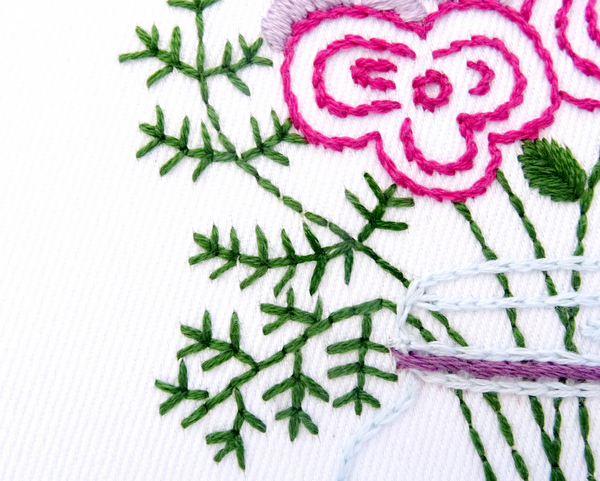
The Wildflower Bouquet Pattern featuring a spray of fern stitch foliage.
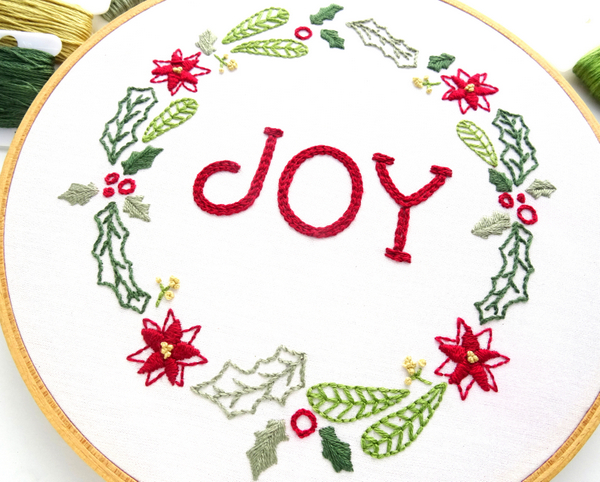
Or, the Christmas Wreath Pattern which uses fern stitch to create bold leaves inside the holly wreath.
Badgers Embroidery
Excellent explanation, it’s simple & focus. Keep up the great work!