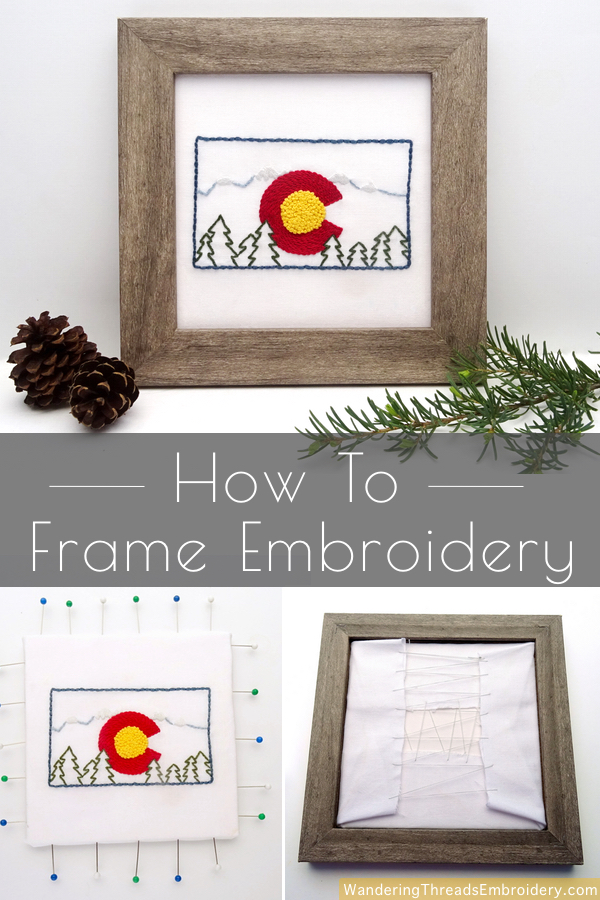
If you find yourself falling short at the end of an embroidery project because framing sounds intimidating… I am here to help! Learning how to frame embroidery is not as intimidating as it sounds. A few basic materials and about 20 minutes of your time are all you need to turn that embroidery piece you spent hours stitching into a finished masterpiece.
You Will Need…
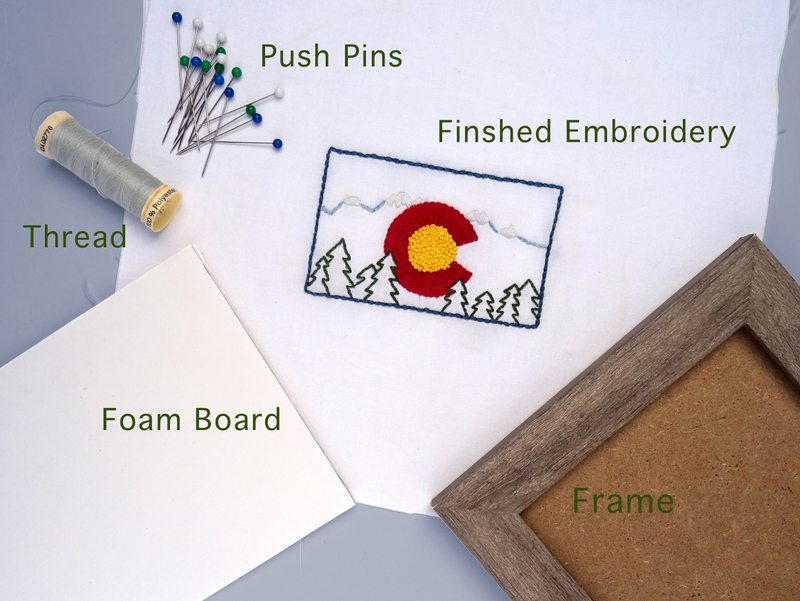
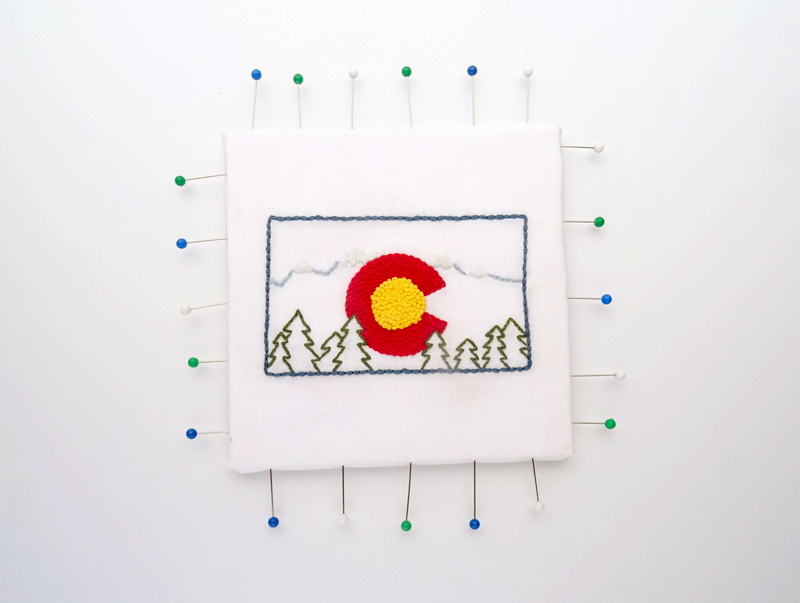
- Your Finished Embroidery Piece – washed & pressed. The fabric must be big enough to fill the frame with 2 or 3-inches of extra fabric for wrapping around the back. If you’re like me and trim your fabric while it’s in the hoop to keep it out of the way, be sure to leave extra if you plan to frame the finished piece.
- A Picture Frame large enough to fit your embroidery. This tutorial does not use the glass front of the frame. For aesthetic reasons, I prefer the stitching without glass in front of it, and for practical reasons, it can harm the thread over time. However, if you choose to have glass on the front, you will need to use a deep, shadowbox type frame and spacers so the embroidery does not touch the glass.
- A Foam Board* cut to fit the inside dimensions of your frame. Cut the board about a 1/8-inch smaller than the inside measurements to account for the fabric that will be wrapped around the edges. *If you don’t want to buy a large posterboard size piece of foam board, ask at your local framing shop if they have any small remnants.
- Sturdy Cotton Thread
- Push Pins
How to Frame Embroidery
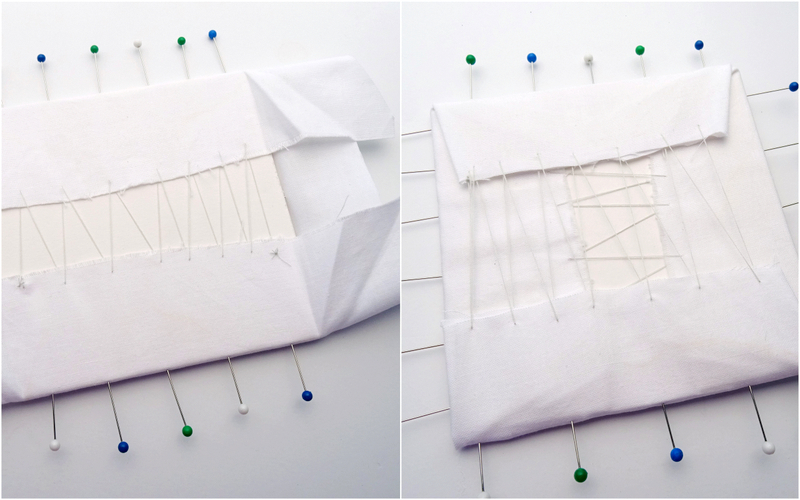
Once you have gathered and prepared all your materials, begin the framing process by positioning the foam board in the center of your embroidery piece. Make sure it’s straight! Carefully flip it over so the fabric is on the bottom. Starting with the long sides, fold the extra fabric into the center. If necessary, trim the fabric to leave a roughly 1-4-inch space in between. Pull the fabric tight and secure by pushing the pins into the foam board.
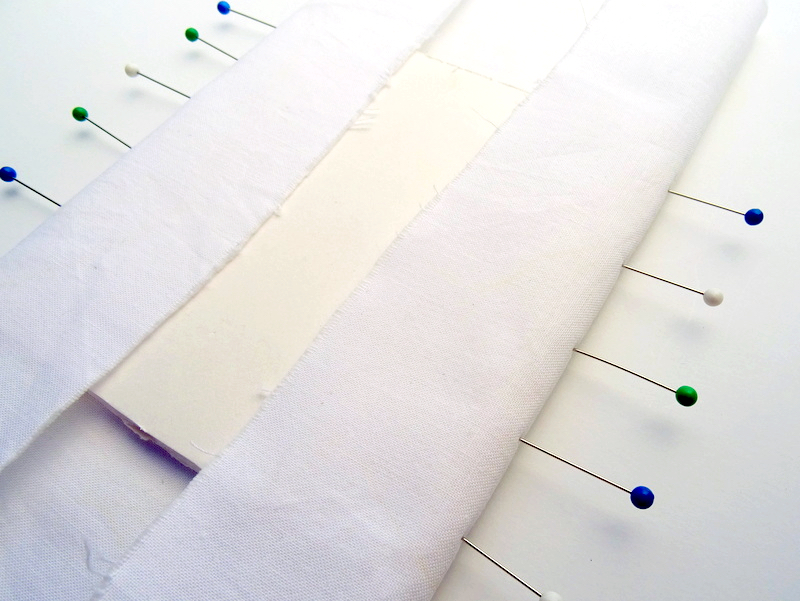
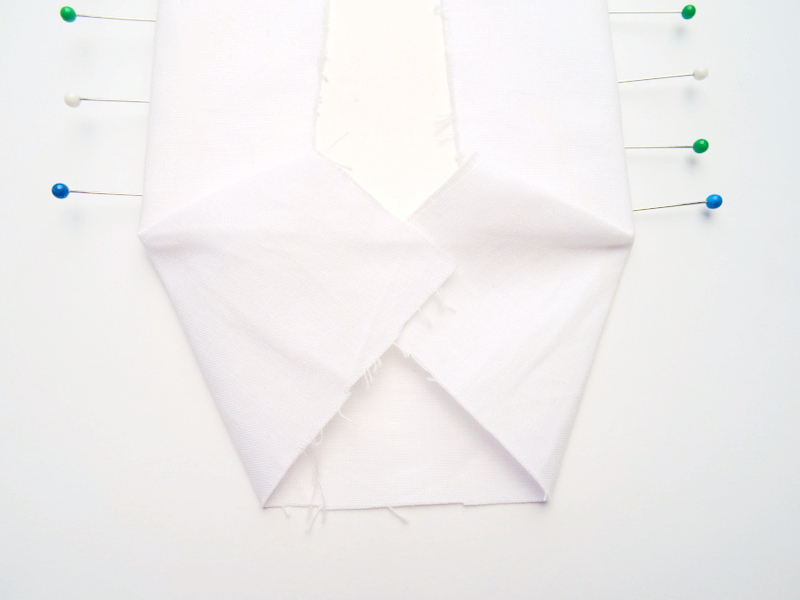
Repeat this procedure on the short sides. Depending on the shape of your frame, you might need to fold the corners on a diagonal and trim the fabric to prevent it from bunching. The finished fabric-wrapped foam board will need to fit snuggly inside the frame so try your best to avoid bulky corners.
Once the fabric is secured onto the board, flip it over and do a final check to make sure it is straight.
The final step is stitching the fabric together on the back using a simple lacing technique. Start by flipping the extra fabric from the short sides out of the way. Insert a needle with a long strand of thread about a 1/4-inch from the edge of the fabric and weave back and forth while pulling the fabric tight. Tie off the thread at the end and start a new piece. Finish the lacing by folding the fabric from the short sides back over into the middle and lacing it together.
Remove the pins and the fit the embroidery board inside the frame.
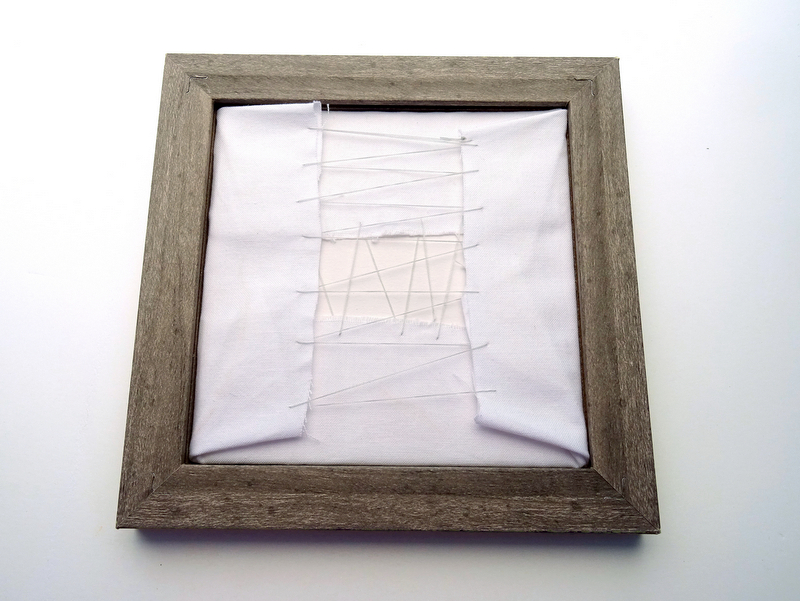
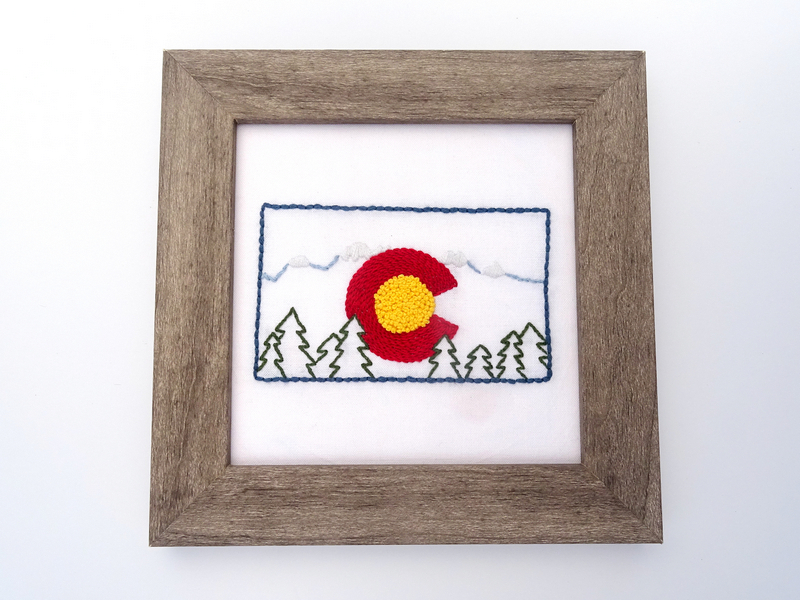
Replace the frame backing, flip it over, and admire your handiwork!
Wait, There’s More!
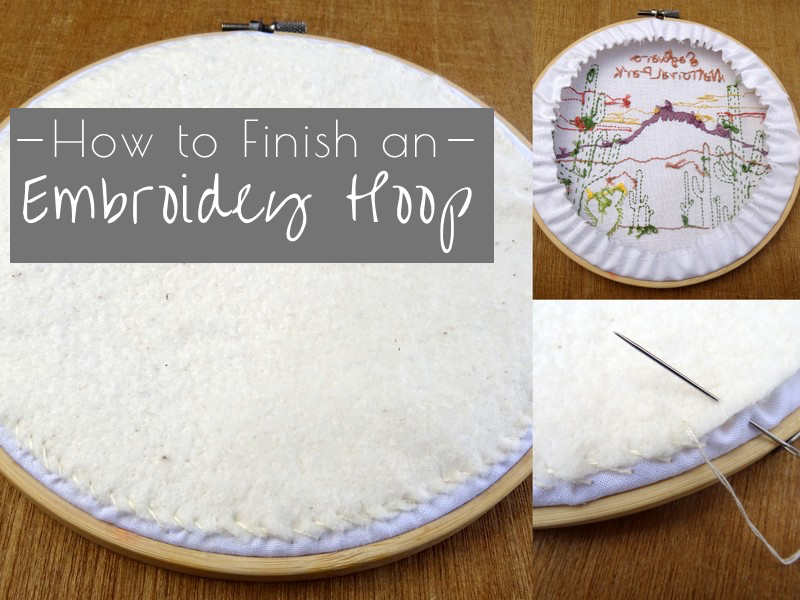
Want to learn how to frame embroidery inside the hoop? That trusty wooden hoop you used for stitching can also serve as a fantastic frame. Learn how by visiting my post: How to Finish an Embroidery Hoop.
Stitch Life Frames
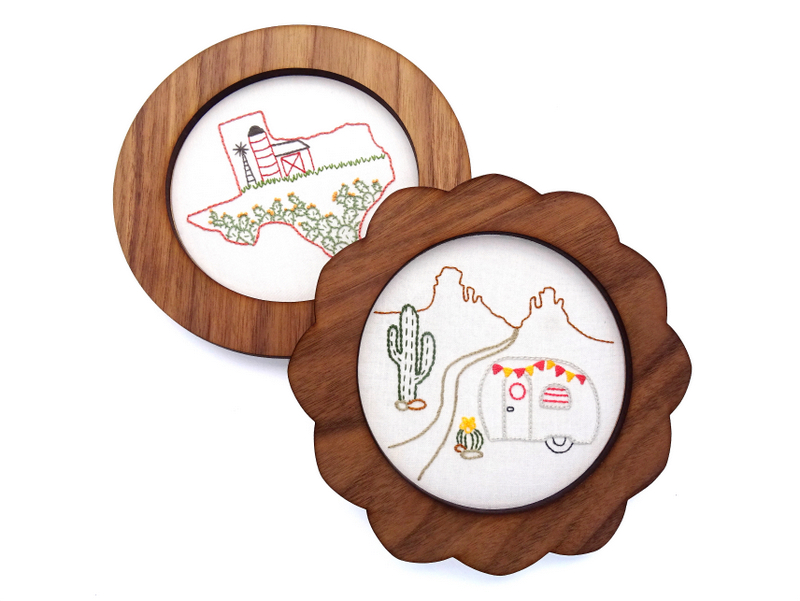
Finally, if all of the folding, stretching and lacing sounds like too much work…how about something easier? These solid wooden frames made by Stitch Life Studio are by far the simplist, most visually appealing embroidery framing option I have come across.
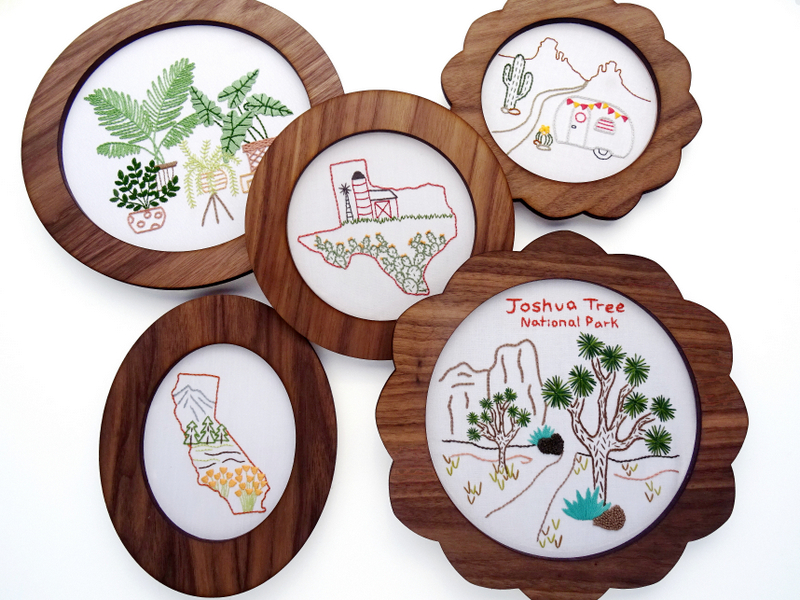
Available in a range of styles, shapes, sizes and finishes, these hand crafted frames allow you to simply slip your finished embroidery piece – hoop and all – behind the frame where it is secured in place with elastic bands.
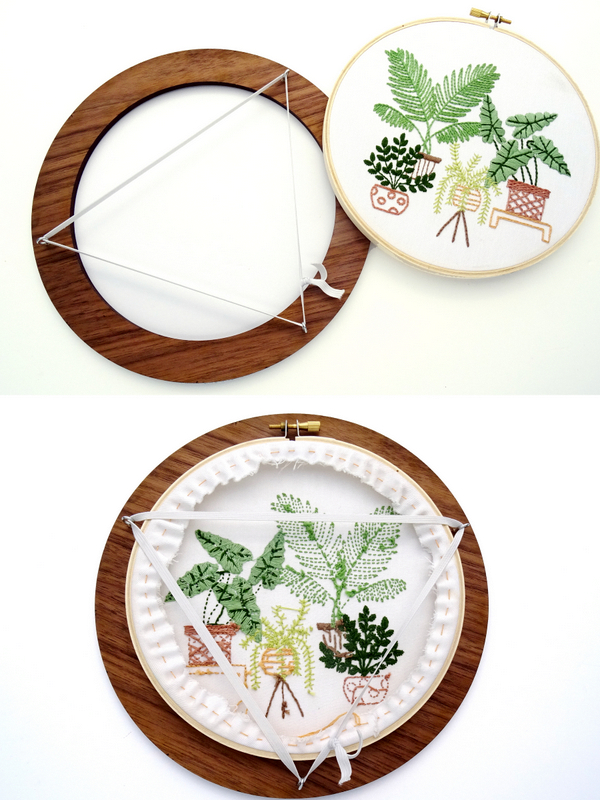
Flip it over, adjust the placement, and viola, you have a perfectly framed piece of embroidery art! You can view all of the frame options by visiting Stitch Life Studio on Esty.


Celia Birung
Very helpful! Thanks!
Badgers Embroidery
Thanks for the information. sounds so great and helpful. Kudos!
Sherilyn
I have a lighthouse scene finally finished now that we are all home pulling out our old crafts. It is a round image with blue sky background. I need to compare prices of frames that are rectangle and those that are round. I’ve always imagined it in a round frame but need to consider alternatives. the finished image is 12×12 but I could go for a 14×14 finished screen that would included the white around the printed picture.
Jayanthi
Very useful framing projects…thanks ma’am ?
Laura Dalton
Is it better to put glass over the framed embroidery piece or leave it open? Thanks 🙂
Amanda
I generally choose to omit the glass because, over time, the fabric can become yellow in the areas where the glass presses against it. This problem can be avoided by using a deep frame that allows the embroidery to be set inside without touching the glass.
Laura
Hi Amanda,
Thanks for writing back, that’s great information. I appreciate it! Guess I’ll have to break out the vacuum to keep them from getting dusty.
Marianne Flammang
Where can you buy foam board?
Amanda
I have had luck finding foam board at most craft supply stores such as Michael’s or Joanne Fabrics.
Lenora
Thank you, I’ve held off doing a mounting job of my mother’s works… I am very proud and would like to share her fine work… Thank you so very much.
Linda M Harrison
Dollar Tree stores sell foam board
sarah kasprzak
Thank you. I pay over $100.00 to have a 5 x 7 framed. I will try myself and see what happens.
Armani
Really inspired by your website and today my 8year old daughter and I had a go at embroidering hearts. Your explanations and images are fantastic and we are excited to try more patterns. Thank you.
Amanda
Oh this is so sweet! Thanks so much for sharing!
Darlene Taylor
Is there anything that can be ‘sprayed’ on the finished embroidery to help protect it (from dust etc.) when it is hung for display
Amanda
Unfortunately, I’m not aware of any sprays that will repel dust from fabric. However, if you would like to protect your framed embroidery behind glass, try looking for a shadow-box style frame where the glass is separated from the fabric by spacers. These frames can be a bit difficult to find, but they do work well for framing embroidery.
Kelly
Lint roller to remove dust! It also works on lamp shades and other delicate fabrics!
Virginia
The foam board is too thick for the frame cardboard backing. The backing has the hanging hardware…
Amanda
You’re correct that the foam board is thicker than the backing. However, by removing the glass front, there is plenty of extra room for the foam board and layers of fabric. As for the hanging hardware, if there’s room, I will use the cardboard backing, and if not, I will add my own hanging hardware. Hope this helps!
Heather
Is it necessary to wash the finished piece prior to pressing and framing?
Amanda
It’s up to you, but I generally give the finished piece at least a rinse and lay it flat to dry before framing.
Epicstitch
Thanks for sharing this great information with us.
Anne Stack
Thank you. This is exactly what I needed to know. I wanted to reframe an embroidery I did about 45 years ago to gift to my niece. It had not been done correctly back then but with your instruction, it looks great!