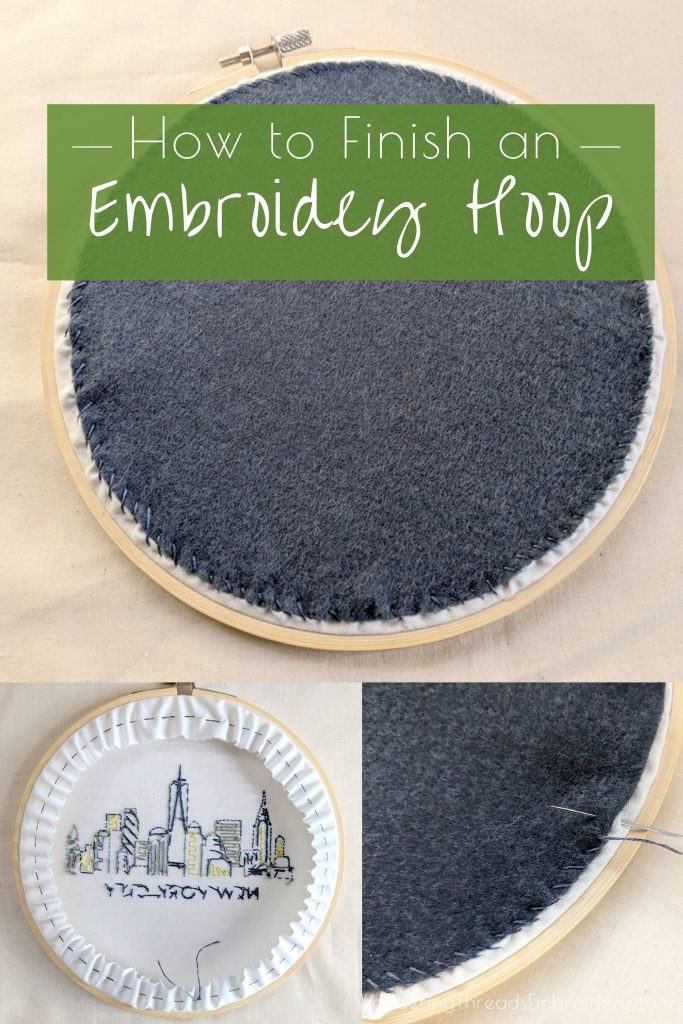
How to Finish an Embroidery Hoop

You got the pattern, you learned the stitches, and you spent weeks perfecting each tiny little detail. Now what? How do you display all that hard work? Well…you know that trusty wooden hoop that you used for stitching? It also makes a great frame! With a few simple steps, you can learn how to finish an embroidery hoop so it can be displayed and enjoyed for years to come!

How to finish and embroidery hoop!

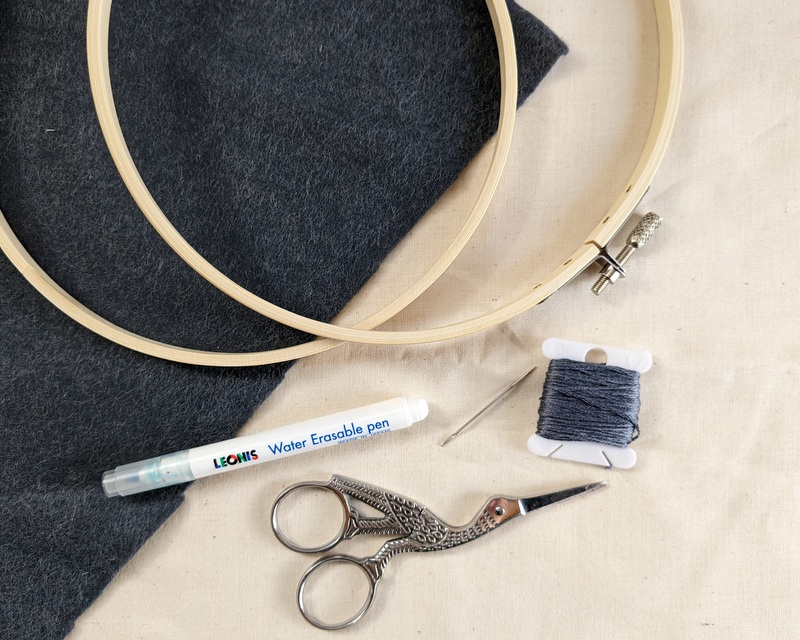
You Will Need…

  • A square of felt at least as big as your hoop
  • Embroidery floss the same color as the felt
  • Embroidery needle
  • Scissors
  • Marking pen or pencil
Materials needed for framing embroidery in the hoop.

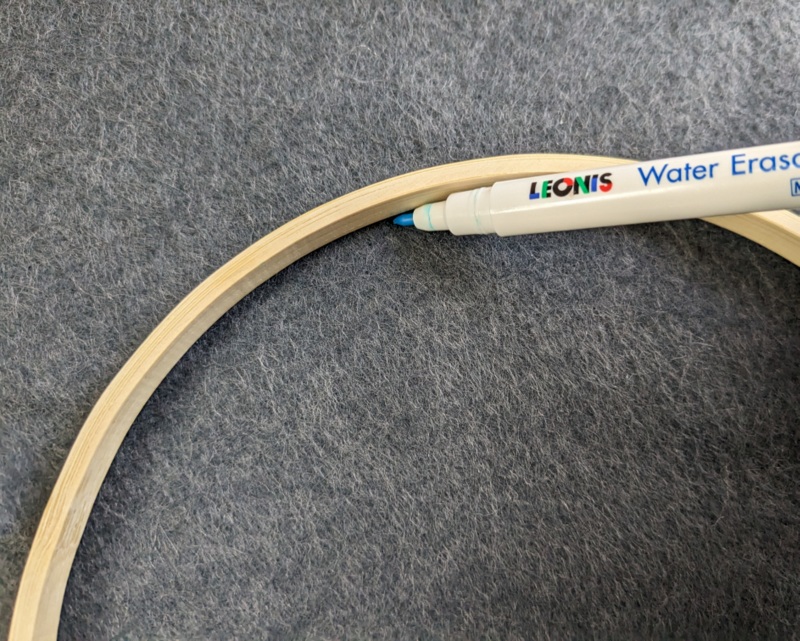
Using the inner ring of the embroidery hoop, trace a circle on the felt. Cut out the circle and set it aside.

Trace the felt inside the embroidery hoop to make a circle.

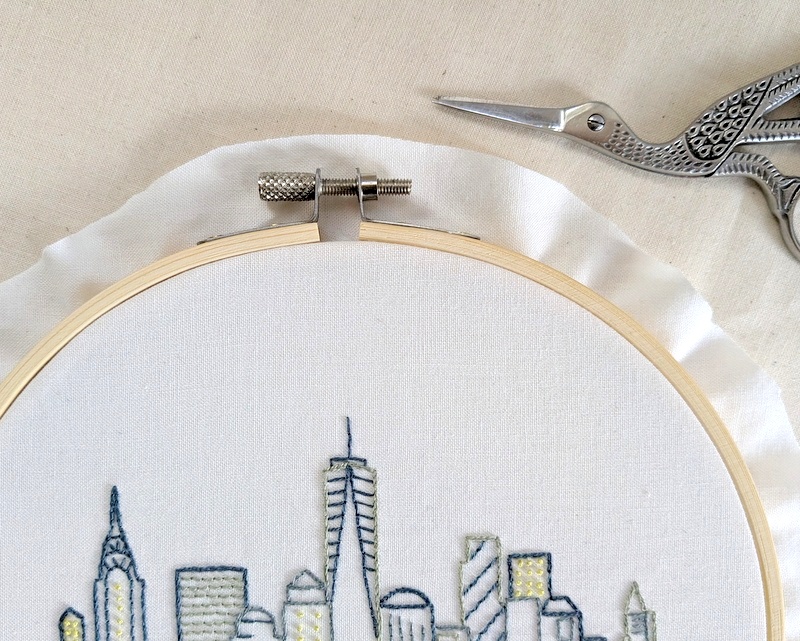
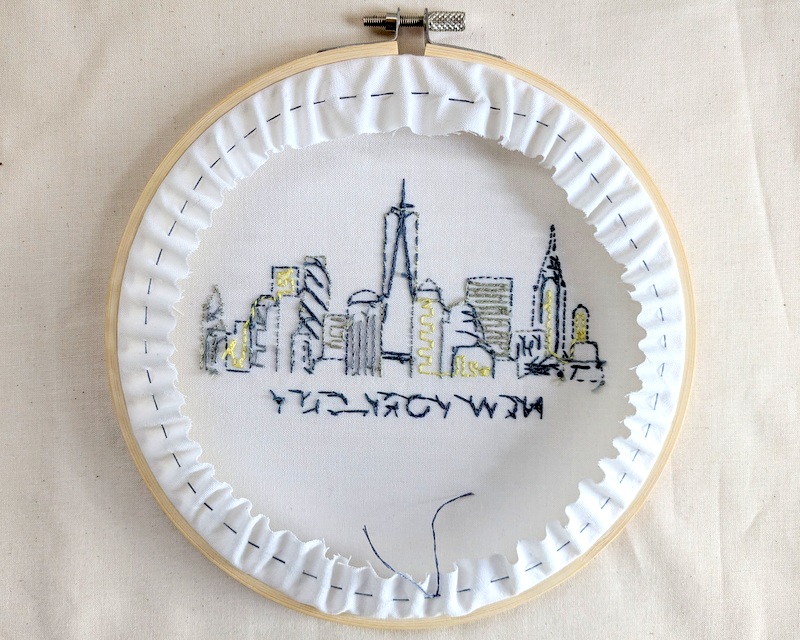
Place your finished embroidery in the hoop, stretch it smooth, and tighten the screw. Trim the excess fabric around the edges roughly an inch larger than the hoop. Don’t worry about making it a perfect circle, because you won’t see it in the end.

Trim the excess fabric around the edges roughly an inch larger than the hoop.


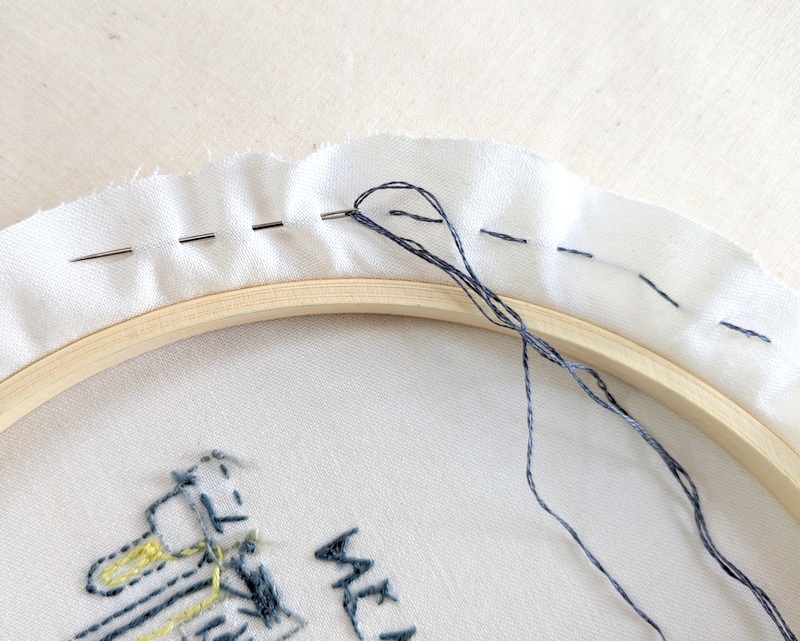
Cut off a long piece of sewing thread. Make sure it’s long enough to stitch all the way around the circle. Leaving a 4-5-inch tail at the beginning, stitch around the edge with Running Stitch.

Stitch around the edge of the hoop using running stitch.


When you’ve stitched all the way around grasp both ends of the thread and pull until the fabric gathers together. Tie a knot and cut off the excess thread.

Finish embroidery in the hoop by stitching around and pulling the thread tight.


You could stop here and call it done. Many of the embroidery pieces that I keep for myself are finished in this manner. The running stitch is just enough to keep the excess fabric out of the way for displaying on the wall. However, if you’re going to give the piece as a gift, or you simply want a more polished look, taking the time to sew on a backing piece really adds a nice finishing touch.

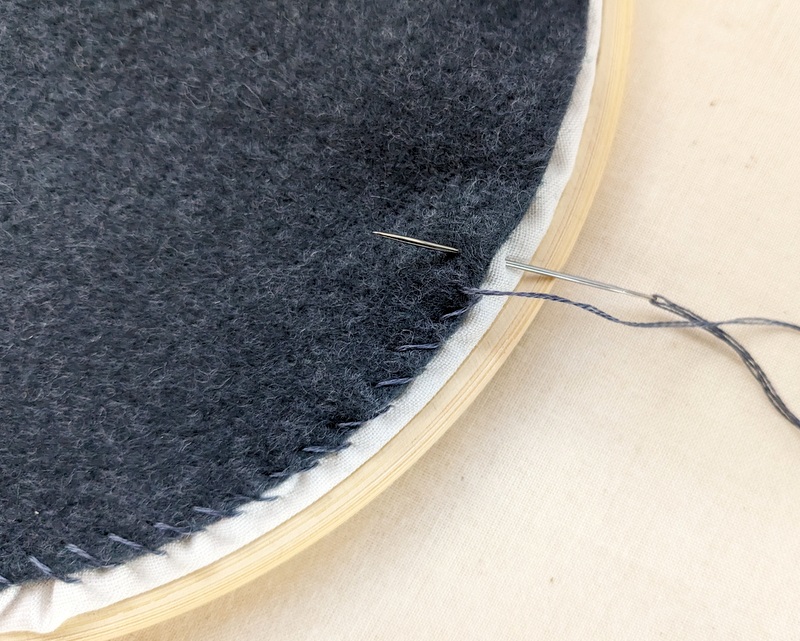
Position the felt circle that you cut out earlier over the back and sew it into place with a whip stitch. I like to use a coordinating color embroidery thread so it blends into the felt.

Attatch the backing felt with a whip stitch.

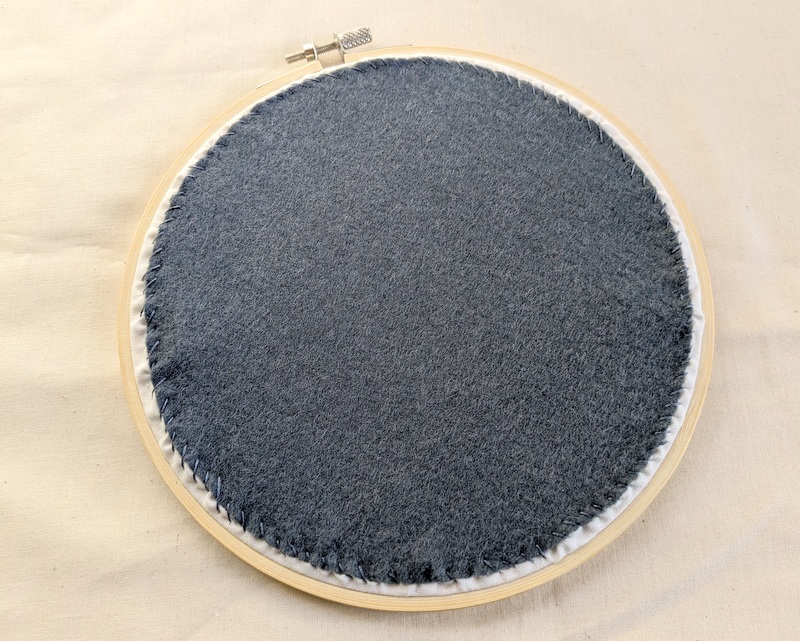
Continue sewing all the way around, tie off the thread and you are done. Congratulations, you just learned how to finish an embroidery hoop!

Embroidery in hoop with felt backing.

Wait, There’s More!

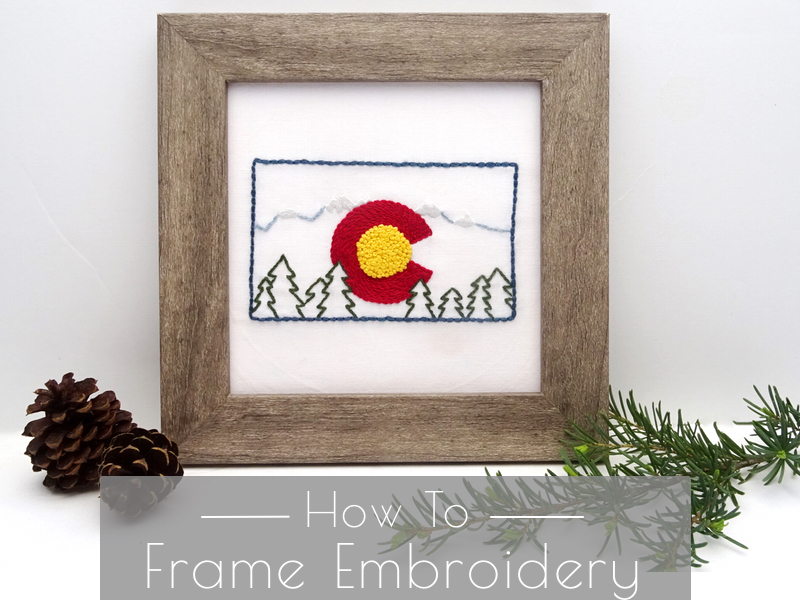
Want to learn how to frame embroidery in a traditional picture frame? Learn how by visiting my post: How to Frame Embroidery: The Easy Method.

How to Frame Embroidery

Happy Stitching!

Satin Stitch Embroidery Tutorial

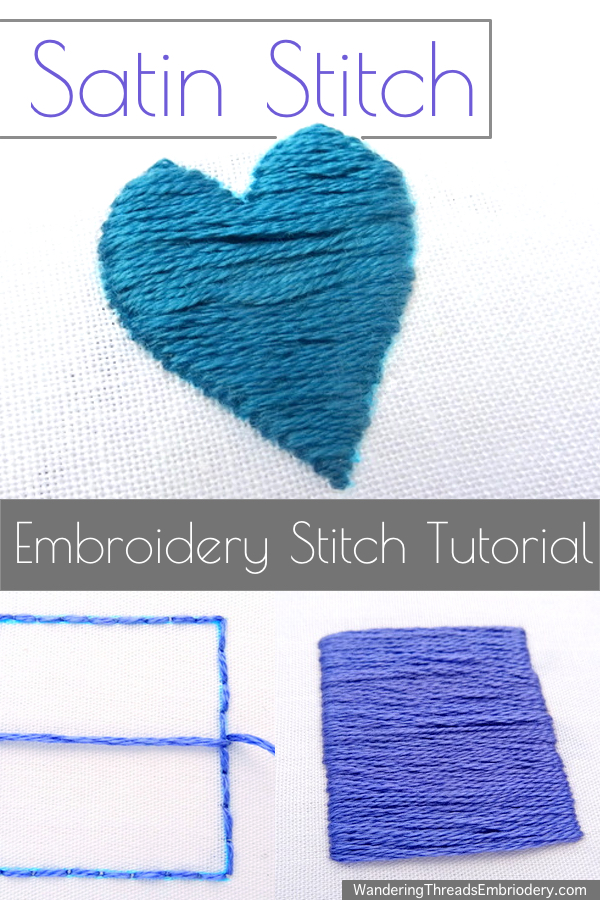
Satin Stitch is both a favorite and least favorite stitch for filling in shapes. On one hand, satin stitch can create a smooth block of color with a lovely satin-like finish. On the other hand, satin stitch can be finicky and frustrating with the end result not always as smooth and silky as it should be. Don’t let that stop you from learning satin stitch though! If you follow the steps below, read all the tips, and give yourself time to practice, you’ll soon be satin stitching like a pro.

Satin Stitch Embroidery Tutorial

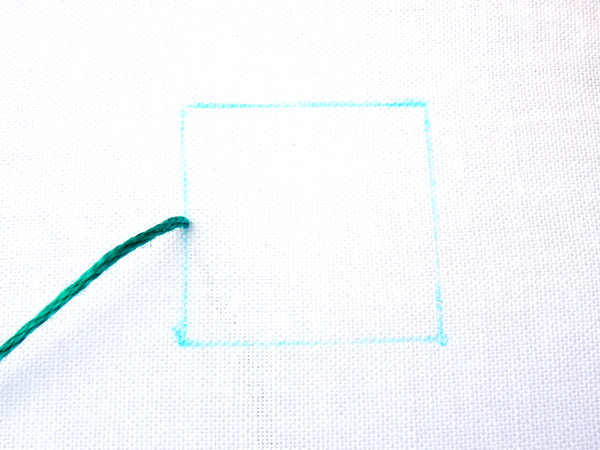
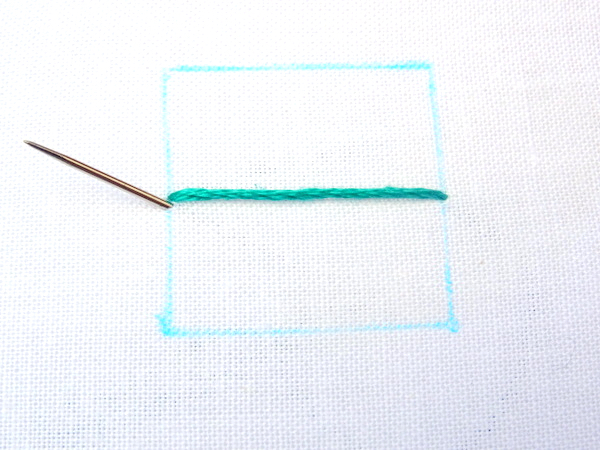
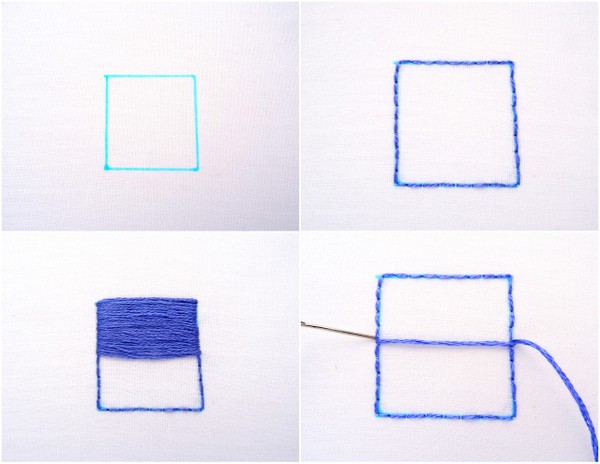
Satin stitch can be used to fill in any shape. For practice purposes, let’s start with something easy like a square. Begin by bringing your needle and thread up on the edge of the square. I always start my satin stitch in the middle of the shape. For uniform shapes such as squares, starting in the middle is not as critical, but when filling non-uniform shapes it helps keep the stitches straight. For this reason, it’s a good general practice to adopt.

Satin Stitch Embroidery Tutorial

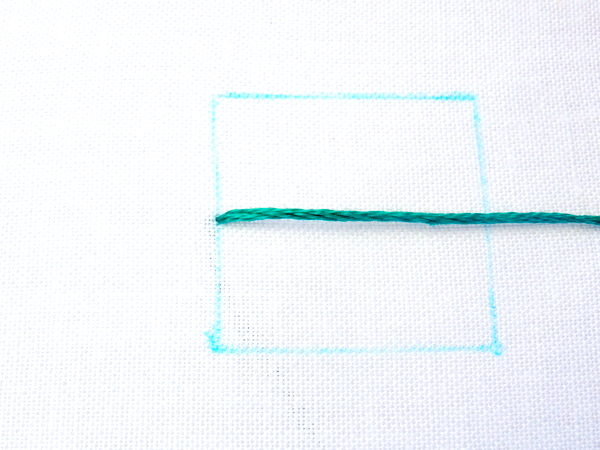
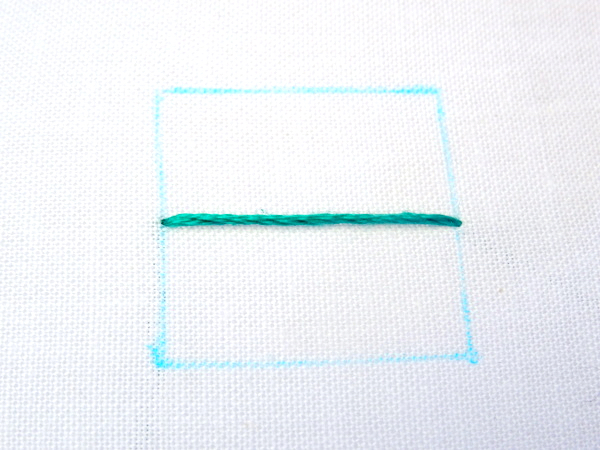
To make the first stitch, bring the needle back down directly across from where it came up. But wait! Before you make that first stitch, be sure it is absolutely straight. This stitch will be the foundation from which all the others are worked and if it’s slanted all the rest of the stitches will be slanted as well. The easiest way to ensure the stitch is straight is to stretch the thread across the shape and adjust it until it’s level before inserting the needle.

Satin Stitch Embroidery Tutorial

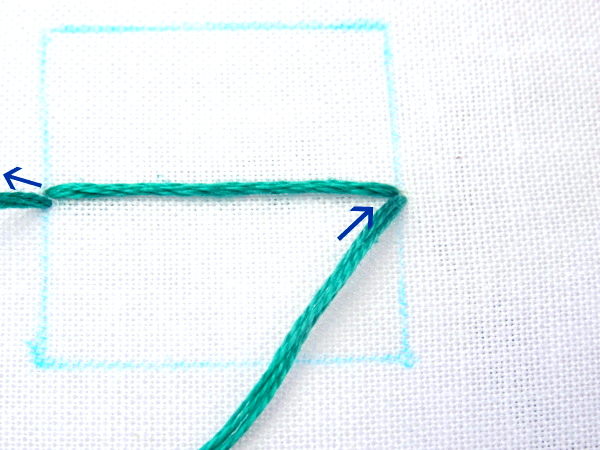
To make the second stitch, bring the needle back up right next to where you started the first stitch. The key to a smooth satin stitch is positioning the stitches close together without overlapping.

Satin Stitch Embroidery Tutorial

Bring the needle down next to the first stitch.

Satin Stitch Embroidery Tutorial

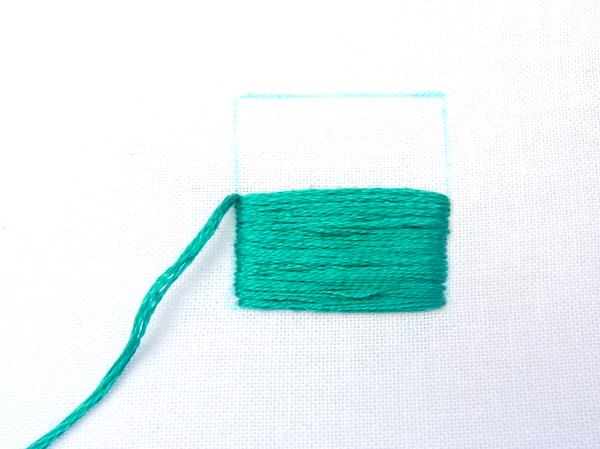
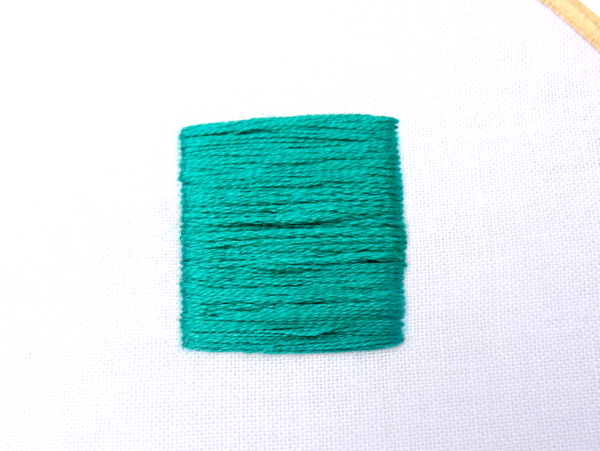
Continue in this fashion until you reach the bottom of the shape. Now, come back up to where you first started and stitch the top half.

Satin Stitch Embroidery Tutorial

A few tips for a successful satin stitch:

  • Keep the stitches straight, parallel, and close together, while making sure they don’t overlap.
  • If you’re working with a multi-strand embroidery floss, be sure to keep the strands smooth and flat and not twisted.
  • Be careful not to pull the stitches too tight or the fabric will pucker and the shape will become distorted.
  • Always stitch to the outside edge of the drawn line.
  • Outline the shape with back or split stitch for a more even edge. *(See below for instructions)

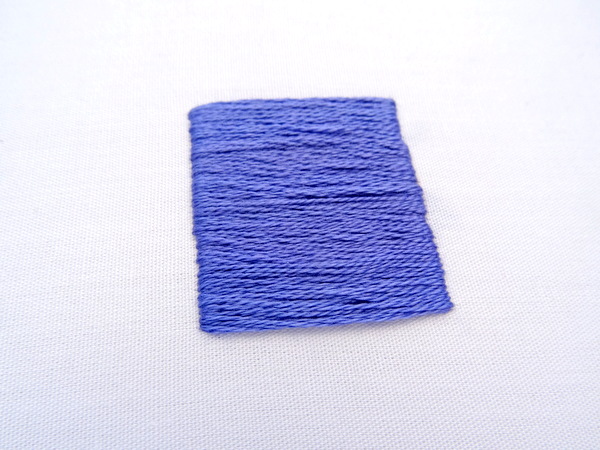
Most important, don’t stress if your satin stitch isn’t perfect. The edges might be a little uneven and the finish not quite as satin-like as you would like. It’s not an easy stitch and as you can see by my example below, even after years of practice, my satin stitch is not even close to perfect. In the end, it’s not really a big deal. Satin stitch is most often used to fill smaller shapes that are part of a bigger pattern and the small imperfections are barely noticeable when all is said and done.

Satin Stitch Embroidery Tutorial

Satin Stitch Outline

A quick trick for creating smooth edges is to outline the shape with back or split stitch and then work the satin stitch over the top of the outline. It’s a little more work, but that few minutes you spend outlining can make a huge difference in the end result. As a general rule, I use half the number of floss strands to outline as to work the satin stitch. The reason for this is so I don’t create a raised edge around the shape.

The example below uses two strands of floss to outline the square in backstitch and four strands to work the satin stitch over the top.

Satin Stitch Embroidery Tutorial

The finished shape is still not perfect but is noticeably more even around the edges. I find this method most helpful when filling in larger shapes or those with jagged or uneven edges.

Satin Stitch Embroidery Tutorial

Satin Stitch for Irregular Shapes

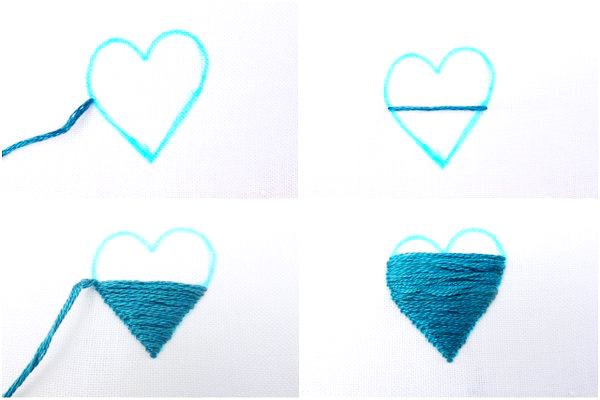
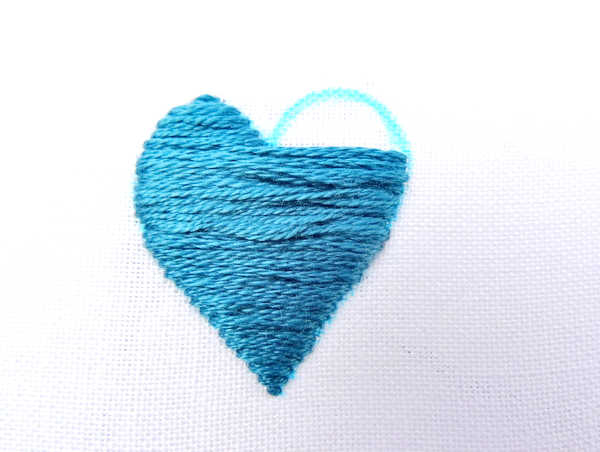
Now that you’ve gotten the basic method down, I’m going to quickly show you how to use satin stitch to fill in a less uniform shape. Many of my State Embroidery Patterns contain a small heart filled with satin stitch, so we’ll try a heart. My heart is hand-drawn which means it’s not perfectly symmetrical. No big deal. Follow the same procedure as above: start in the middle of the shape, work down to the bottom, then come back to the middle and work up until you reach the point where the two bumps meet.

Satin Stitch Embroidery Tutorial

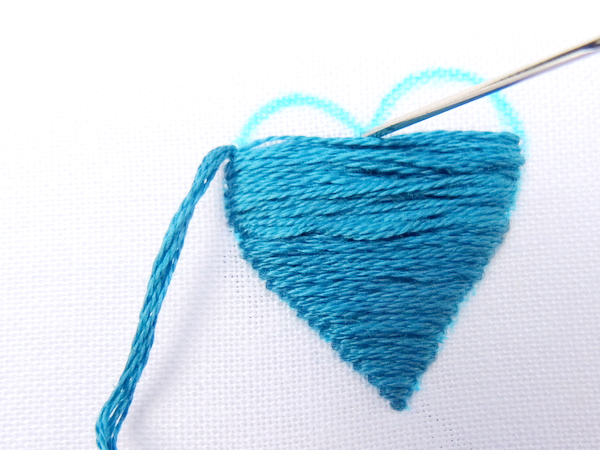
Now, we’re going to fill in the heart bumps one at a time. Start on one side and stitch up the edges of the bump until you reach the top.

Satin Stitch Embroidery Tutorial

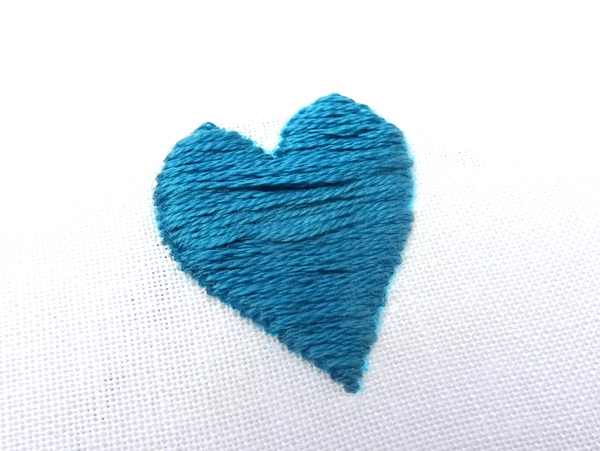
Repeat the procedure on the other side, and you have yourself a heart! As you can see, non-uniform shapes are not really any more difficult than uniform shapes. Sometimes you simply need to break the shape up into sections and work them one at a time.

Satin Stitch Embroidery Tutorial

Satin Stitch Patterns

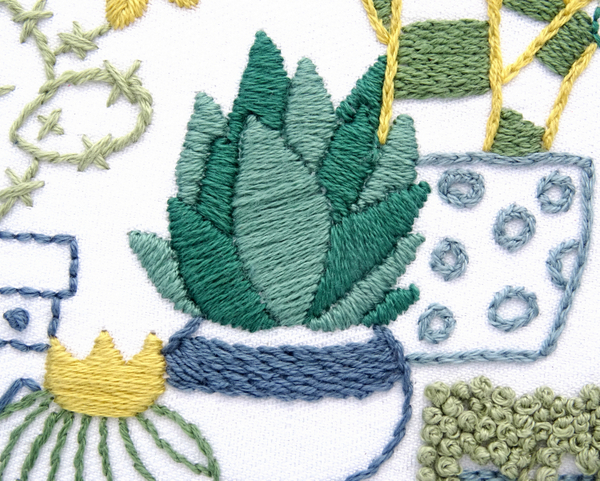
Satin stitch can be used in so many ways! The Desert Garden Pattern uses it to create a gorgeous multi-colored Aloe plant.

Desert Garden Hand Embroidery Pattern

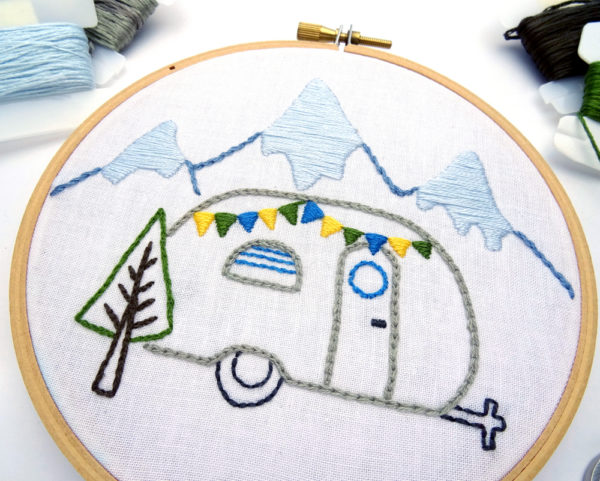
The Vintage Trailer Winter Mountains Pattern uses satin stitch for the layer of snow on the mountains.

Satin Stitch Embroidery Tutorial

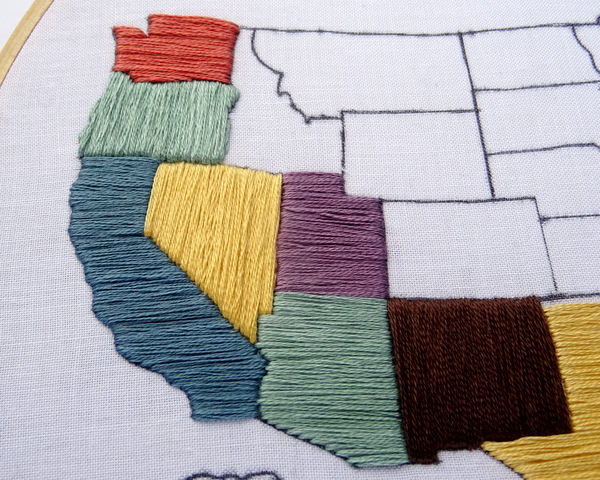
And the US Travel Map utilizes it as the sole stitch for creating a colorful and interesting map. By alternating the direction of the stitches on the map a patchwork of colors emerges.

Satin Stitch Embroidery Tutorial

Get out there and start stitching!

Basic Embroidery Stitches: 4 Line Stitches

Basic embroidery stitches are the backbone of all embroidery stitches. Once you master the basics, the rest is easy. The most basic of the stitches are called line stitches. They are – you guessed it – worked along a line! The line can be straight, curved, angular, or just about any other shape.

Basic line stitches are nearly universally present in all embroidery patterns. Whether you’re working on a simple or elaborate pattern, chances are, at least one basic line stitch will be present. Fortunately, line stitches are easy to learn and simple to master. Let’s start with the four most common basic embroidery stitches.
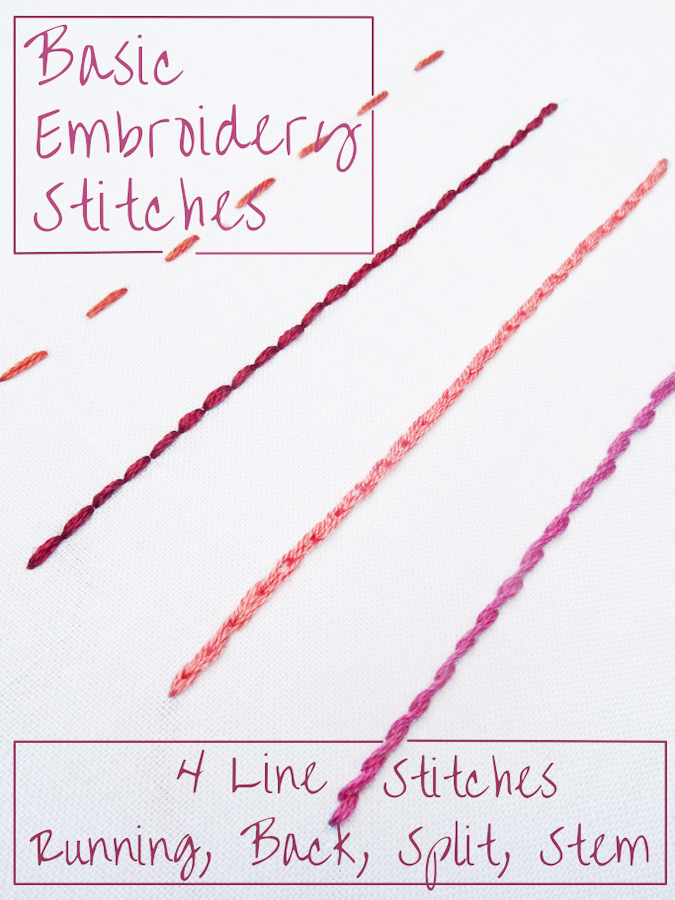

Basic Embroidery Stitches Tutorial

Running Stitch

Of all the basic embroidery stitches, running stitch is the easiest to master. This quick stitch is perfect for borders and outlines. You can change the look by lengthening or shortening the stitches.
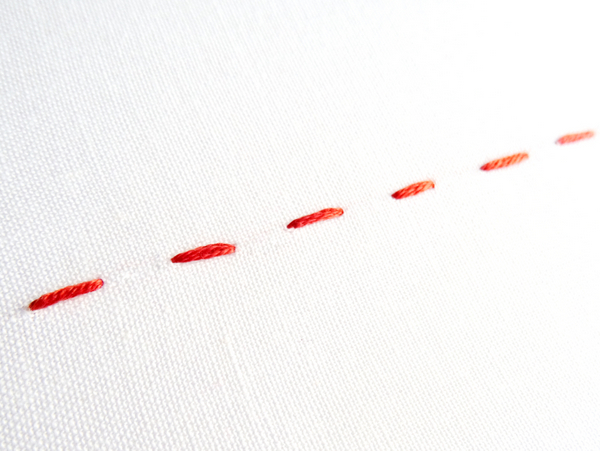
Basic Embroidery Stitches Tutorail

Start by making a single stitch. Next, move the needle one stitch length away and make another stitch. Try to keep the spaces the same length as the stitch. Follow this pattern until you have a line of stitches with spaces between.
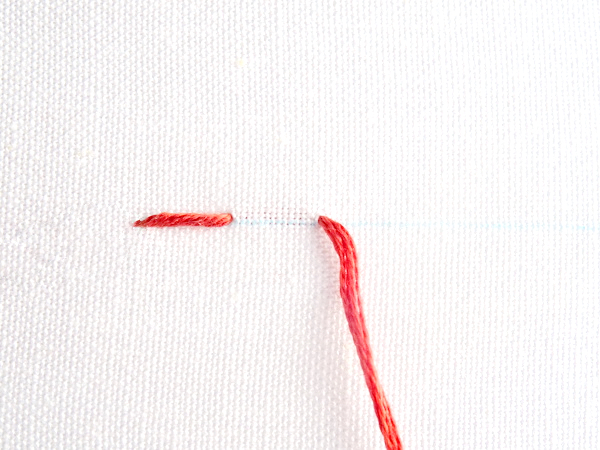
Basic Embroidery Stitches Tutorial

You can also create running stitch with an alternate method that is reminiscent of hand sewing. Instead of making each stitch separately, weave the needle in and out of the fabric several times before pulling it all the way through. This method is much quicker, but it can sometimes be harder to make uniform stitches. Try both and see which you prefer.
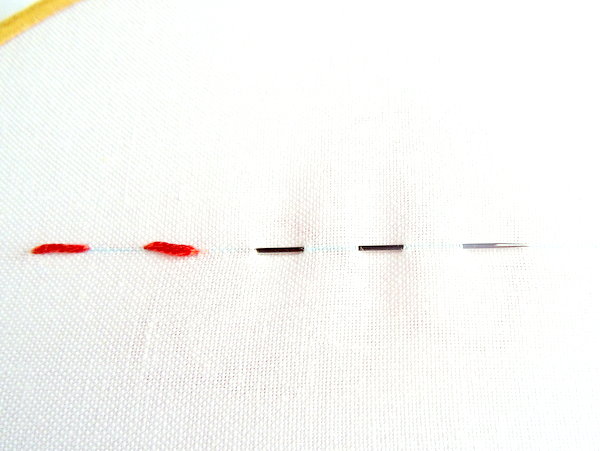
Basic Embroidery Stitches Tutorial

Back Stitch

Back stitch is similar to running stitch except it creates a solid line. Depending on what kind of thread you use, it can make delicate or heavy lines. Back stitch is commonly used for outlines and borders but it’s also great for embroidering text or filling in small spaces.
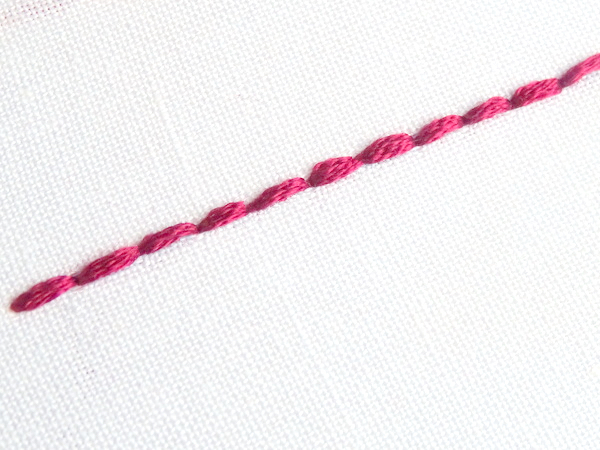
Basic Embroidery Stitches Tutorial
Begin by bringing the thread up through the fabric one stitch length away from the starting point. Now, go back and bring the needle down at the beginning. Think of it as stitching in reverse.
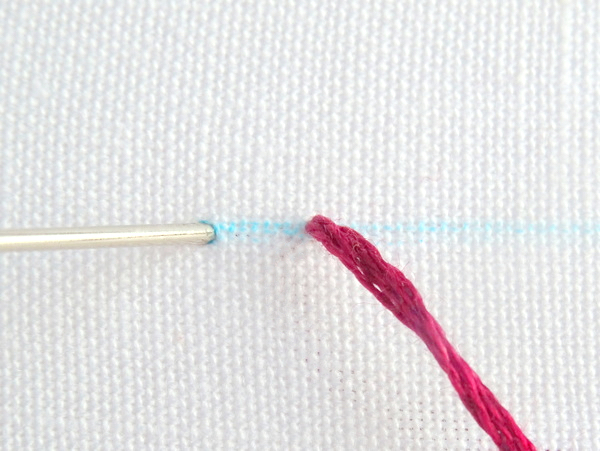
Basic Embroidery Stitches ~ WanderingThreadsEmbroidery.com

The next stitch is made in the same manner. Come up one stitch length away from the previous stitch and bring the needle down at the end of the previous stitch. Once you get the hang of it this stitch becomes almost like second nature.
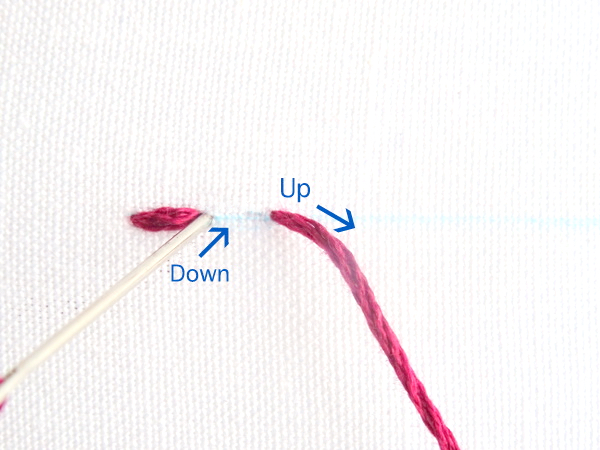
Basic Embroidery Stitches Tutorial

Split Stitch

Split stitch also creates a solid line, but with a bit of added texture. I use split stitch when I want a to add something extra to my outlines. Trees, leaves, flower petals, and anything else that could benefit from extra texture look great with split stitch. Varying the stitch length will result in different looks. Small stitches give a nubby texture while long stitches look more like a braid.
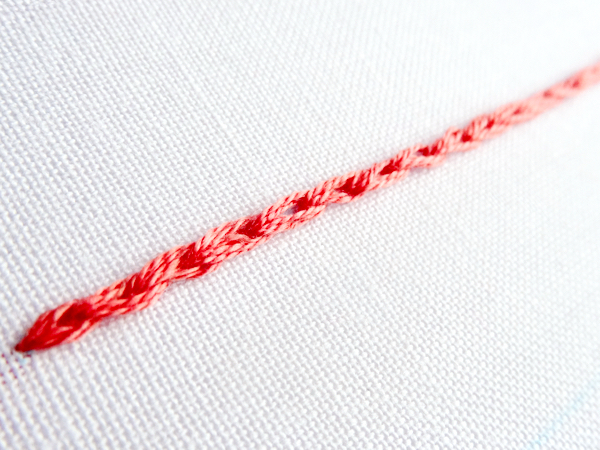
Basic Embroidery Stitches Tutorial

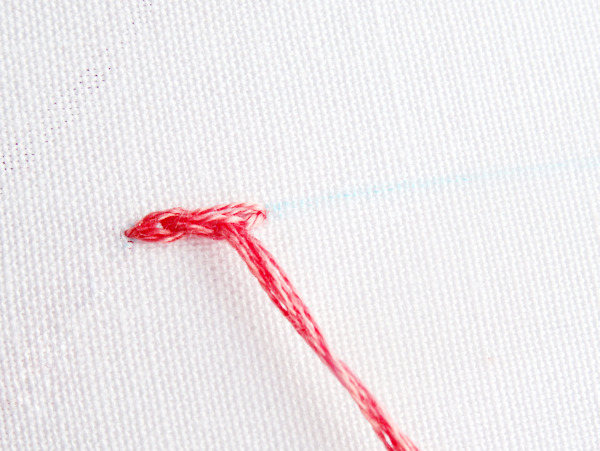
Begin by making a single stitch. Now, bring the thread up in the middle of the stitch you just made.
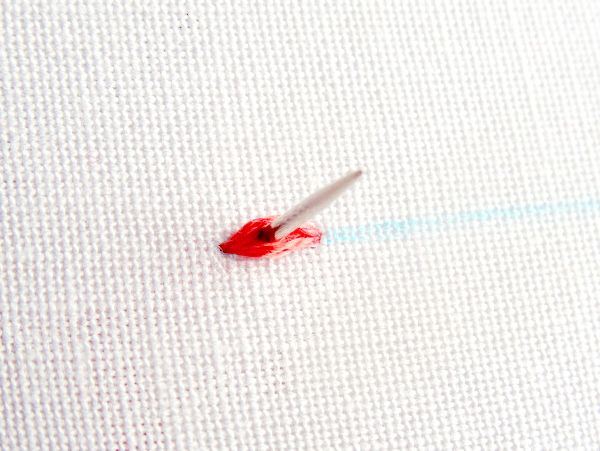
Basic Embroidery Stitches Tutorial

Pull the thread all the way through and make another stitch. Once again, bring the needle up in the middle of the previous stitch. That’s it!
Basic Embroidery Stitches Tutorial

Stem Stitch

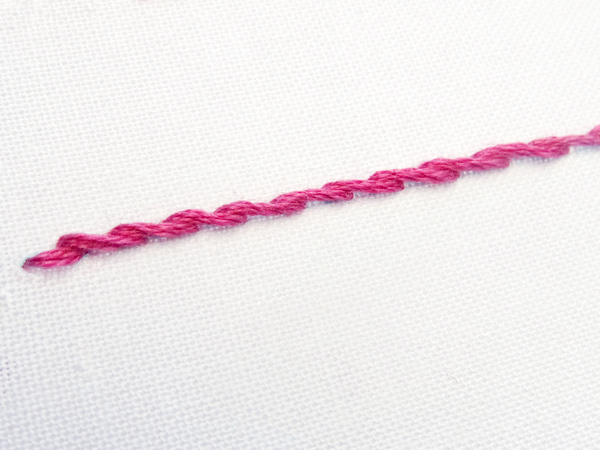
Stem stitch is similar to split stitch except instead of coming up in the middle of the stitch, you come up next to it. The result is a twisted stitch that turns corners beautifully and makes excellent lettering. Stem stitch can also be worked in rows or a continuous circular to create an interesting filler.
Basic Embroidery Stitches Tutorial

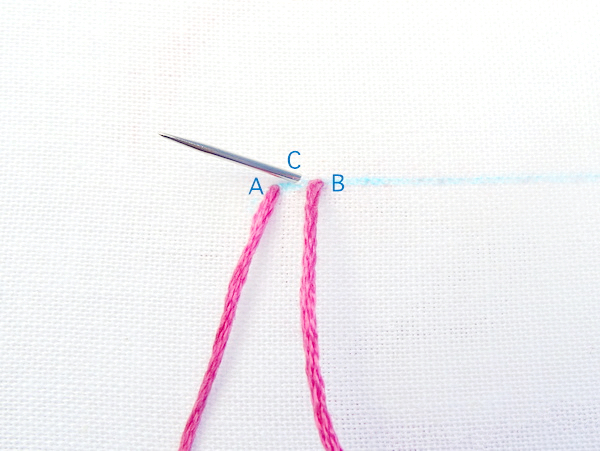
There are two popular ways to work stem stitch. Let’s start with the method that is most similar to split stitch. First, make a single stitch. Without pulling the thread all the way through, bring the needle back up halfway between two points and just above the line. If you’re following the diagram, come up at A, go down at B, and back up at C. Remember that C is just above the line. Be sure to keep the working thread below the line.
Basic Embroidery Stitches Tutorial

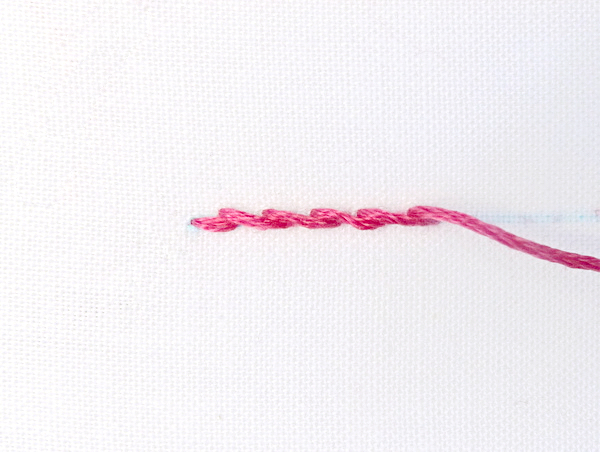
After a few stitches, you will see the twisted line form.
Basic Embroidery Stitches Tutorial

The second method is the sewing method. The first method brings the needle all the way into the fabric and then back up in a different spot. The sewing method has you insert the needle one stitch length away and then angle it backward and bring it back up just above the line. Like with the first method, the needle comes out about halfway between the points and a little above the line.
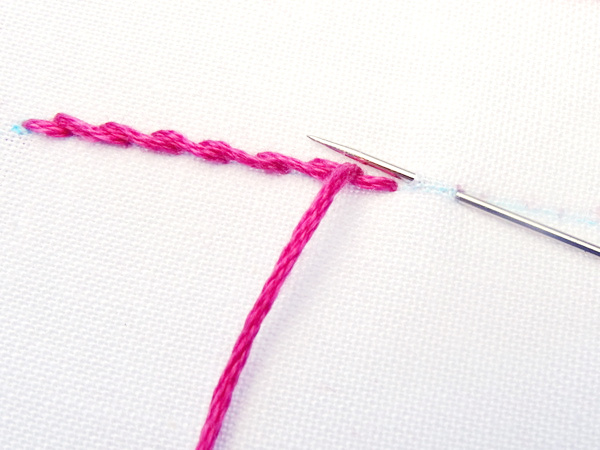
Basic Embroidery Stitches Tutorial

For most people, one method comes more naturally than the other. I like to use the first method for times when I need small stitches – such as when embroidering letters – and the second method for longer stitches on larger objects. Give both a try and see which one works best for you.

Basic Line Stitch Patterns

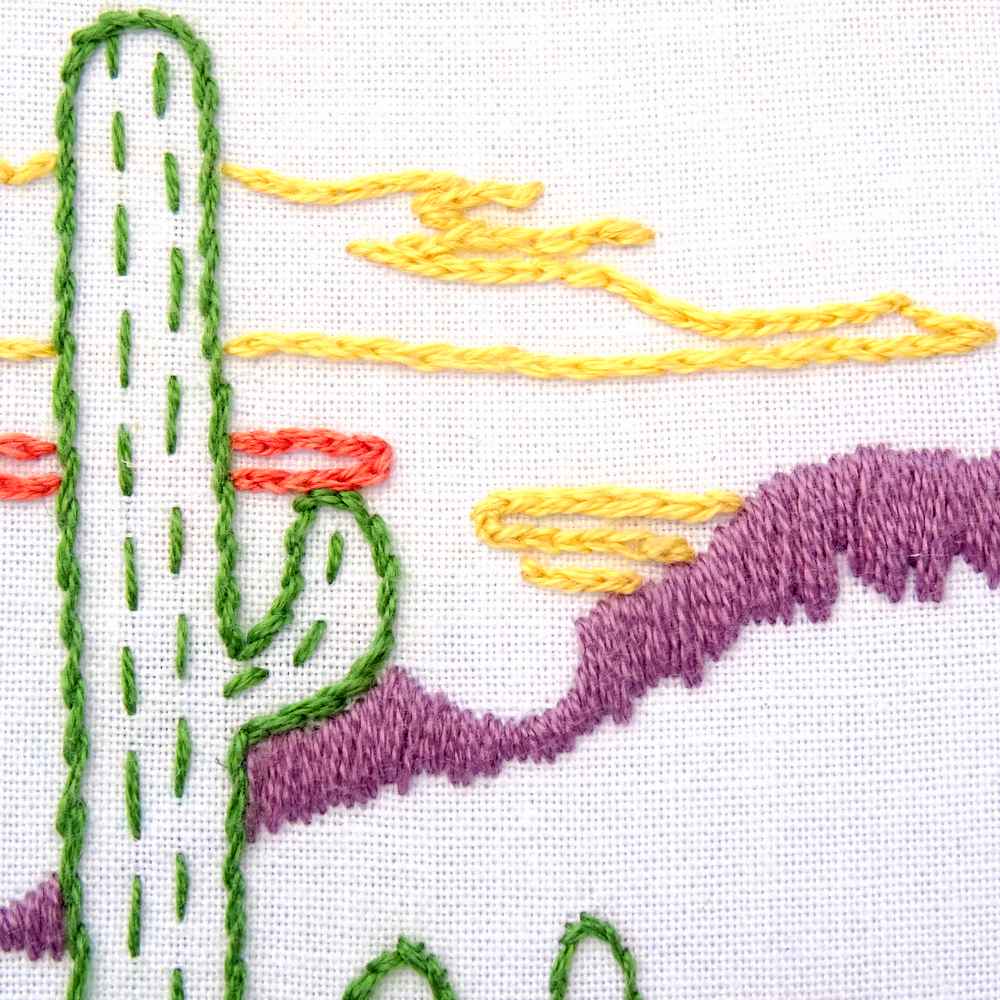
All of the Wandering Threads patterns contain at least one of the basic line stitches. Running Stitch is used to create ribs on the cactus in the Saguaro National Park Pattern.
Saguaro National Park Hand Embroidery Pattern
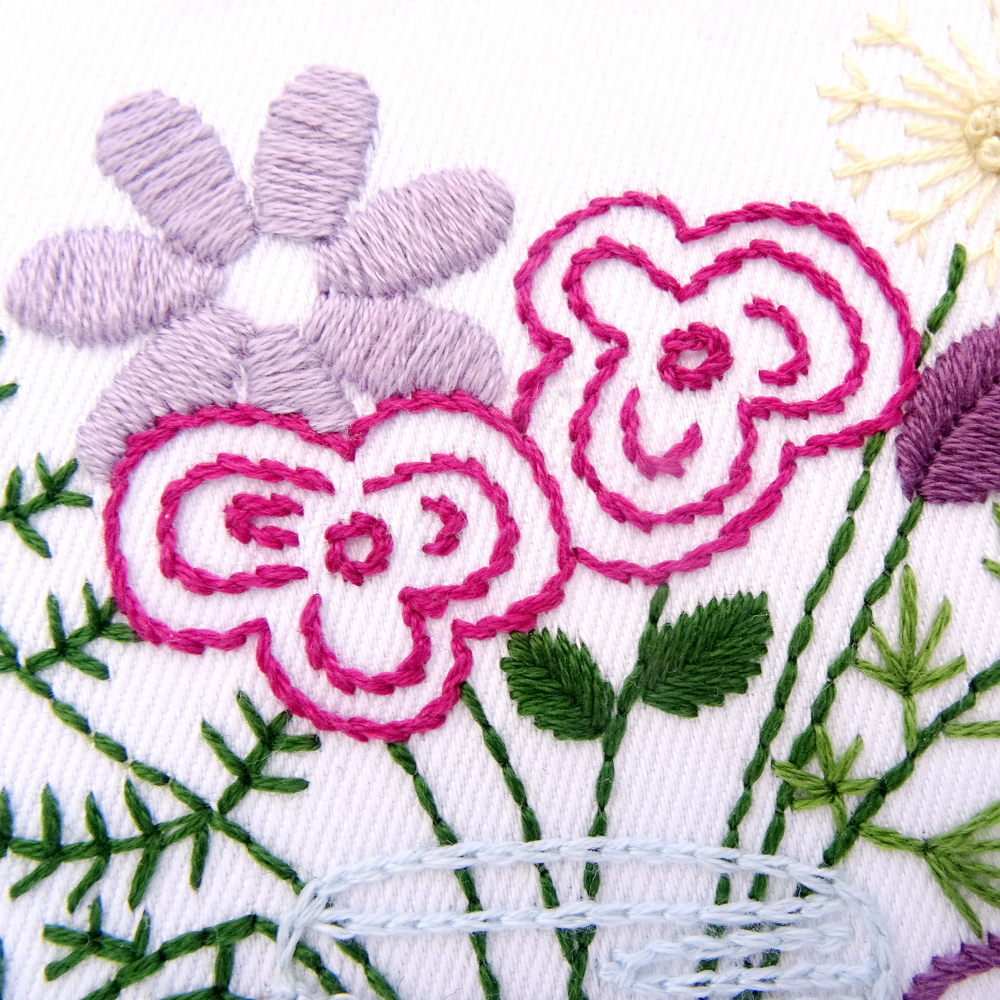
Back stitch is used to outline all the State and State Flower Patterns as well as for some of the letterings in the National Park Patterns. Back stitch is also great for flowers and stems such as the ones found in the Wildflower Bouquet Pattern.
Wildflower Bouquet Hand Embroidery Pattern
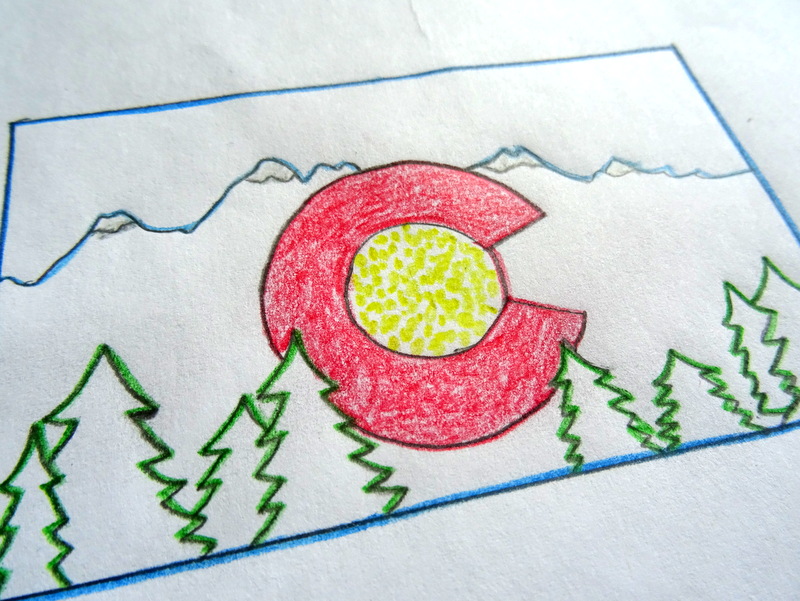
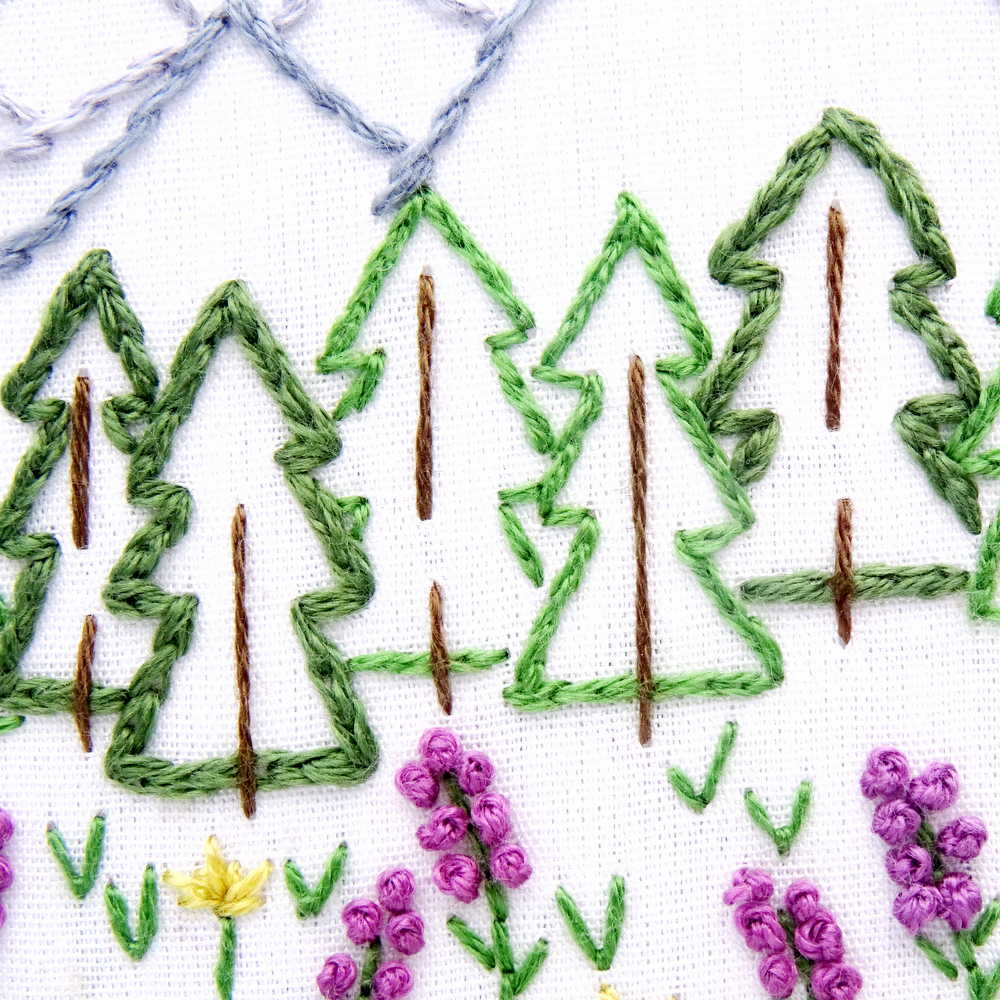
Split Stitch can be found in many of the patterns with trees and leaves. These trees in the Colorado State Pattern are worked with split stitch.
Colorado Hand Embroidery Pattern
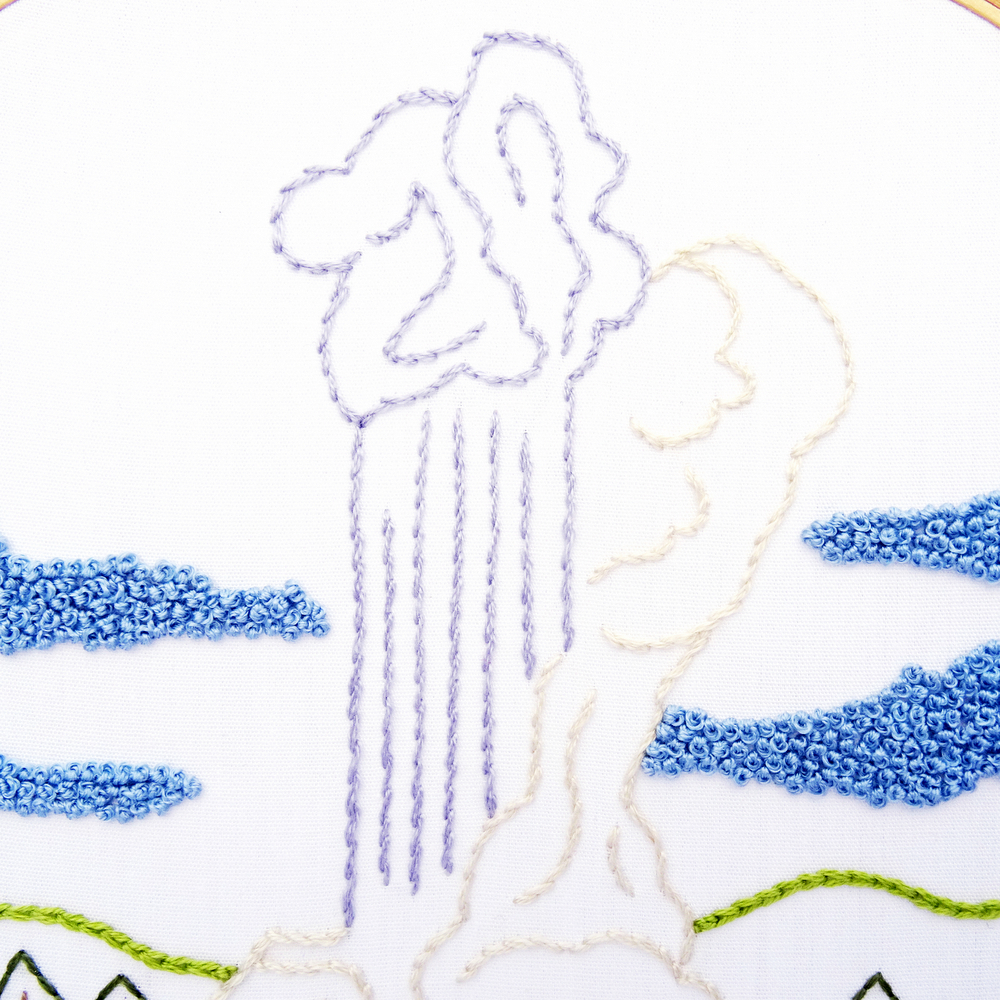
Stem Stitch is one of my favorites for curved lines. In fact, I like it so much that I’ve probably used it at least once in all of the Wandering Threads patterns! Most often stem stitch creates an outline like in the Yellowstone National Park Pattern. In this pattern, stem stitch is used to both outline and create the inner smoke of the Old Faithful Geyser.
Stem stitch is also an interesting filler stitch for curved shapes. The sun in the Iowa State Pattern features the twisted lines of stem stitch worked in rows.
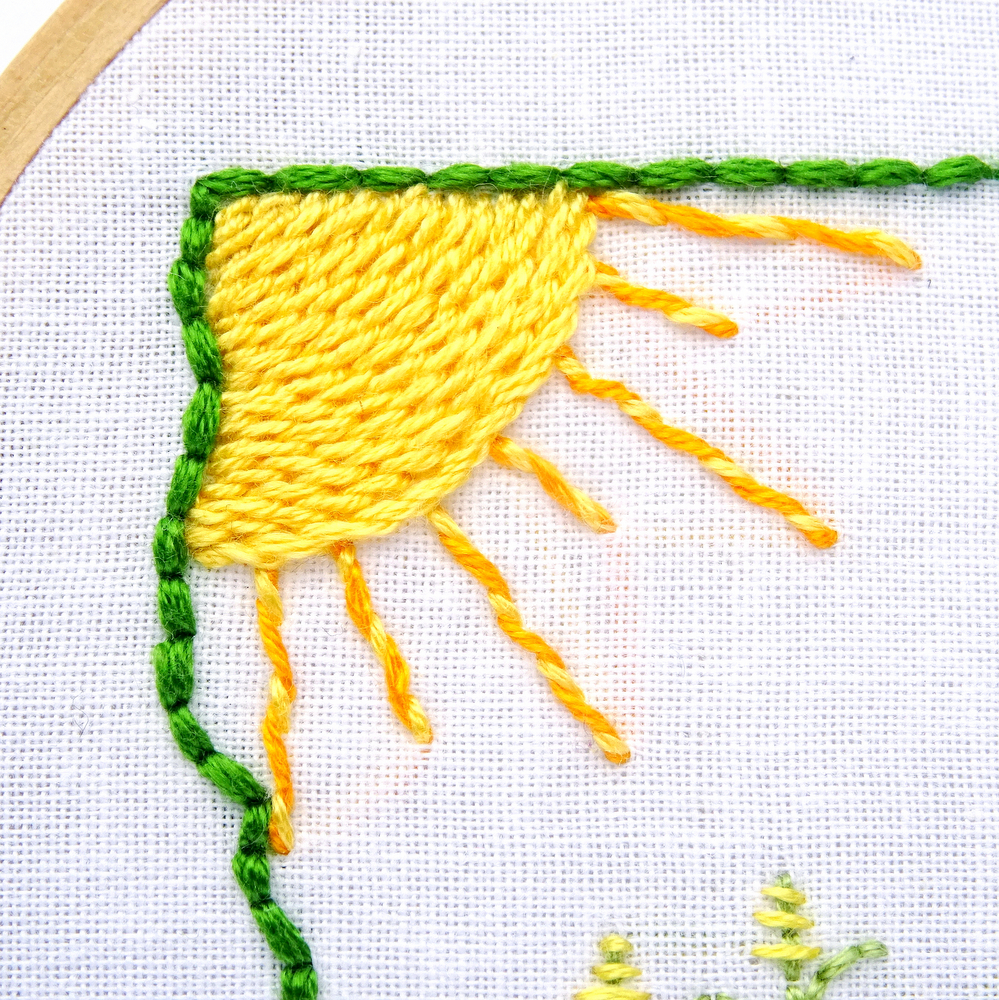
Iowa Hand Embroidery Pattern

With these four basic embroidery stitches, you can tackle nearly any pattern. Happy Stitching!
50 States, 50 Embroidery Patterns

Creating a unique embroidery pattern for each of the 50 U.S. states was no easy task. From inspiration to design to finished product, each pattern was carefully thought out and executed. The end goal was to use recognizable images to represent a taste of what makes each state special.

50 States, 50 Embroidery Patterns

Flags, Flowers, & Frolicking Moose

For inspiration, I sometimes turned to official state icons such as the flag, state flower, bird or tree. The very first state pattern I designed was Colorado. With a fairly distinct and ascetically pleasing state flag, I knew I wanted to incorporate at least some of it into my design. I also knew I couldn’t properly represent Colorado without mountains and trees. Eventually, my hand drawn design came together with the Colorado “C” from the flag set against a backdrop of snow covered mountains and a stand of evergreen trees.

50 States, 50 Embroidery Patterns

Personal Experiences

Other times, I pulled from my personal experiences while visiting a particular state. Last summer, we spent a month in Minnesota exploring a handful of the 10,000 lakes set amid dense forests and low rollings hills. We moved our house on wheels around to the many campgrounds that dot the lake shores and spent the long summer evenings paddling the clear blue waters.

Cass Lake, Minnesota

After our time in Minnesota, I knew the state design must prominently feature water. So I turned the entire state into a lake with a bright orange canoe smack in the middle. This is Minnesota!

50 States, 50 Embroidery Patterns

Keep it Simple!

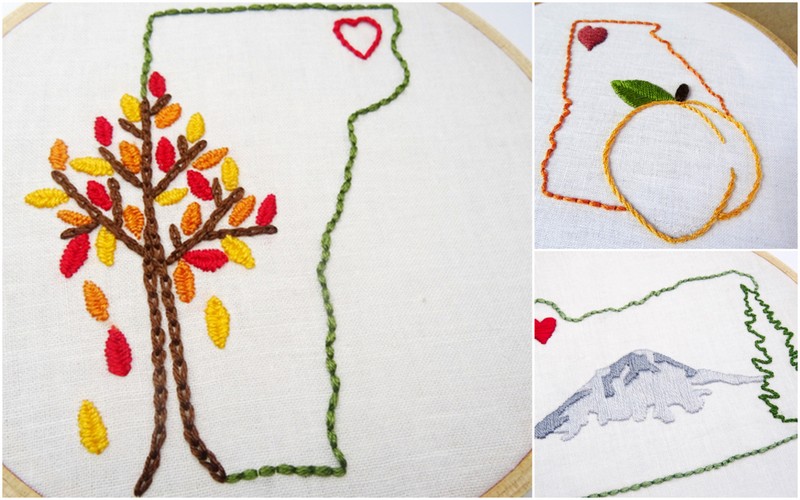
In addition to representing each state, the U.S. state patterns are designed to be simple. The goal here at Wandering Threads is to share the craft of embroidery with everyone — beginners and experts alike. Because the state patterns are designed to be small — each PDF contains a pattern that fits either a five or seven-inch hoop — the images must be simple and easy to stitch on a small scale. In an effort to create designs that were both easy to stitch, rich in detail, and small enough to fit inside the state outline, I often incorporated the images into the shape of the state. In Georgia, a juicy ripe peach sits at the bottom of the state, in Oregon, a tall evergreen tree dominates the eastern border, and in Vermont, falling autumn leaves drop from state’s western edge.

50 States, 50 Embroidery Patterns

For a complete listing of all the Wandering Threads state embroidery patterns, visit the State Patterns page.

1 8 9 10 11 12