If you want to add a personal touch to your projects, learning how to embroider letters is a great skill to have. There are countless possibilities for adding lettering to all your sewing and craft projects. Maybe you want to make a personal label for a quilt, add your favorite quote to an embroidery piece, monogram cloth napkins, or even stitch a funny little saying on a piece of clothing. Well, guess what? Once you learn the basics, embroidering letters is really easy!
Font Choice
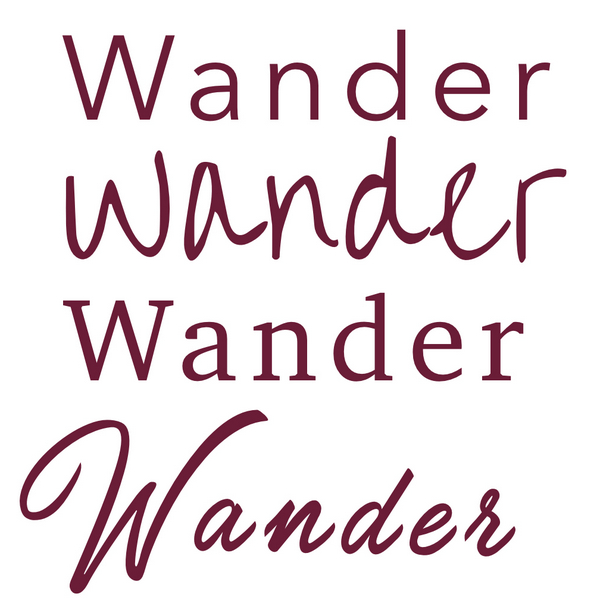
How do you decide what type of font to use when embroidering letters? For the most part, it’s a matter of personal choice, but there are a few factors to keep in mind when choosing a font.
- Size: If you are embroidering a small size text, it’s best to keep the font simple. The smaller the letters, the more difficult it will be to embroider around tight curves and angles.
- Legibility: Sometimes a font that looks great on paper doesn’t look so great when worked with needle and thread. A few practice letters is always a good idea before committing to one font.
- Appearance: Think about the overall appearance of the item you are adding lettering to and choose a complementary font. For example, if you’re making a personalized label for a wedding quilt you might choose a romantic cursive font, while a more casual, handwritten font would be perfect for adding a fun quote to your favorite dish towel.
How to Embroider Letters Using 4 Easy Stitches
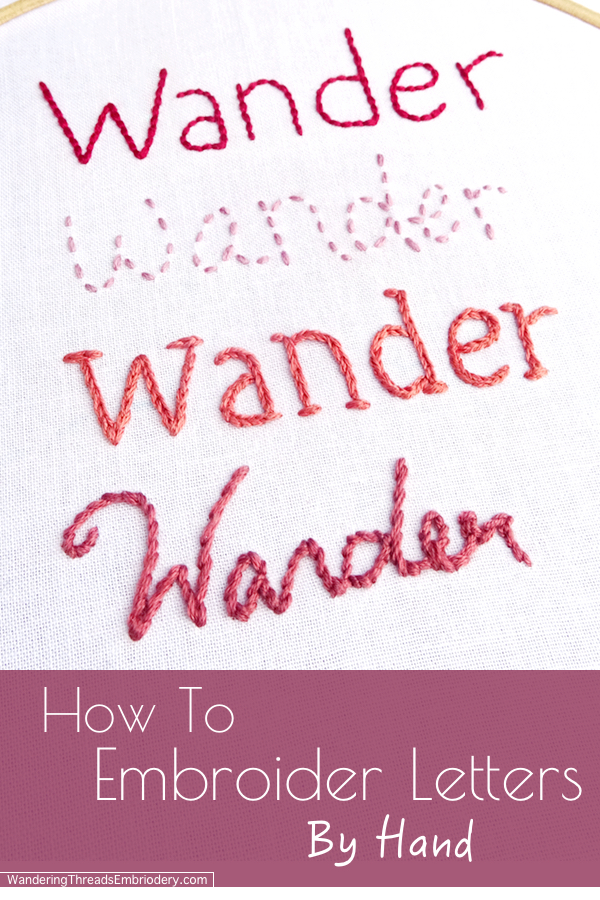
When it comes to embroidering letters, the choice of stitches is nearly endless. From basic stitches like back or running to more complicated stitches like double chain and french knot (yes, you really can embroider letter with french knots), the possibilities are nearly limitless. Despite all those choices, I find myself coming back to the same four basic stitches again and again when embroidering letters. These four stitches – back, running, split, & stem – not only look great with any font, but they are also easy to learn and simple to execute.
{These are the same four stitches featured in the Basic Embroidery Stitches Tutorial. If you are not familiar with these stitches, I recommend checking out that post.}
Let’s get started!
Back Stitch Lettering
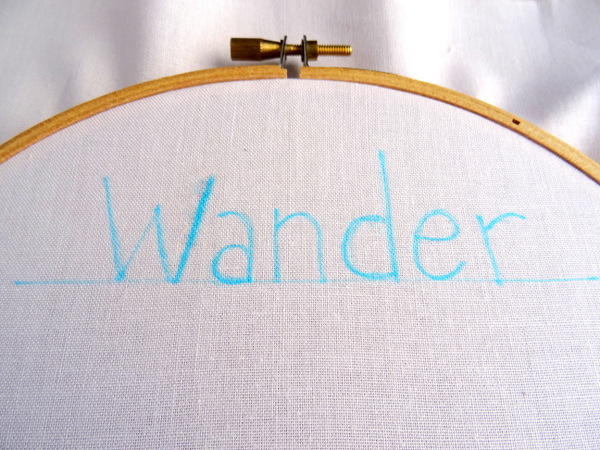
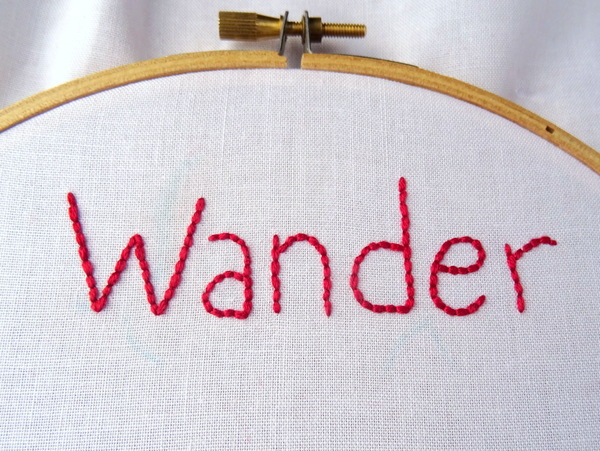
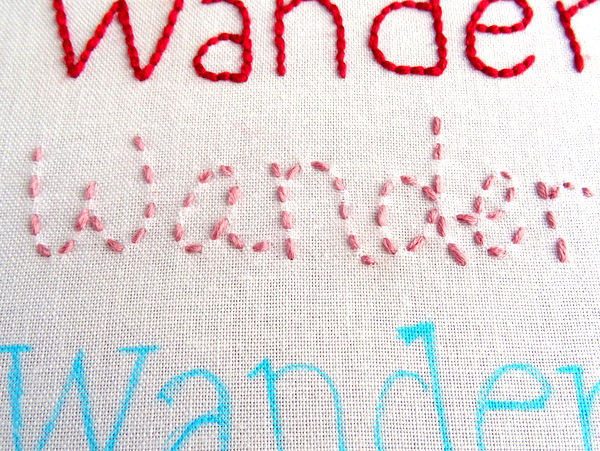
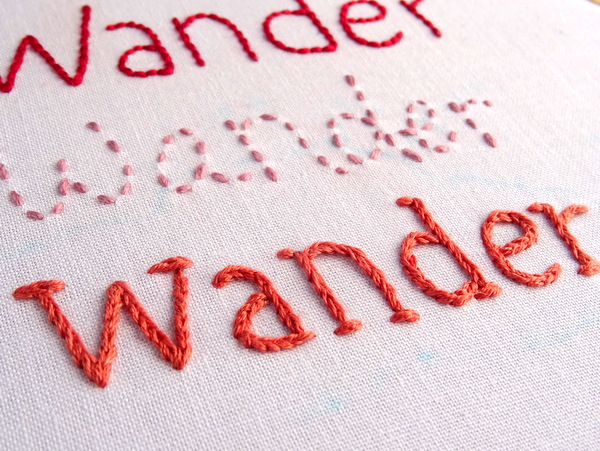
To practice, choose a word at least 5 or 6 letters long. You can use a word processing program to select a font, print it out and transfer to your fabric, or simply draw the letters by hand. I chose the word “wander” and a very basic font. All of the letters in this tutorial are stitched using four strands of DMC embroidery floss.
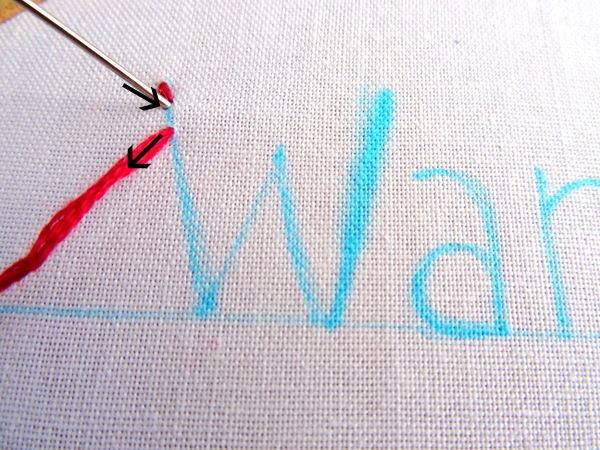
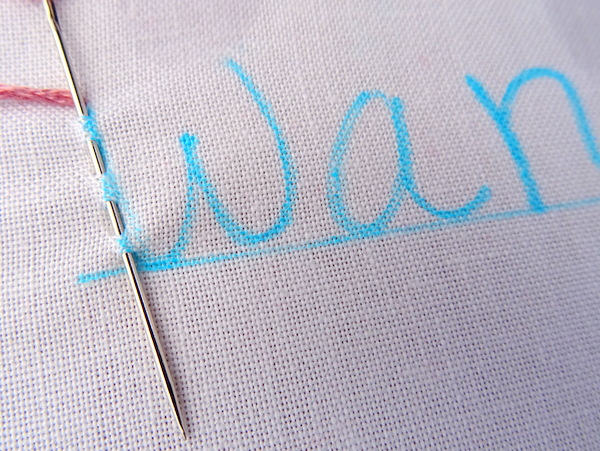
Start your back stitch my making a single stitch, coming up one stitch length away, and going back in the same place where the previous stitch ended. It’s kind of like stitching in reverse.
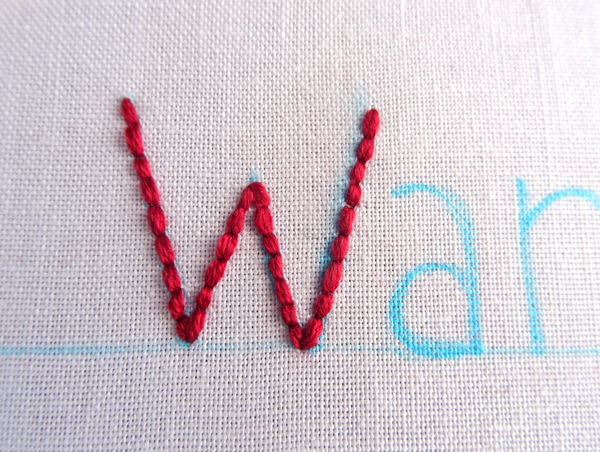
Continue stitching until the letter is complete. Hey, you just embroidered your first letter! {Pro tip: While it’s tempting to trail your thread from one letter to another, if you’re using a light colored fabric it will be visible! Resist the urge. Unless your letters flow together, taking the time to end the thread before starting another letter is worth the effort}
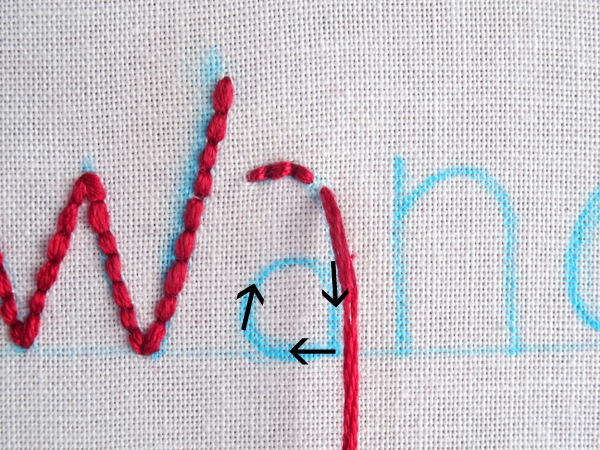
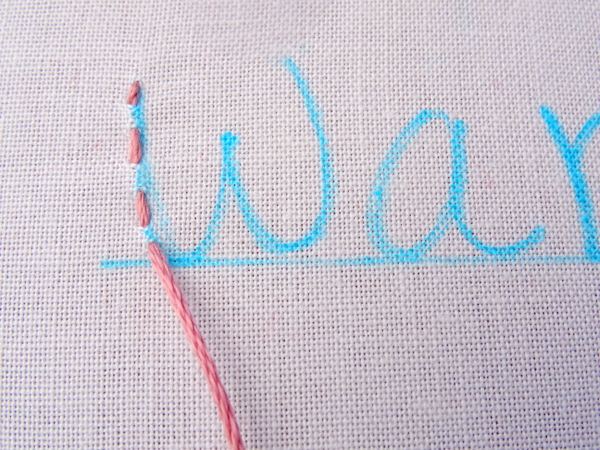
When you’re learning how to embroider letters, the instinct is to simply follow the same path you would when writing. That doesn’t always work out. Take the letter “a” for example. Instead of starting in the middle as if I were writing, I’m going to start at the top and work my way down and around. That way I can be sure the inside loop meets up with the back of the “a”.
The same rule applies to letter “n”. Start by stitching down the straight side. If you were writing, chances are the pen would now travel back up the straight side before making the curve. This won’t work with embroidery. Doubling up on stitches will only look bulk and messy.
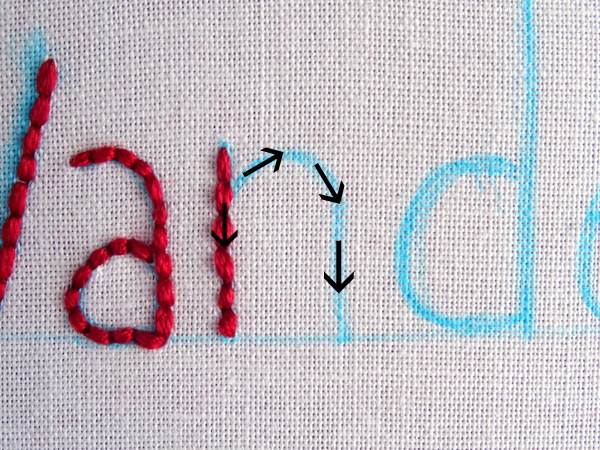
You also don’t want to simply take the thread from the bottom and pull it across the back to where the curve starts. Instead, turn your work over and wrap the thread up the stitch until you reach the start of the curve. Now, the bulk of the double line is hidden on the back, and you won’t see a stretched piece of thread through the fabric.
Continue stitching until your word is complete.
No matter what stitch you’re using the same four rules apply:
- Always properly end the thread before starting a new letter. The exception to this rule is when the letters are connected (like in a cursive font) or if the font is very small and the letters very close together.
- Determine the path of stitching before you begin. It will not always be the same as when writing letters.
- Some letters will need to be stitched in two parts. Instead of stretching the thread across the back, turn your work over and wrap the thread around the existing stitches until you reach the new starting point.
- Shorten the stitch length when stitching around corners.
Running Stitch Lettering
Next, we’re going to tackle Running Stitch. It can be worked using the sewing method or one stitch at a time. I find for letters it’s best to use a combination of both methods. The sewing method is great for straight lines. Simply bring the thread to the front and weave it in and out of the fabric. Try to keep the stitches and the empty spaces roughly the same length.
Pull the thread through to complete the series of stitches.
While the sewing method is admittedly faster, for curves or really small letters, it’s much easier to make one stitch at a time.
Using the four rules outlined above, continue stitching until you reach the end of the word.
Split Stitch Lettering
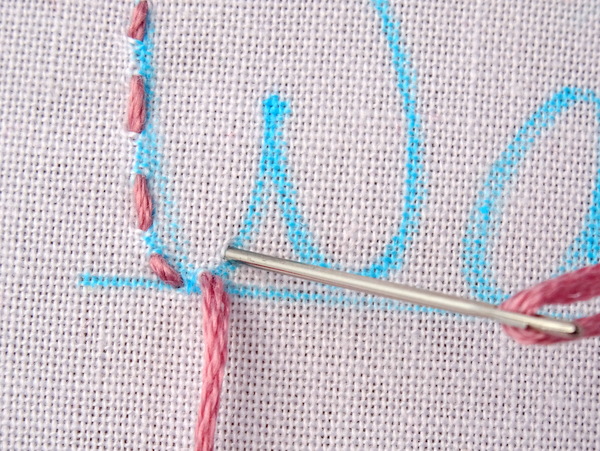
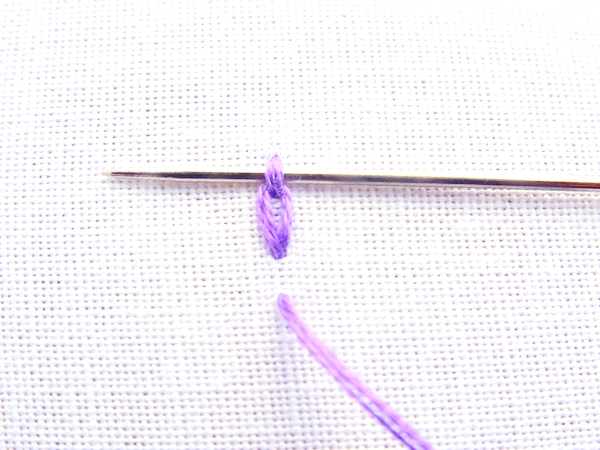
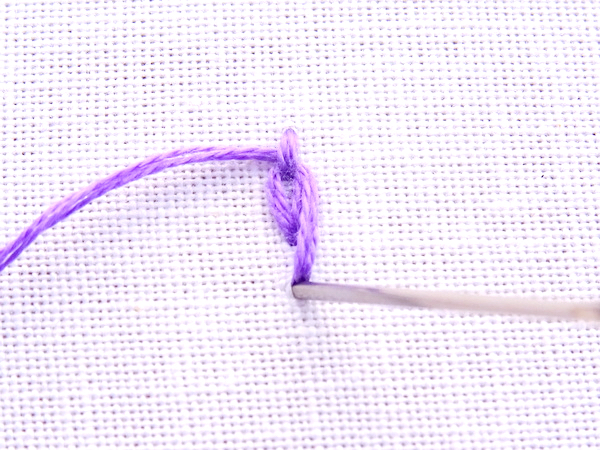
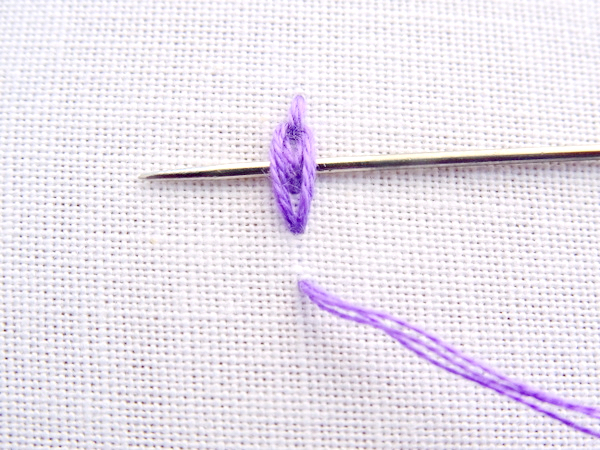
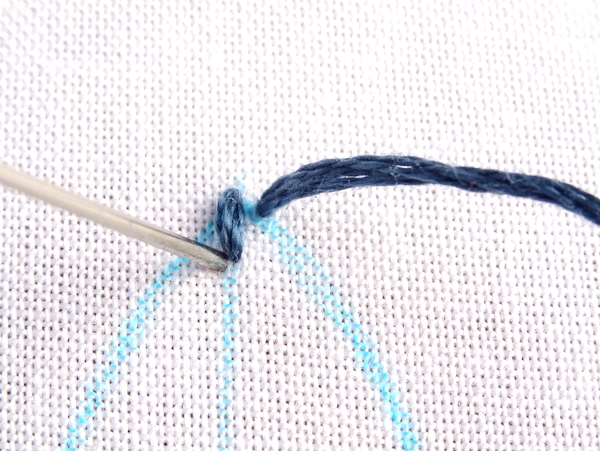
Split stitch is one of my favorites for lettering because it creates a really interesting texture. It’s also a good stitch for small letters and fonts with lots of curves. Start by making a single stitch. Next, bring the thread back up in the middle of that same stitch. Essentially, you are splitting the stitch in two. Pull the needle all the way through and repeat the process.
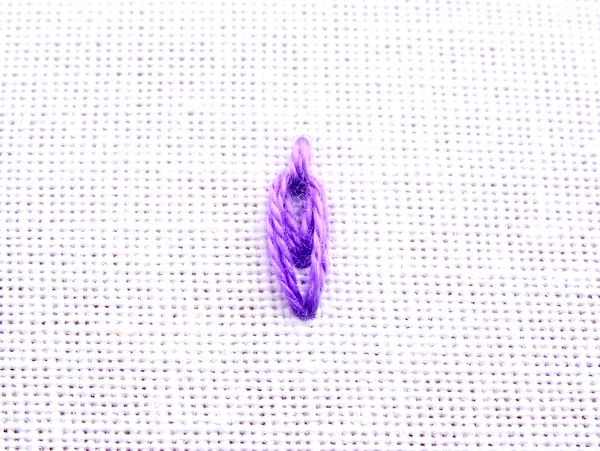
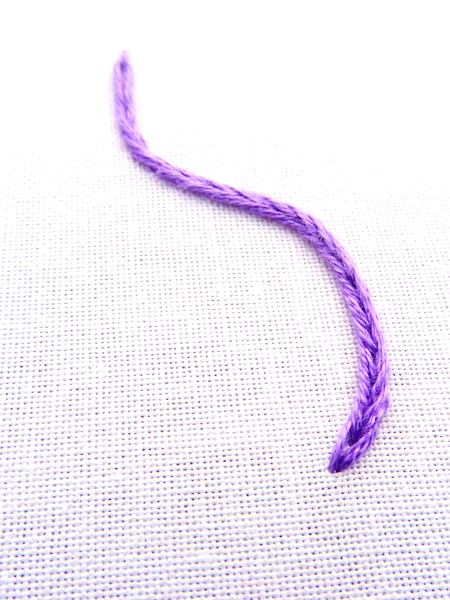
The end result is a beautifully textured letter that looks a bit like a braid.
Once again, using the basic rules outlined above, continue stitching until you reach the end of the word.
Stem Stitch Lettering
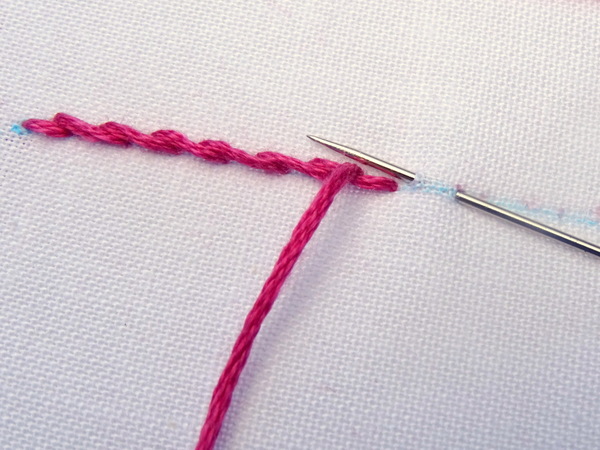
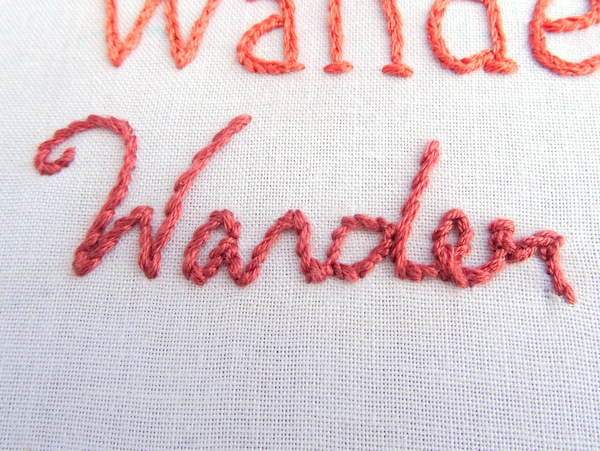
Finally, we reach what is possibly the most beloved stitch for lettering, Stem Stitch. This simple stitch looks like a twisted rope and adds a bit of elegance to embroidered letters. It also turns corners beautifully which makes it the perfect choice for a cursive font. Stem stitch is worked in a similar fashion to split, except instead of coming up in the middle of the previous stitch you come up next to it.
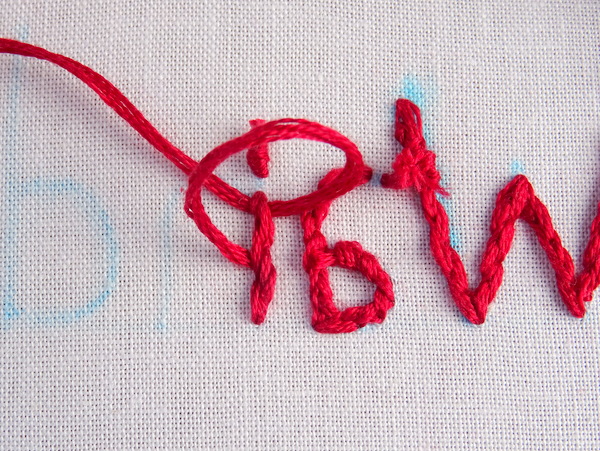
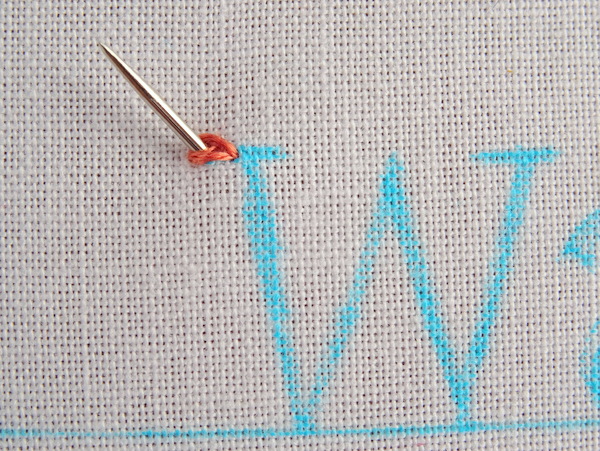
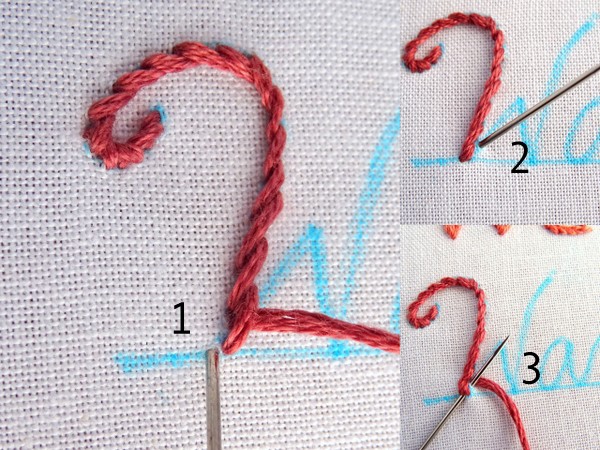
There is one extra rule to follow when using stem stitch for lettering. Are you ready for it? Always stitch in the same direction. For right-handed sewers, the stitch is worked left to right and for left-handed sewers, the stitch is worked right to left. This means as you go around curves, it might be necessary to turn your hoop so you continue stitching in the correct direction. For example, this cursive “W” has a lovely little curve at the top. In order to stitch in the correct direction (I’m right-handed), I had to turn the hoop upside down and so I could go left to right.
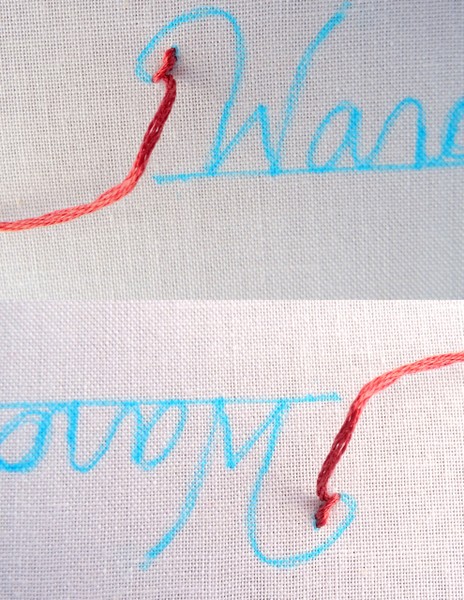
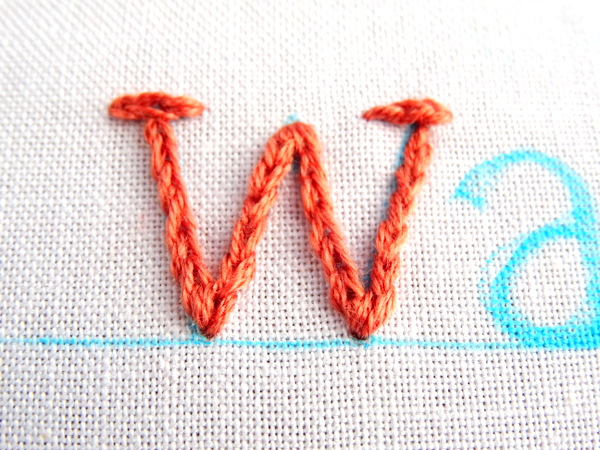
As I rounded the corner I turned the hoop back over and continued in a left to right direction. Don’t forget to shorten your stitch length when you go around corners.
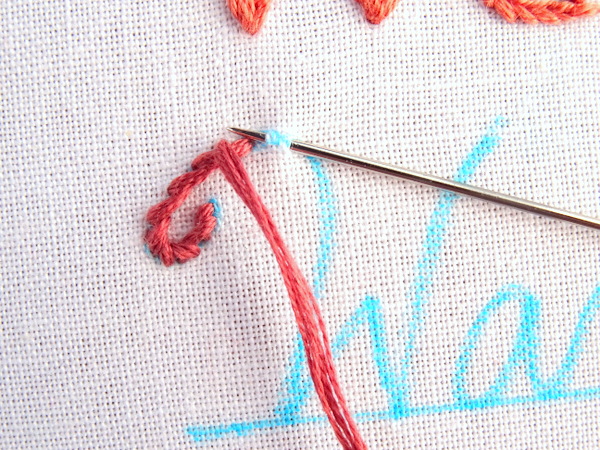
Speaking of corners…while stem stitch is great for turning corners, it does have limitations. Specifically sharp corners like the one we see on the uppercase “W”. If you try to go around this corner – even if you shorten your stitches – you will end up with a rounded curve. The solution is to end the stitch and then come back up again on the other side. Except, instead of coming up at the bottom, come back up one stitch length away and then stitch in a normal fashion. That way you don’t risk pulling out the previous stitch. Are you confused yet? Let’s look at in picture form.
Using these two additional techniques along with the four universal lettering rules, keep stitching until you reach the end of the word.
In the next lesson, we’ll cover more lettering stitches including stitch combinations and filler stitches for large text.
How to Embroider Large Letters by Hand {Part 2}
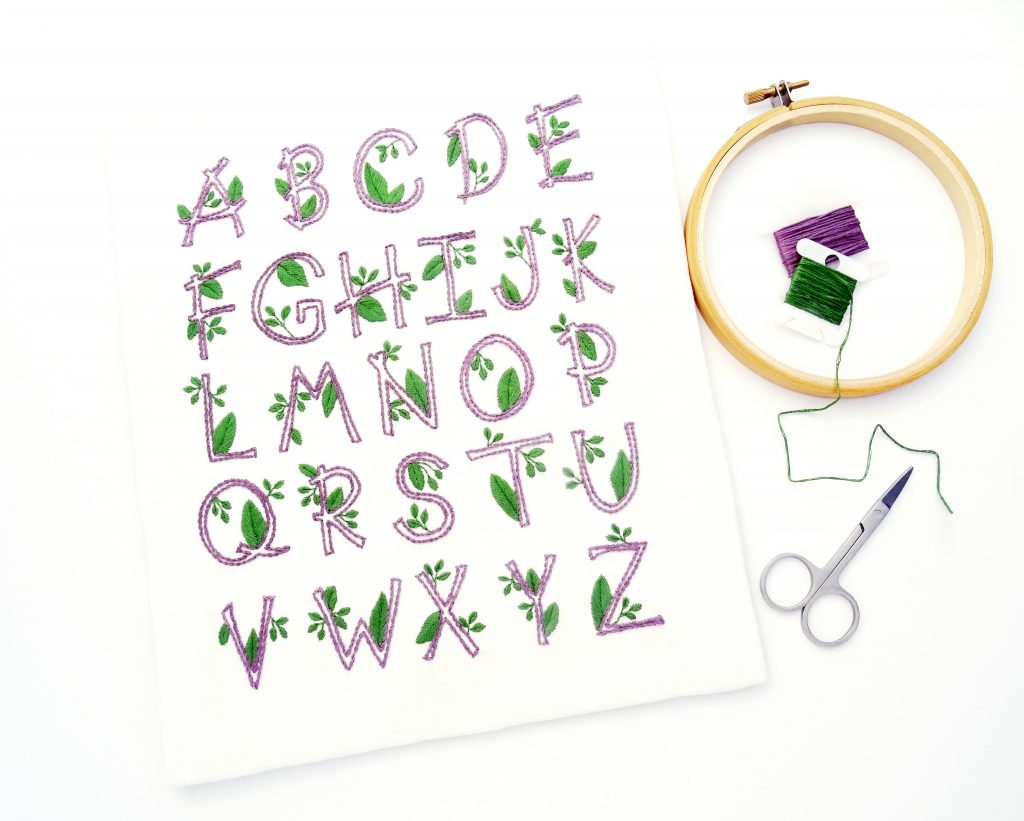
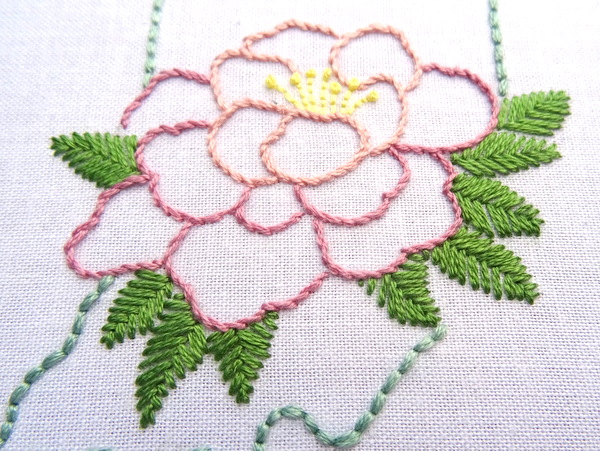
Nature Alphabet Pattern
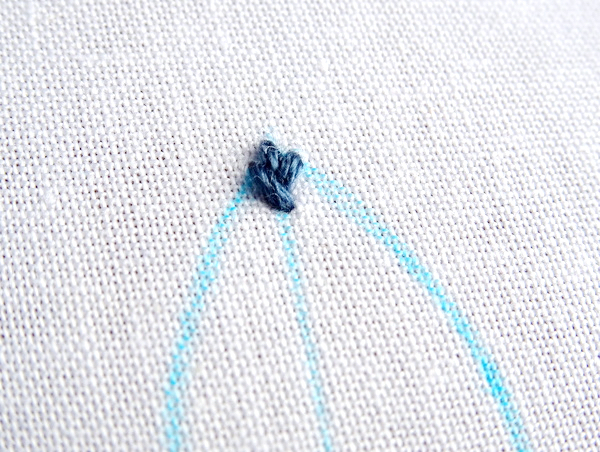
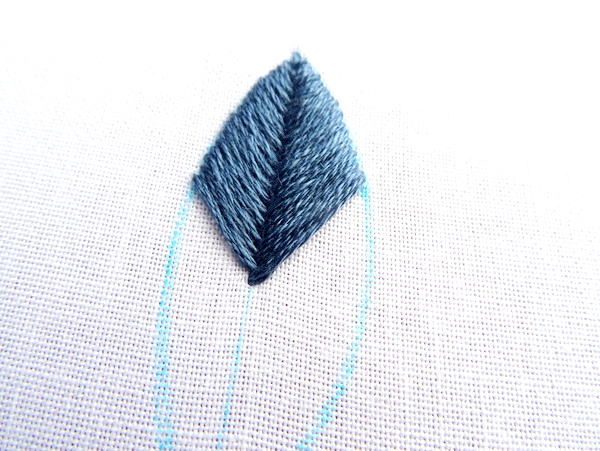
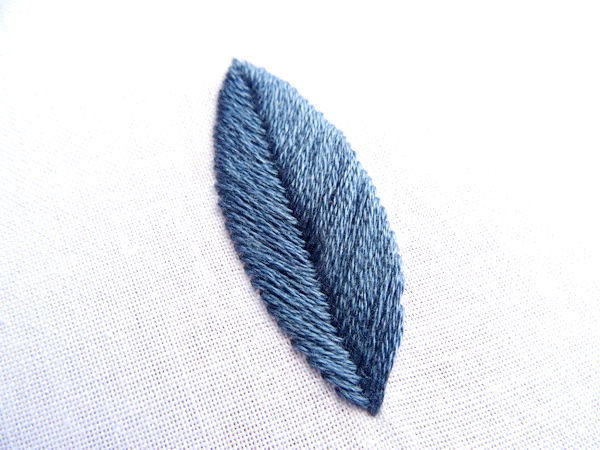
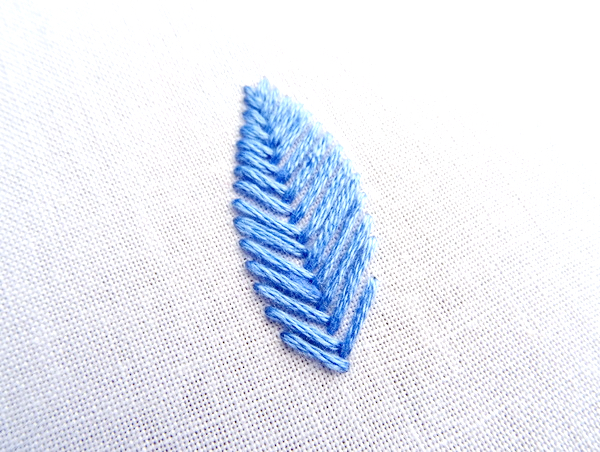
If you love stitching letters, the Nature Alphabet Pattern is for you! Featuring a set of embroidered letters adorned with leaves, this simple pattern uses only three different stitches and is suitable for all skill levels.
Stitch the full alphabet as a sampler, use the individual letters for monograms, or combine the letters to make words of your own. Visit the Nature Alphabet listing in my Pattern Shop for more details about this PDF pattern or to purchase.
Happy Stitching!

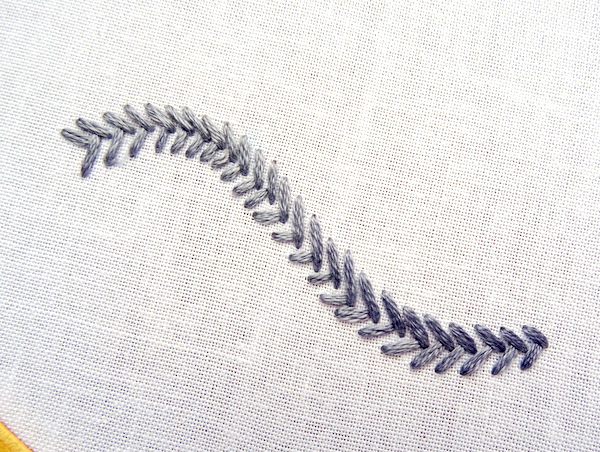
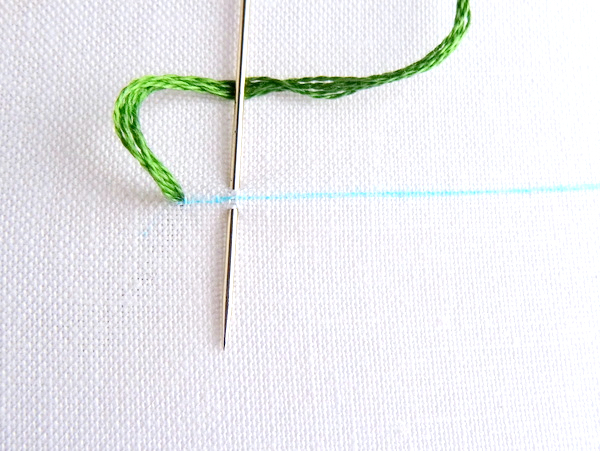
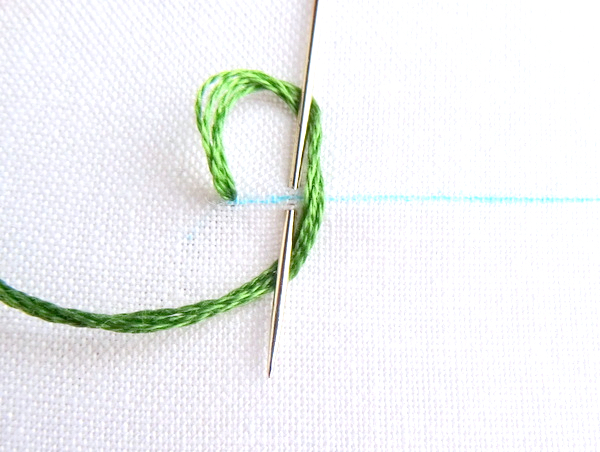
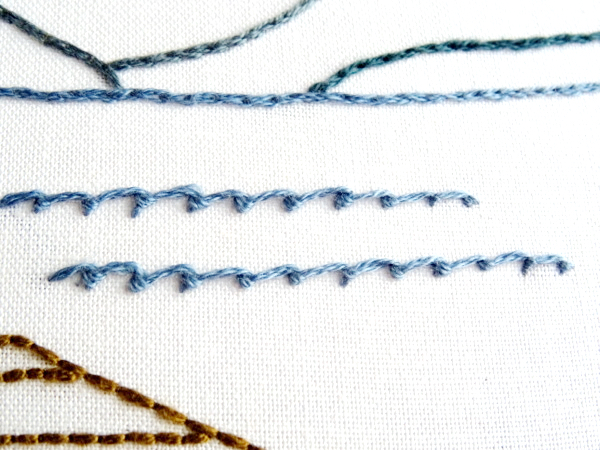
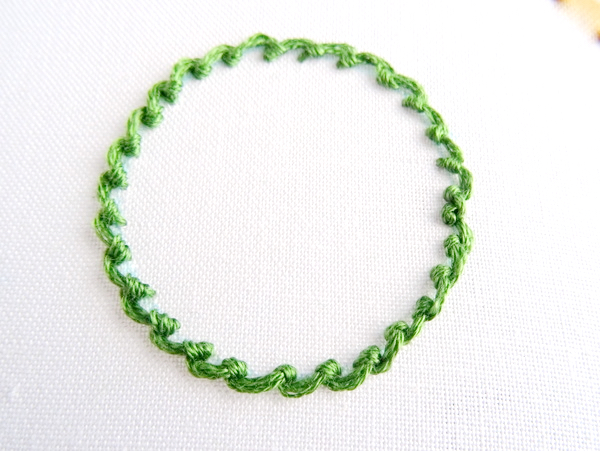
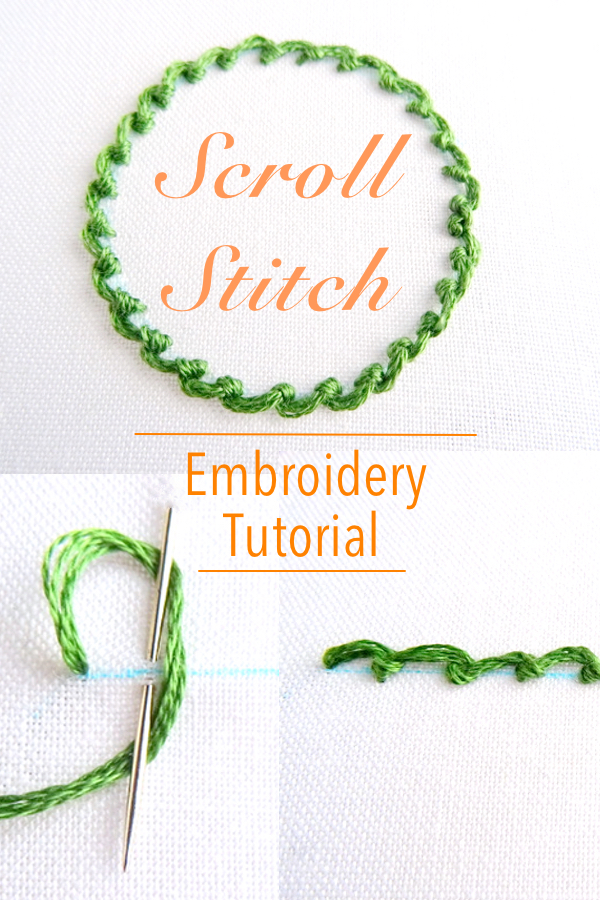 Scroll stitch can be worked on a straight or curved line. Let’s use a straight line to start. Bring the thread to the front of the fabric. Move one stitch length away and take the needle down and back on either side of the line.