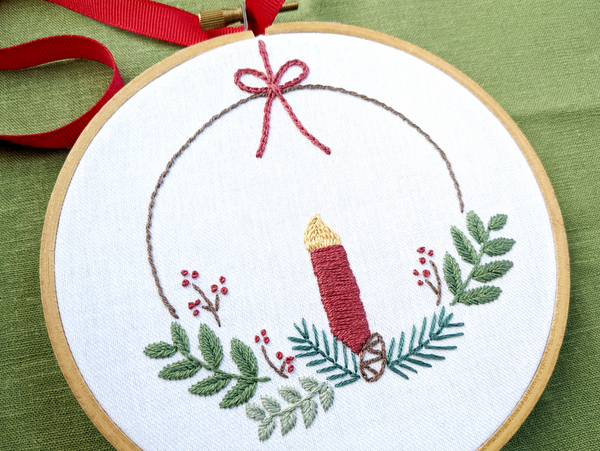
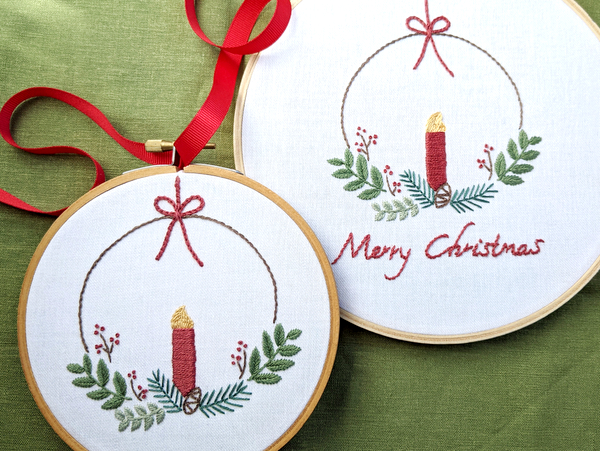
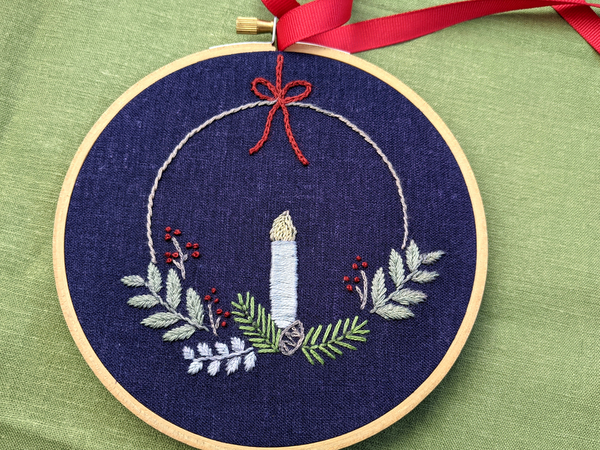
Bring on the spirit of the season with this FREE holiday embroidery pattern and tutorial! This elegant design features a grouping of greenery, berries, and a candle surrounded by a simple hoop topped with a bow.
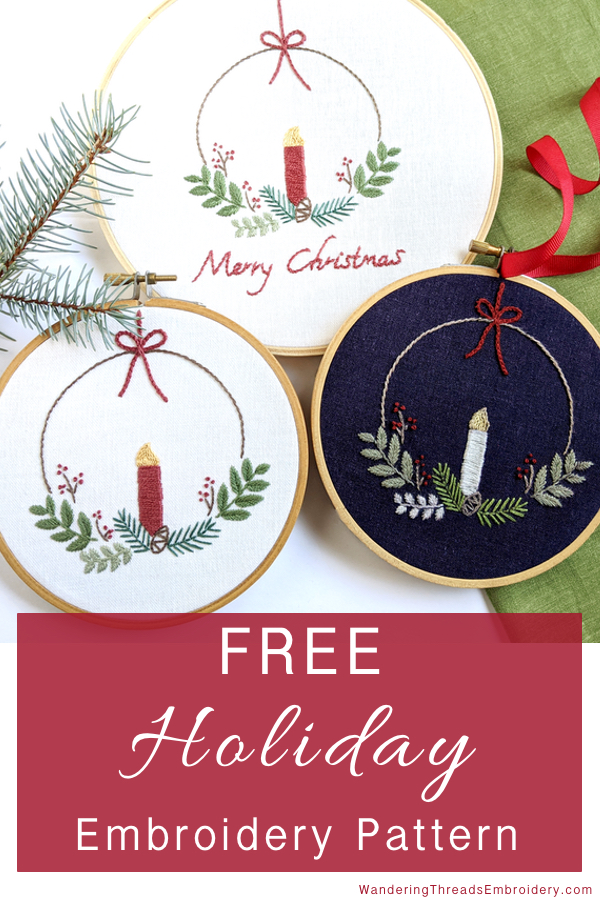
This pattern is versatile and perfect for home decoration or giving as a gift. Display it in the hoop with a ribbon for hanging or complete the look with a wooden frame. Stitch it on napkins, tea towels, or placemats to create a fun holiday table.
Using eight different embroidery stitches, this is a great project for brushing up on skills while creating something uniquely beautiful.
Free Holiday Embroidery Pattern Download
The free embroidery pattern is available to download as a PDF by clicking HERE, or on the title above. The PDF includes:
- Full-color photo of the finished embroidery pieces
- One holiday pattern + optional “Merry Christams” text
- Reverse image of the pattern for the iron-on transfer option
- Printable stitch and color guide
- Material list
- Instructions for transferring the pattern using three simple methods
- Directions for framing the finished embroidery
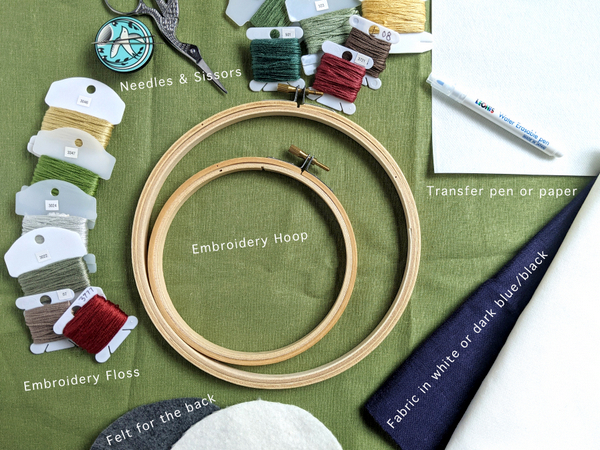
Supplies Needed:
- Embroidery Hoop to fit the pattern. The candle & greenery pattern measures appoximately 4″ x 4″ and fits inside a 5 or 6″ hoop. With the optional “Merry Christmas” text, the pattern measures approximately 4″ x 6″ and fits inside a 7 or 8-inch hoop.
- Fabric big enough to fit the hoop, or add 3-4 inches on each side if choosing to finish the embroidery in a wooden frame
- Embroidery Floss in colors of your choice, or use the suggested colors in this guide. I used two sets of DMC 6-stranded embroidery floss in the following numbers:
- White Fabric – 3721, 08, 676, 3363, 523, 501
- Blue or Black Fabric – 3777, 07, 3024, 3046, 3022, 3347
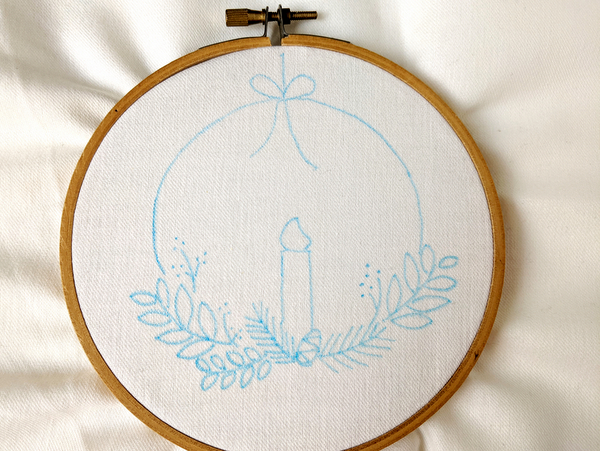
- Free Holiday Embroidery Pattern: Pattern transfer instructions are included in the PDF.
- Sewing Scissors, a Water Soluble Marking Pen or Stick & Stitch Transfer Paper, and an Embroidery Needle.
- Felt for finishing the back of the hoop
Holiday Pattern Stitching Instructions
Step 1:
Choose your fabric and transfer method. For this tutorial, I’m using white fabric with the pattern traced on top with a water-soluble marking pen. If you would like to stitch the fabric on a dark-colored fabric, choose an alternative transfer method* and use the DMC floss colors in the supplies list for blue or black fabrics.
* My favorite method for transferring onto dark fabric is to use a stick & stitch transfer paper that you stitch on top of and then wash off. For a full tutorial on how to use this method, visit, How to use Stick & Stitch Embroidery Transfer Paper.
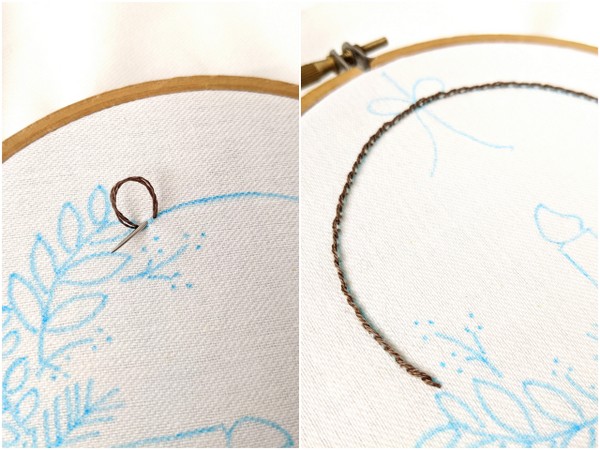
Step 2:
Start by stitching the hoop with Outline Stitch using 3 strands of DMC 08. Remember, the key to outline stitch is to always leave the working thread above the line you are stitching.
Outline Stitch Embroidery Tutorial
Step 3:
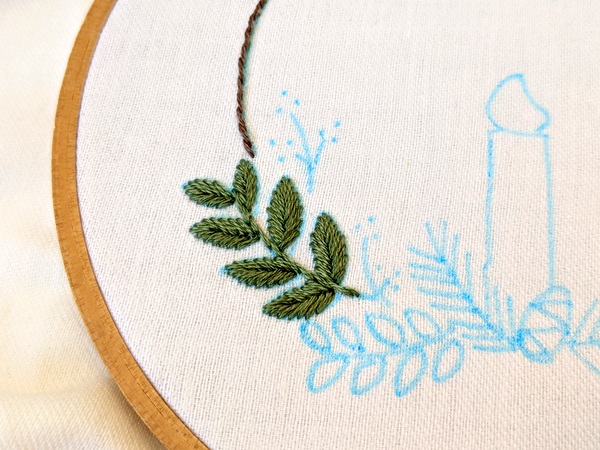
Stitch the branch(es) with large leaves. First, stitch the branch with Stem Stitch using 3 strands of DMC 3363. Start at the bottom and stitch to the top so the thread is in the correct place to begin the leaves. Stem stitch is exactly the same as outline stitch, except the working thread is kept below the line.
Stem Stitch Embroidery Tutorial
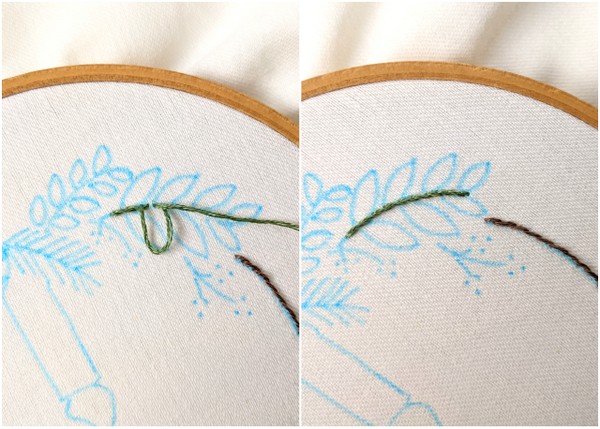
Step 4:
Stitch the leaves with Fishbone Stitch using 3 strands of DMC 3363. Start with the topmost leaf and work your way down the branch.
Fishbone Stitch Embroidery Tutorial
Avoid trailing lines of thread on the back of your work by weaving the thread through the back side of the stitches to the bottom of each leaf. Since you are starting each leaf at the top, a thread line will be created from bottom to top, but as you stitch your way down the leaf with fishbone, the line will disappear under the stitches.
Repeat this step for the other large-leafed branch, or save it for later and move on to the next branch.
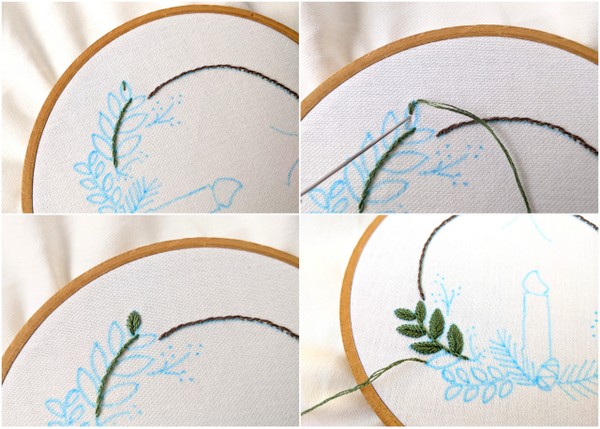
Step 5:
Stitch the branch with small leaves. First, stitch the branch with Stem Stitch using 3 strands of DMC 523. See above for tips and a tutorial link.
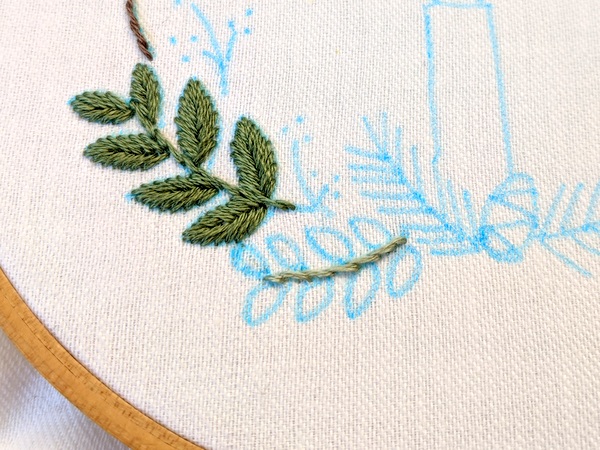
Step 6:
Stitch the leaves with Fishbone Stitch using 3 strands of DMC 523. Start with the topmost leaf and work your way down the branch.
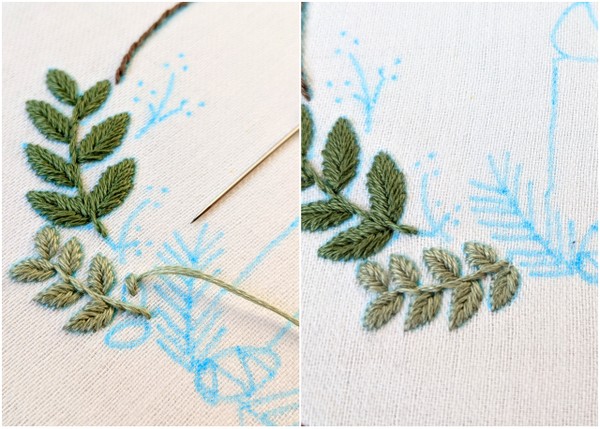
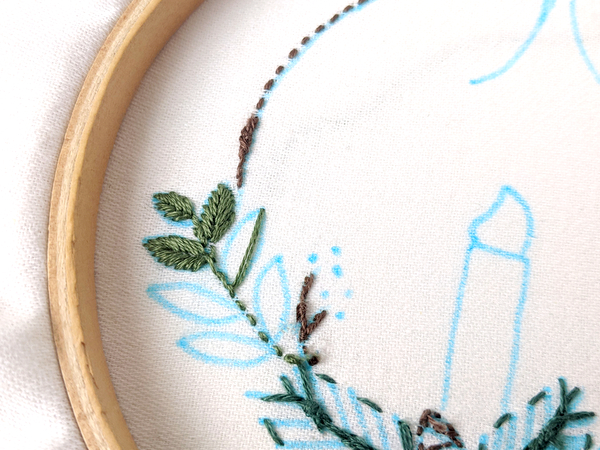
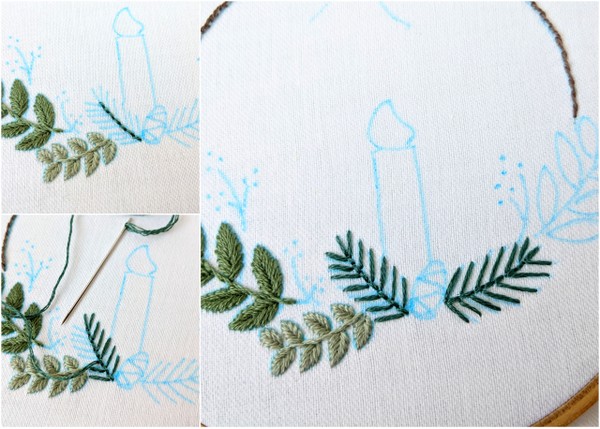
Step 7:
Stitch the evergreen branch and needles with Back Stitch using 3 strands of DMC 501. Stitch the branch first and then the needles using one long back stitch for each.
Back Stitch Embroidery Tutorial
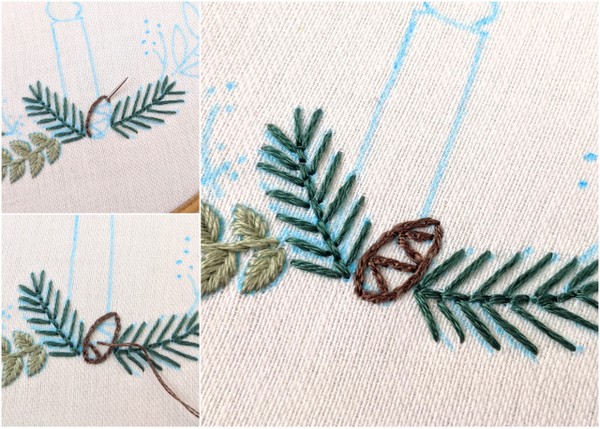
Step 8:
Stitch the pinecone with Split Stitch using 2 strands of DMC 08. Stitch the outline first followed by the inside details. Since the pinecone is small, it will be necessary to keep your stitches small.
Split Stitch Embroidery Tutorial
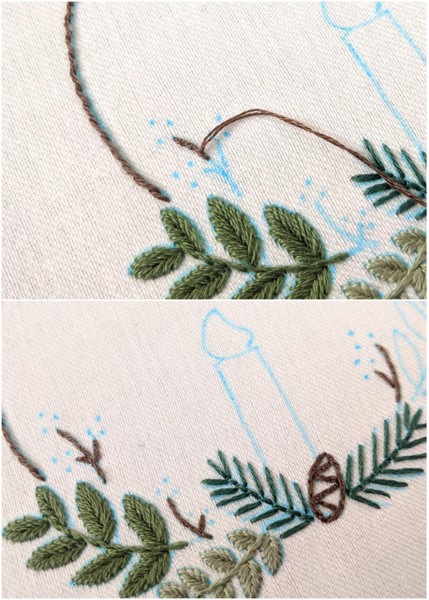
Step 9:
Stitch the berry branches with Split Stitch using 2 strands of DMC 08. Again, these are small branches so make small stitches to keep things neat and even. When stitching a line where the beginning and end are visible using split stitch, I like to make the first and last sitch especially small.
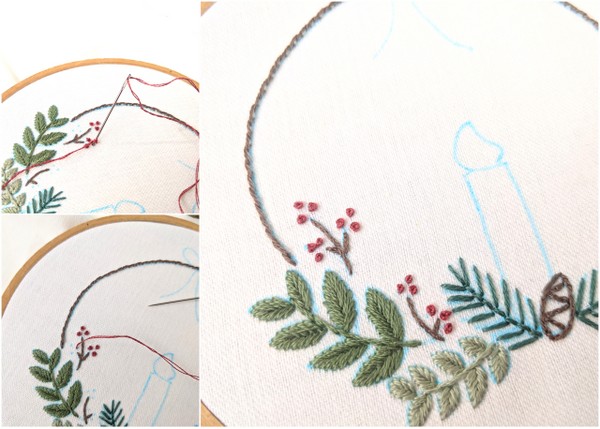
Step 10:
Stitch the berries with French Knots using 2 strands of DMC 3721 wrapped x2.
French Knot Embroidery Tutorial
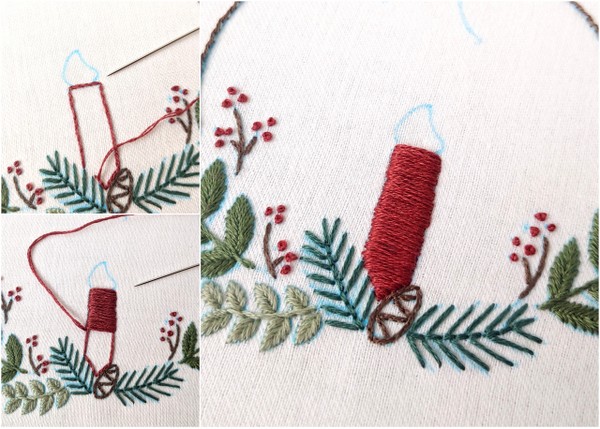
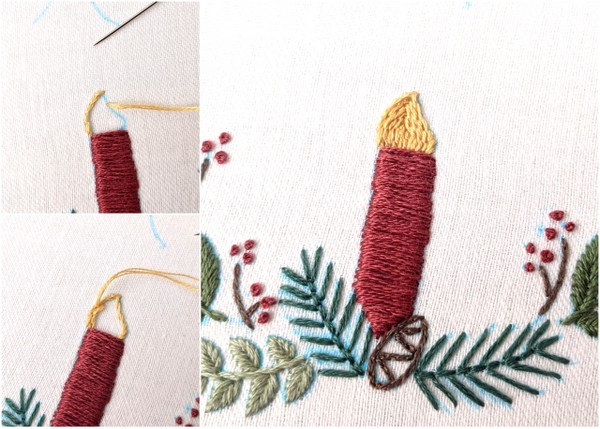
Step 11:
Stitch the candle with Satin Stitch using 3 strands of DMC 3721.
*Optional: Outline the candle with split stitch using 2 strands of thread before stitching over top with satin stitch. While it initially takes a bit more time, I find that in the end, this method allows for a quicker and neater satin stitch.
Satin Stitch Embroidery Tutorial
Step 12:
Stitch the candle flame with Stem Stitch using 3 strands of DMC 676. First, outline the flame, then follow the same stitching pattern until the shape is completely filled in.
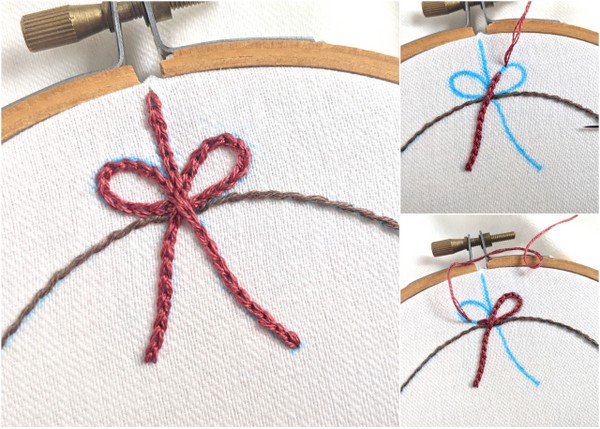
Step 13:
Stitch the bow with Chain Stitch using 3 strands of DMC 3721. Start at the bottom of the ribbon and stitch up and around the loop on the opposite side. Continue stitching around the second loop and then down to the bottom of the ribbon.
Chain Stitch Embroidery Tutorial
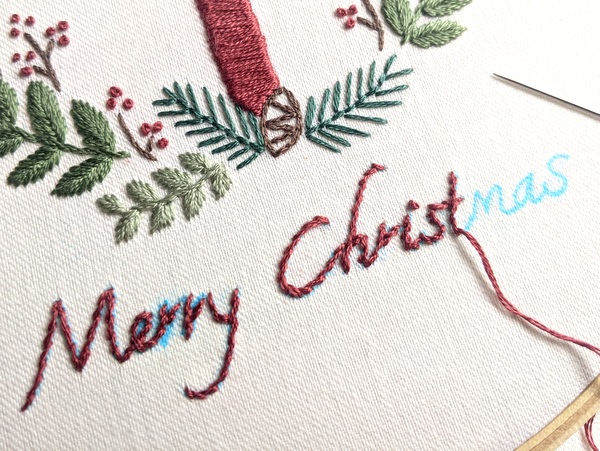
Step 14:
Stitch the optional text with Stem Stitch using 3 strands of DMC 3721.
For complete instructions on stitching letters, visit the How to Embroider Letters by Hand post.
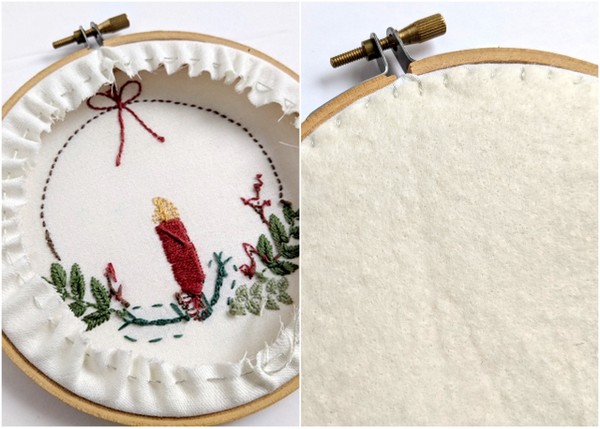
Finish the Back
For this project, I have chosen to finish the back with a piece of felt. This simple two-step method involves sinching the edges and then attaching a piece of felt using a whip stitch. For detailed instructions visit: How to Finish and an Embroidery Hoop.
Alternately, you could choose to finish your embroidery in a wooden frame by following these instructions: How to Frame Embroidery: the Easy Method.
Admire Your Work!
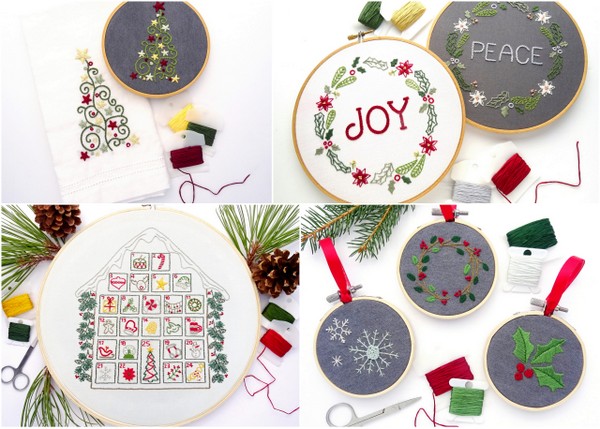
More Holiday Embroidery Patterns
Thanks for downloading the Free Holiday Embroidery Pattern and stitching along with me! You can find additional holiday patterns including wreaths, ornaments, and more in the holiday pattern shop.
15 Free Christmas Hand Embroidery Patterns - The Yellow Birdhouse
[…] 11. Candle and Hoop Design […]
Violeta
This is such a beautiful project! I featured your awesome greenery and candle pattern on Crafts on Display. It looks like a great way to brush up on all those fun stitches. Great work! https://craftsondisplay.com/embroidery/holiday-candle-embroidery-pattern-205633/