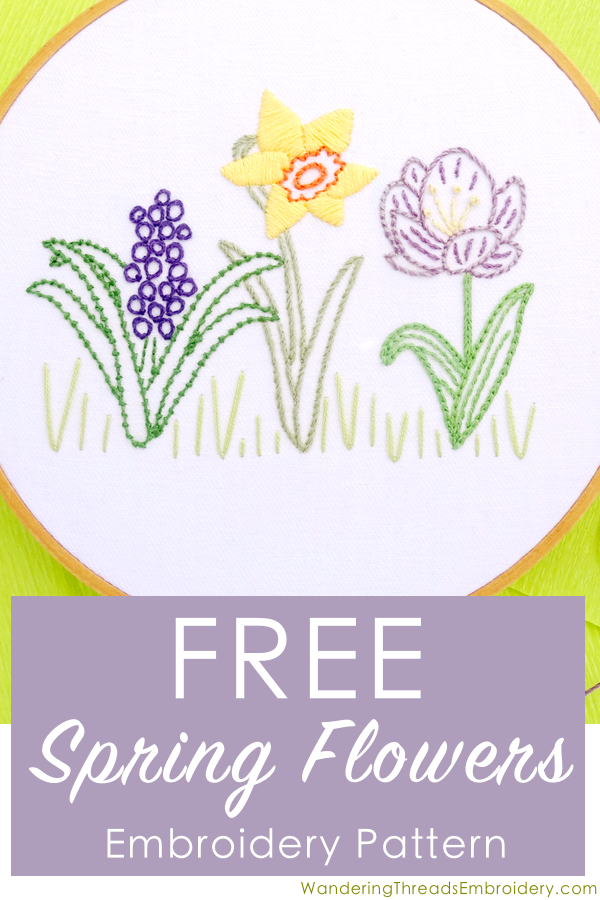
Free Spring Flowers Embroidery Pattern
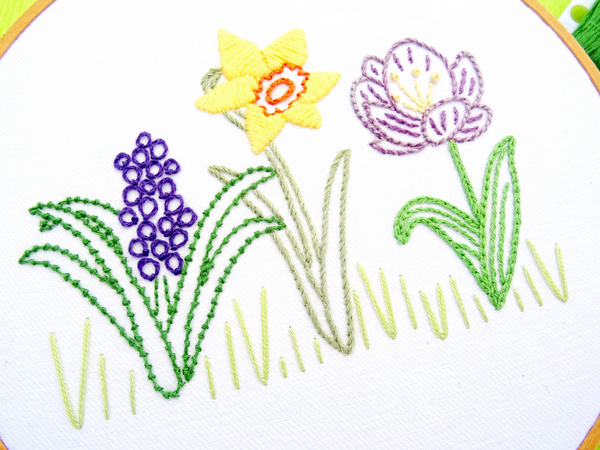
Welcome spring with this FREE spring flowers embroidery pattern. Featuring a trio of colorful blooming flowers created with a variety of stitches designed to sharpen your skills and brighten your walls!
Spring Bulbs Embroidery Pattern Download
The free embroidery pattern is available to download as a PDF by clicking HERE, or on the title above. The PDF includes:
- Full-color photo of the finished embroidery piece
- One pattern sized to fit a 7 or 8″ hoop featuring all 3 flowers
- Individual patterns for each flower
- Reverse image of the patterns for the iron-on transfer option
- Printable stitch and color guide
- Material list
- Instructions for transferring the pattern using three simple methods
- Directions for framing the finished embroidery
For this project, you will need…
- Embroidery Hoop to fit the pattern. This pattern was created for a 7 or 8-inch hoop, but you can re-size the pattern as you like. You can also stitch the flowers separately in a 5 or 6-inch hoop.
- Fabric big enough to fit the hoop for a stand-alone project, or the item you wish to embroider.
- Embroidery Floss in colors of your choice, or use the suggested colors in this guide. I used DMC 6-stranded embroidery floss with the following numbers:
Hyacinth – 987, 29
Daffodil – 3053, 744, 922
Tulip – 989, 3041, 3743, 677
Grass – 3348 - Free Spring Flower Embroidery Pattern: Download and resize however you like. Pattern transfer instructions are included in the PDF.
- Sewing Scissors, a Water Soluble Marking Pen, and an Embroidery Needle.
Stitching Instructions
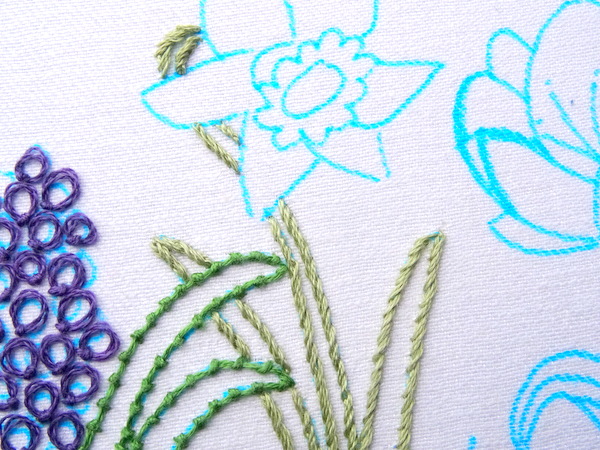
Hyacinth Flower
Step 1:
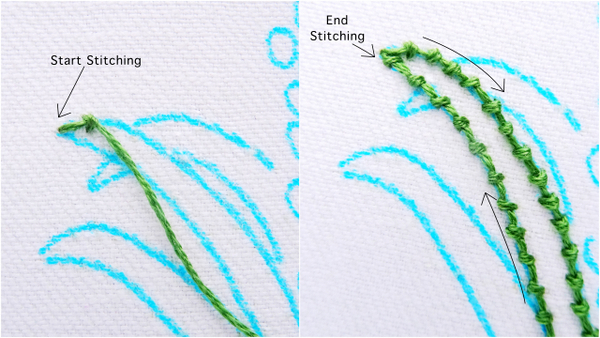
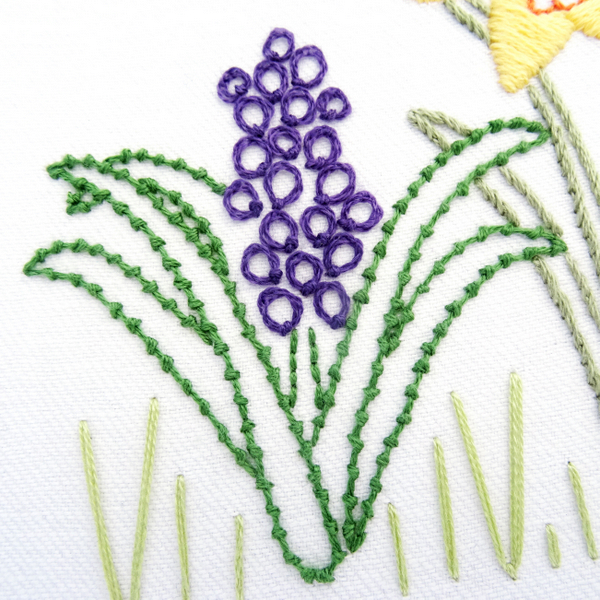
Stitch the leaves with Coral Stitch using 3 strands of DMC 987.
Coral Stitch Embroidery Tutorial
Coral stitch is best worked from left to right. You could start at the bottom of each leaf, stitch up and over the top, and then down to the bottom. However, for these leaves, we want to create a sharp point at the top which is difficult to achieve by stitching over the top with coral stitch.
Instead, start stitching at the top of each leaf, work your way to the bottom, and then back up. Repeat this step for all the leaves, starting and ending each string of stitches at the top of each leaf.
Step 2:
Stitch the center stem with Back Stitch using 3 strands of DMC 987.
Back Stitch Embroidery Tutorial

Step 3:
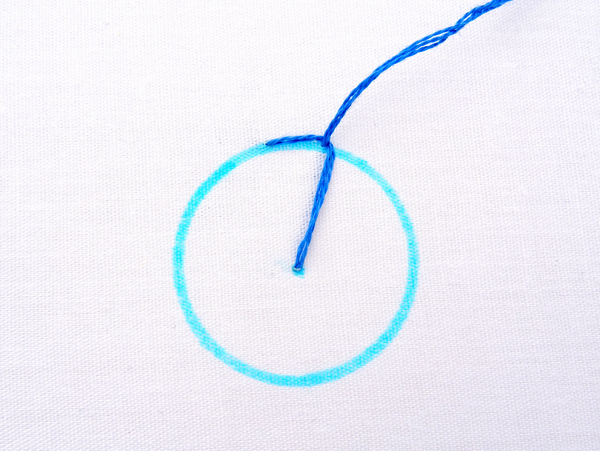
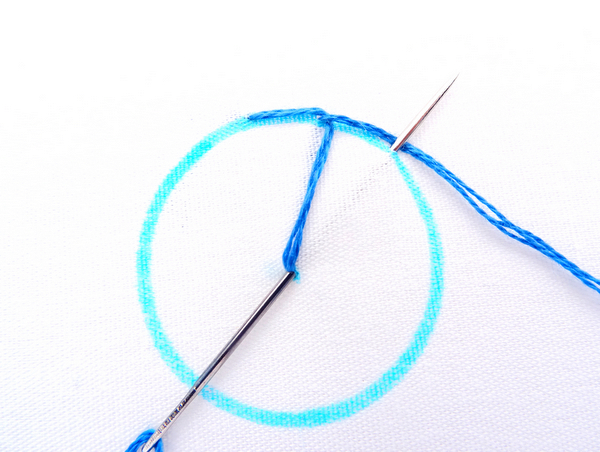
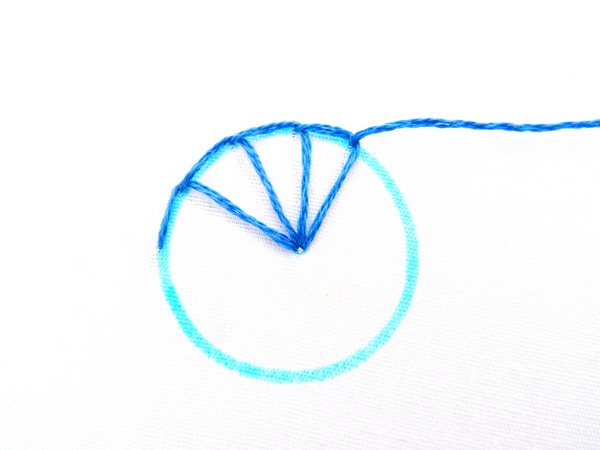
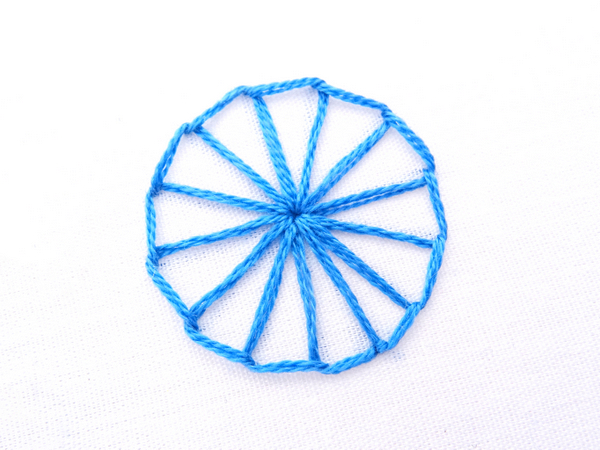
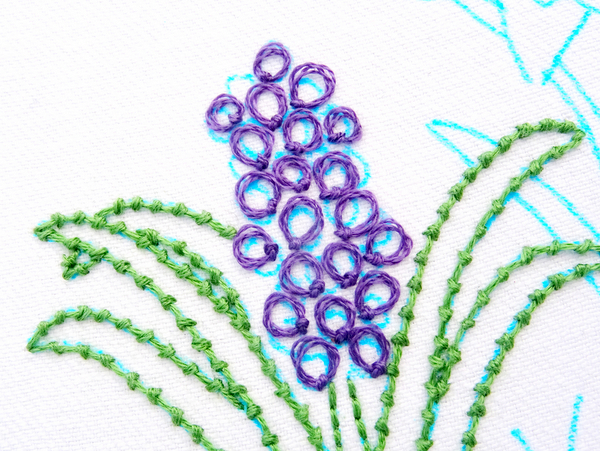
Stitch the Hyacinth flowers with Peking Knots using 3 strands of DMC 29.
Don’t worry about following the pattern markings for these small flowers too closely. The idea is to fill the area with knotted circles that are roughly the same size. You will find step-by-step instructions for this stitch along with extra tips in the Peking Knot Embroidery Stitch Tutorial.

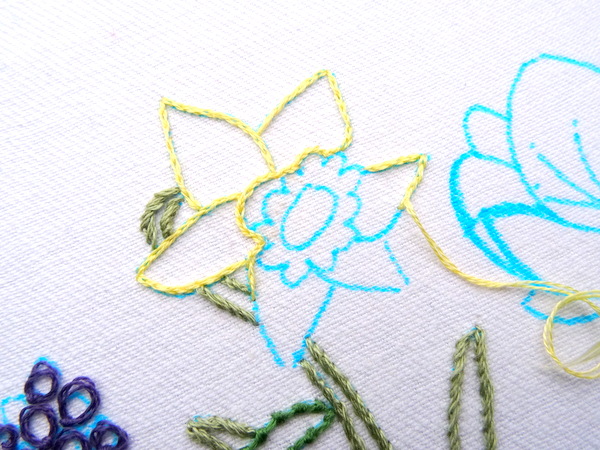
Daffodil Flower
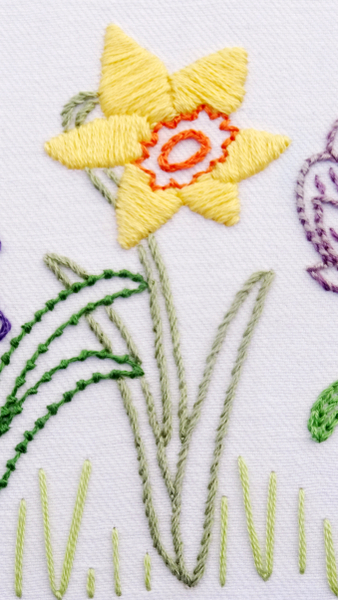
Step 1:
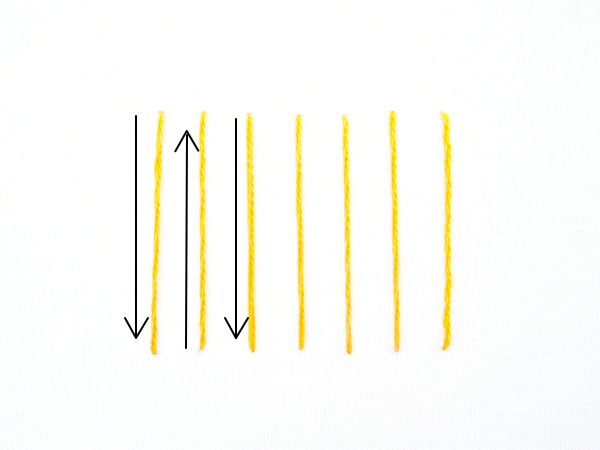
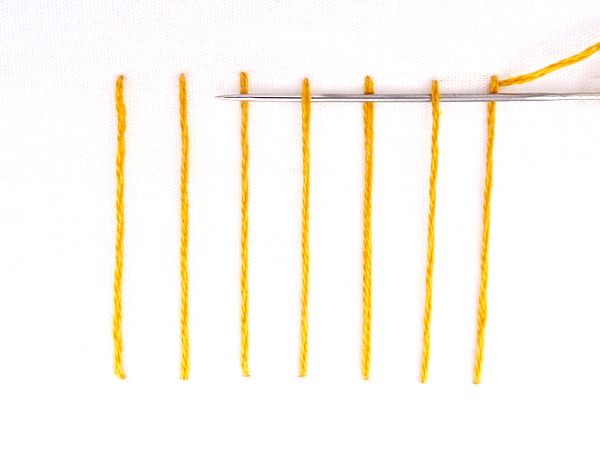
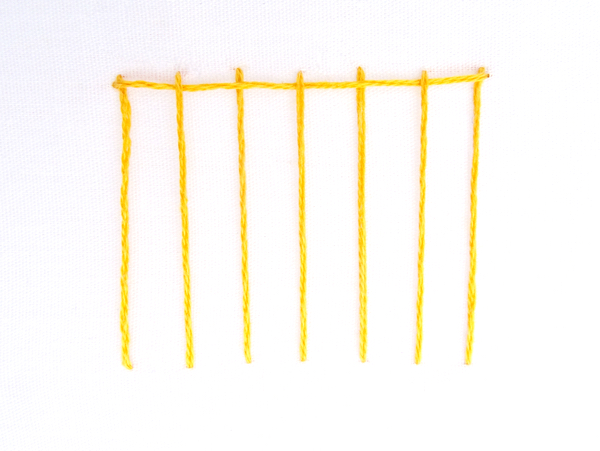
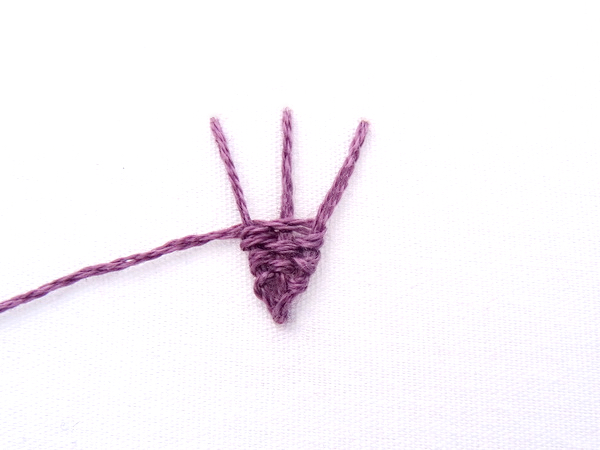
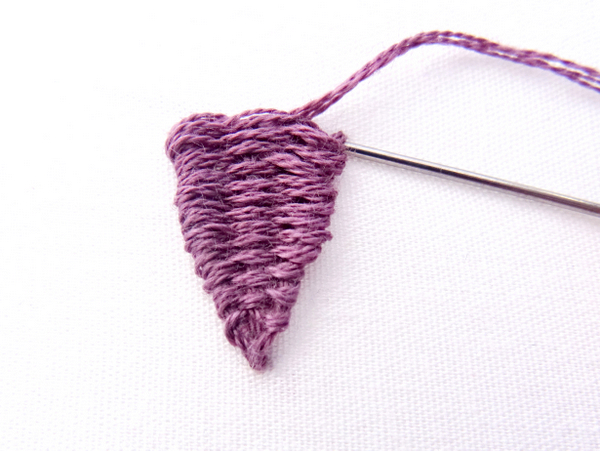
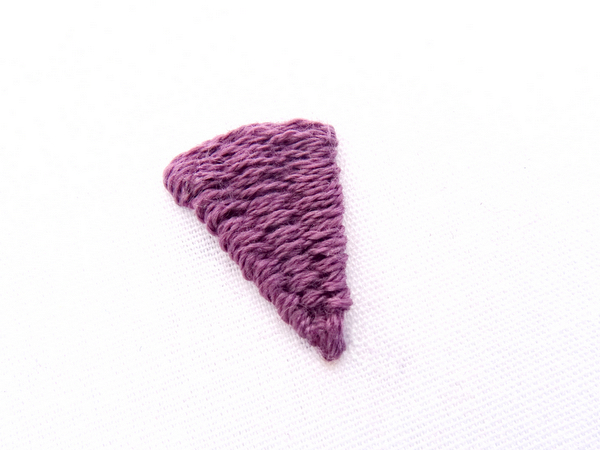
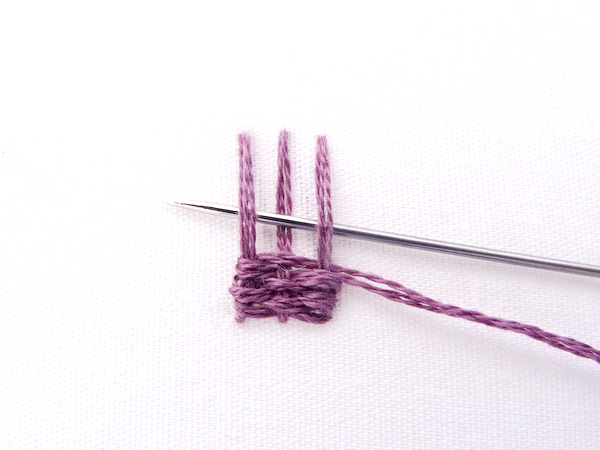
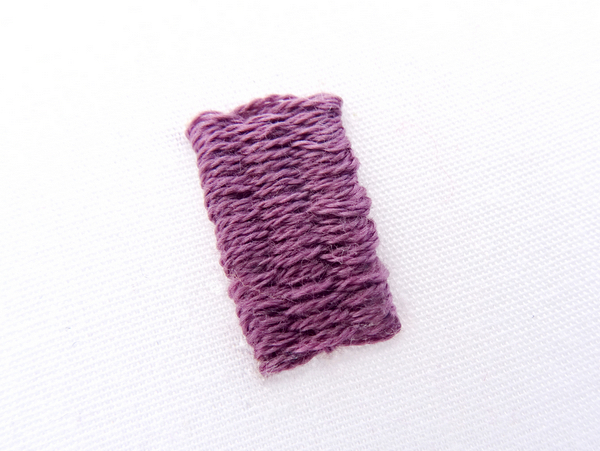
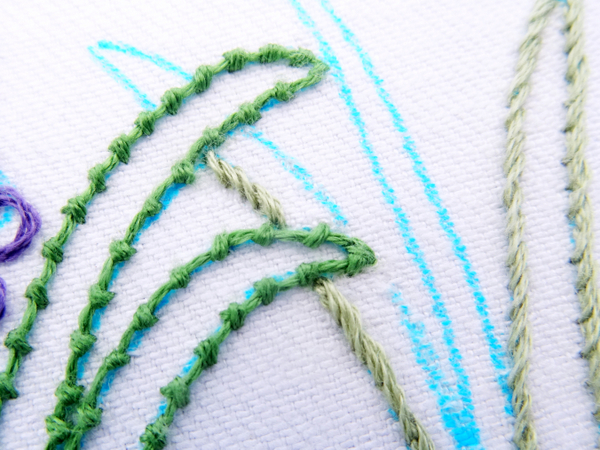
Stitch the leaves and stem with Rope Stitch using 2 strands of DMC 3053.
Rope Stitch Embroidery Tutorial
Once again we are stitching leaves with sharp points at the top. This time, start at the bottom and stitch up the leaf. To achieve the sharp corner, end the row of stitches at the top (for rope stitch this requires you to anchor the last stitch with a tiny loop), bring the needle back up just to the right of where the last stitch ended, and start another line of stitching down the other side of the leaf.

Stitch the second leaf using the same method to create a sharp pointed tip. When you reach the overlapping hyacinth leaves bring the thread down on one side, back up on the other, and then resume your line of stitching.
Stitch each side of the flower stem with rope stitch.
Step 2:
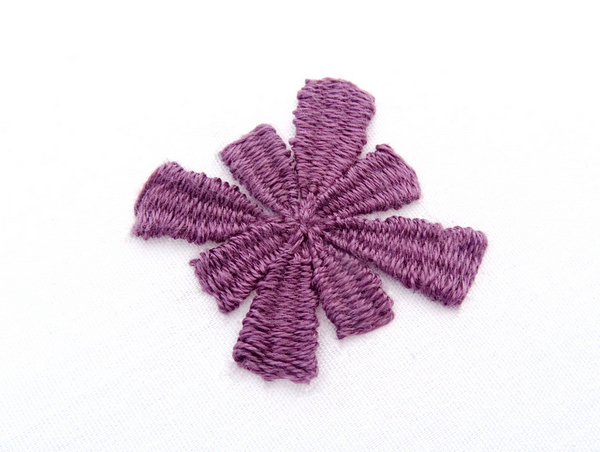
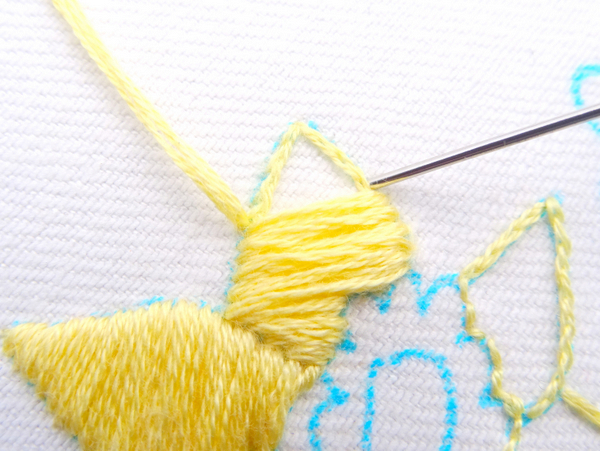
Fill the daffodil petals with Stem Stitch using 4 strands of DMC 744.
Satin Stitch Embroidery Tutorial
For more defined edges, I recommend outlining each petal with split stitch using 2 strands of DMC 744 and then stitching over the outline with 4 strands of thread.
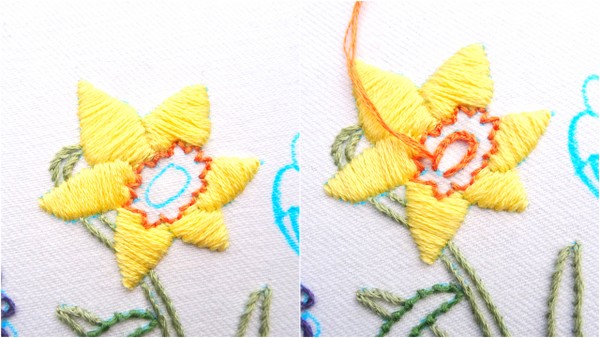
Step 3:
Stitch the center of the daffodil with Back Stitch using 4 strands of DMC 922.
Tulip Flower
Step 1:
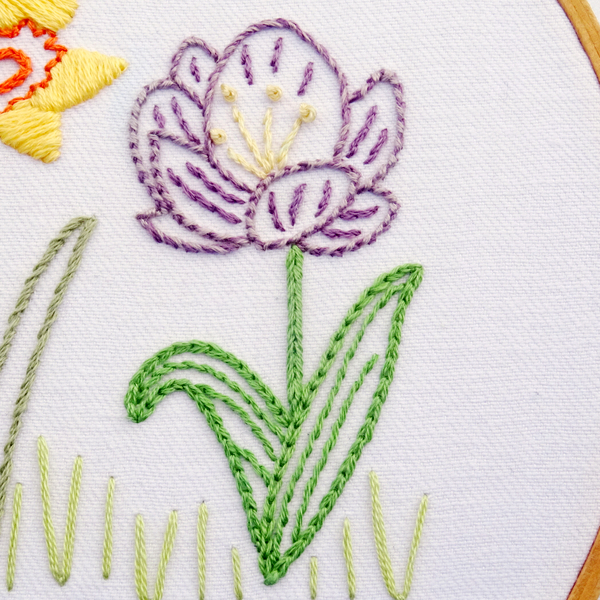
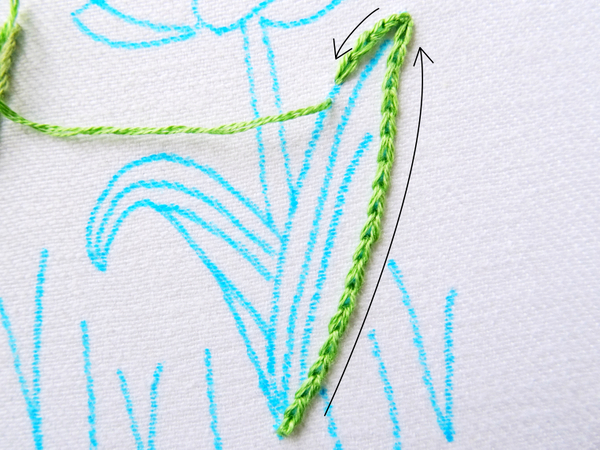
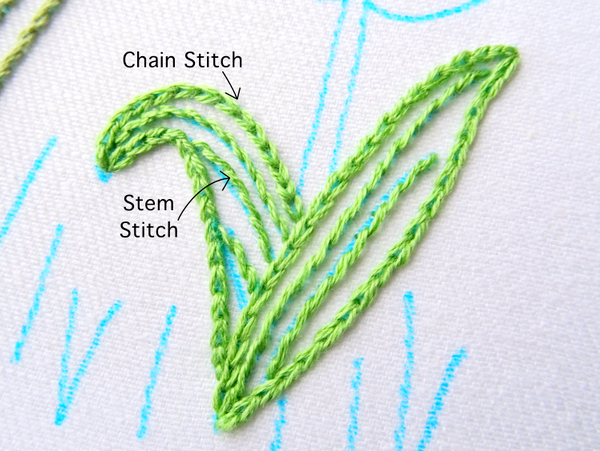
Stitch the outline of the tulip leaves with Chain Stitch using 3 strands of DMC 989.
Chain Stitch Embroidery Tutorial
For this final set of leaves, use the same method as above to create the sharp points at the top. Start at the bottom of the right leaf and stitch up the top. End the stitching at the top of the leaf (anchor the last stitch with a small loop), and start it again on the other side.
Finish stitching down the left side of the leaf, then move over to the the second leaf and repeat.
Step 2:
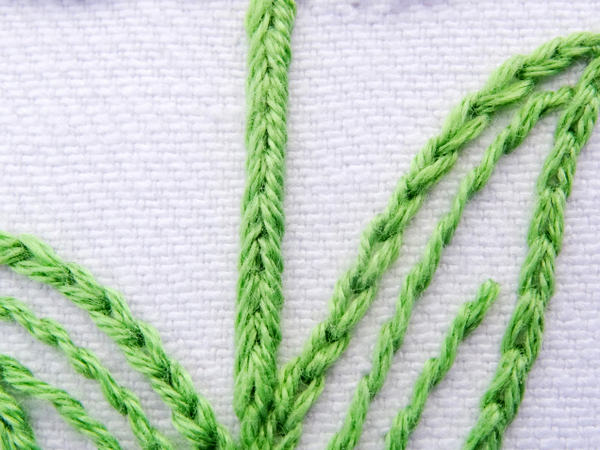
Stitch the leaf veins with Stem Stitch using 3 strands of DMC 898.
Step 3:
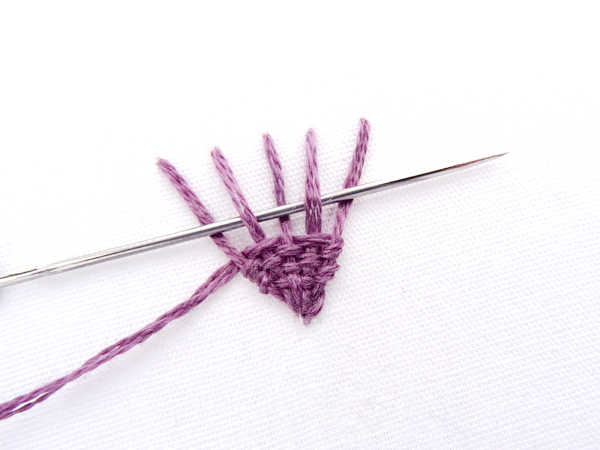
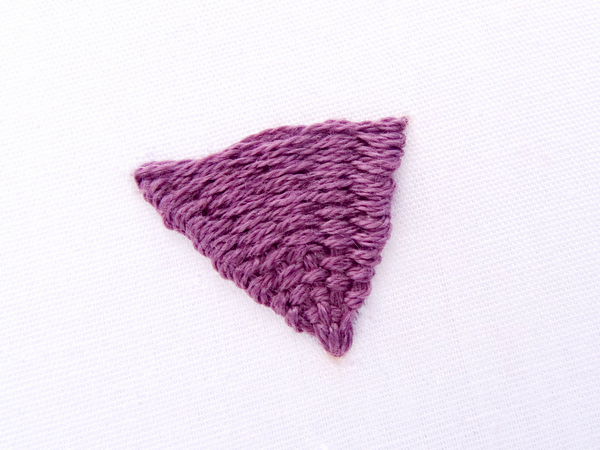
Stitch the flower stem with Heavy Chain Stitch using 3 strands of DMC 989
Heavy Chain Stitch Tutorial
Stitch a single line of heavy chain from the leaves up to the bottom of the flower.
Step 4:
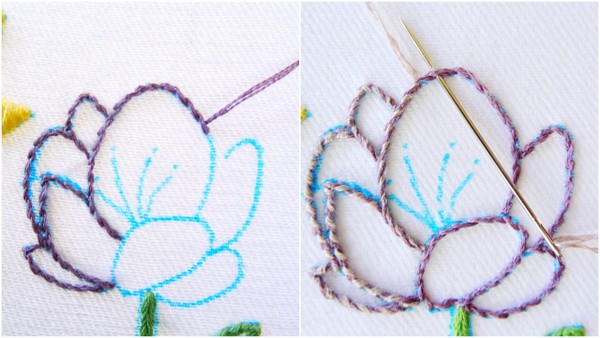
Outline the tulip flower petals with Stem Stitch using 4 strands of DMC 3041. Whip the stitching with 2 strands of DMC 3743.
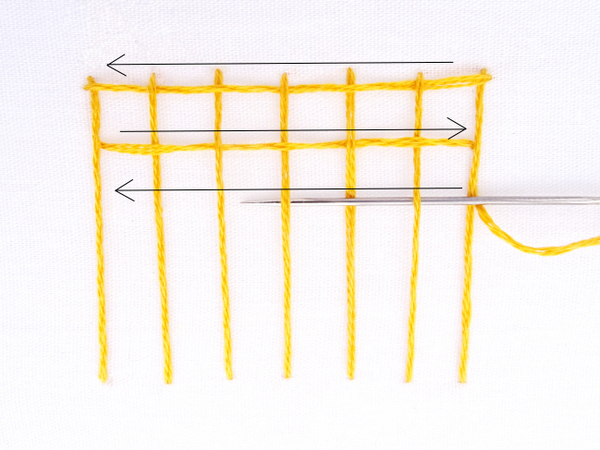
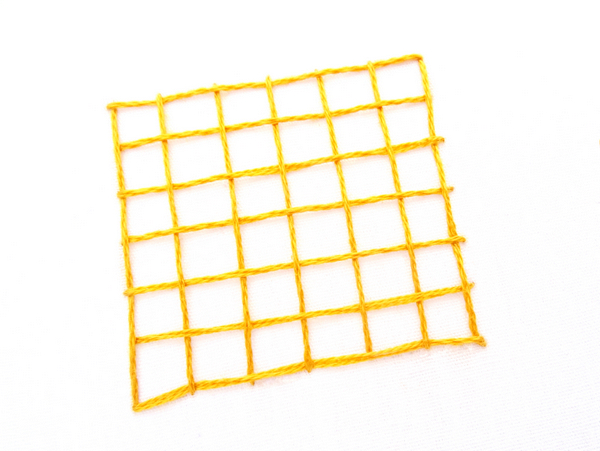
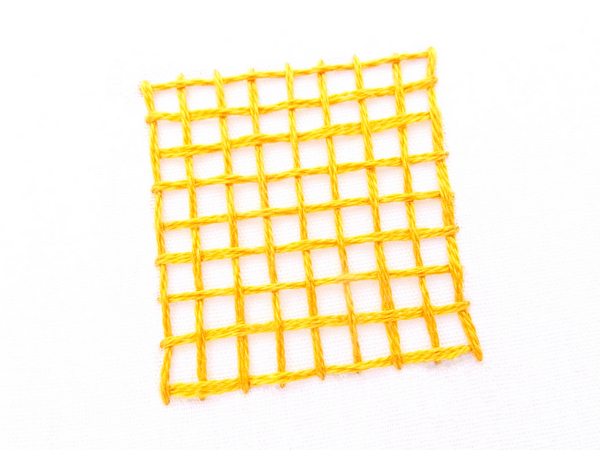
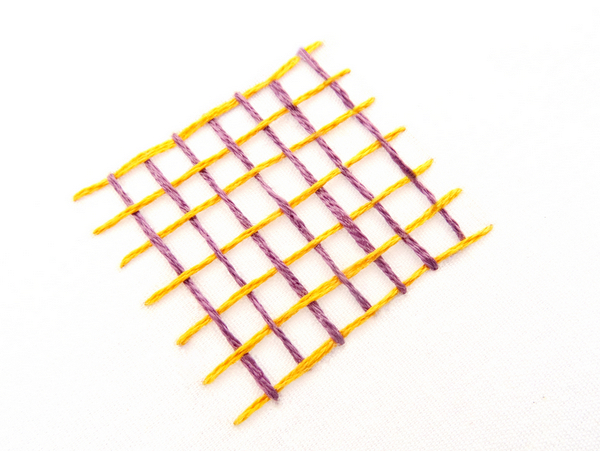
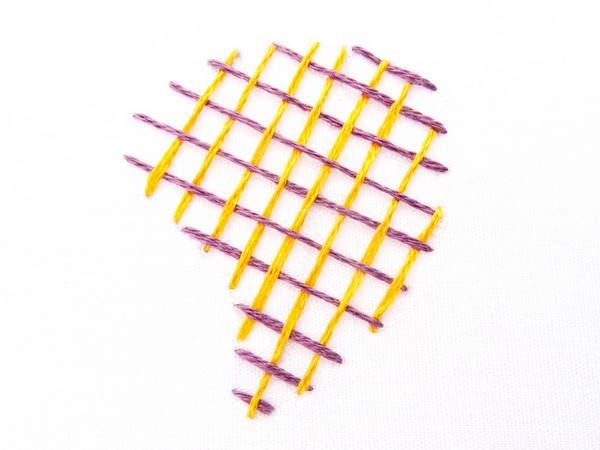
Whipped & Woven Stitches
Start at the bottom of each petal and stitch around and over the top. When all the petals are outlined whip the lighter color thread in and over each stitch without going through the fabric.
Step 5:
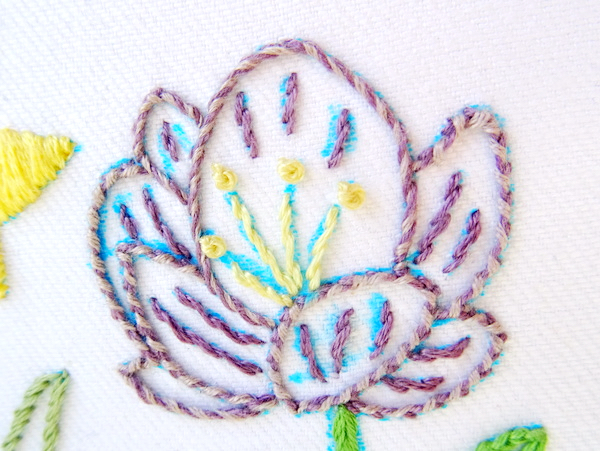
Stitch the detail lines inside the petals with Stem Sitch using 4 strands of DMC 3041.

Step 6:
Finish the flower by stitching the stamens with Stem Stitch topped by French Knots using 3 strands of DMC 677.
French Knot Embroidery Tutorial
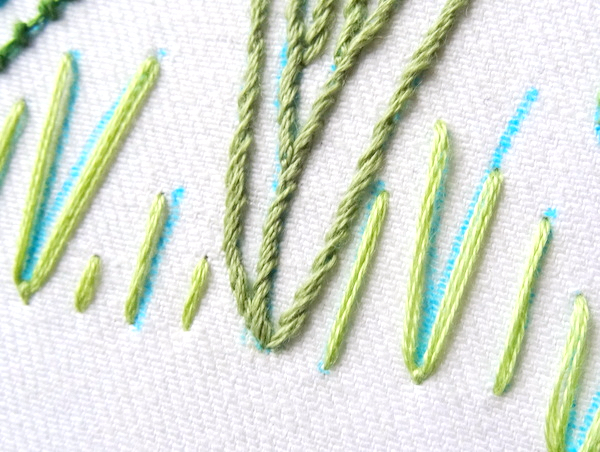
Grassy Meadow
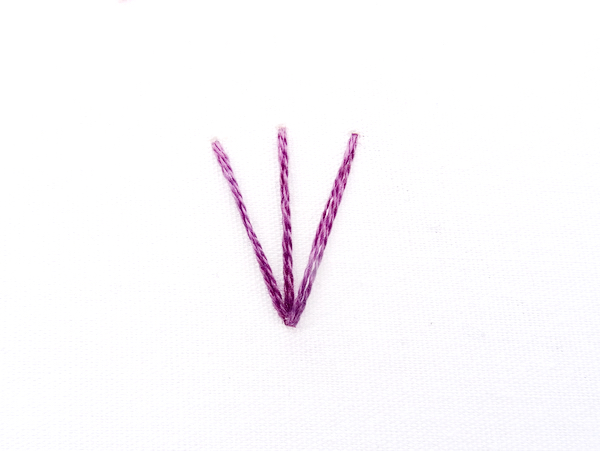
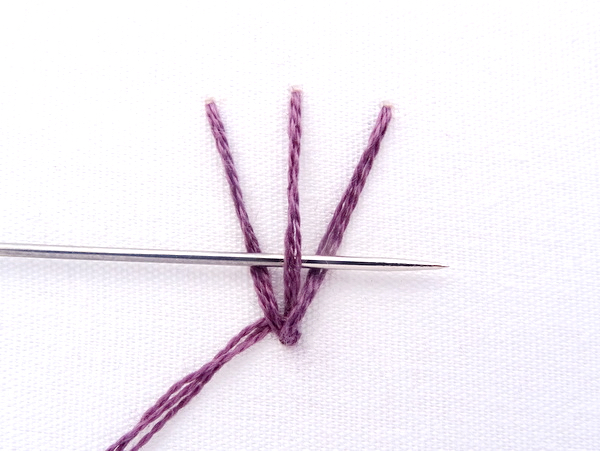
Step 1: Stitch the grass with Back Stitch & Fly Stitch using 4 strands of DMC 3348.
Fly Stitch Embroidery Tutorial
Use back stitch for the straight blades and fly stitch for the V-shaped blades.