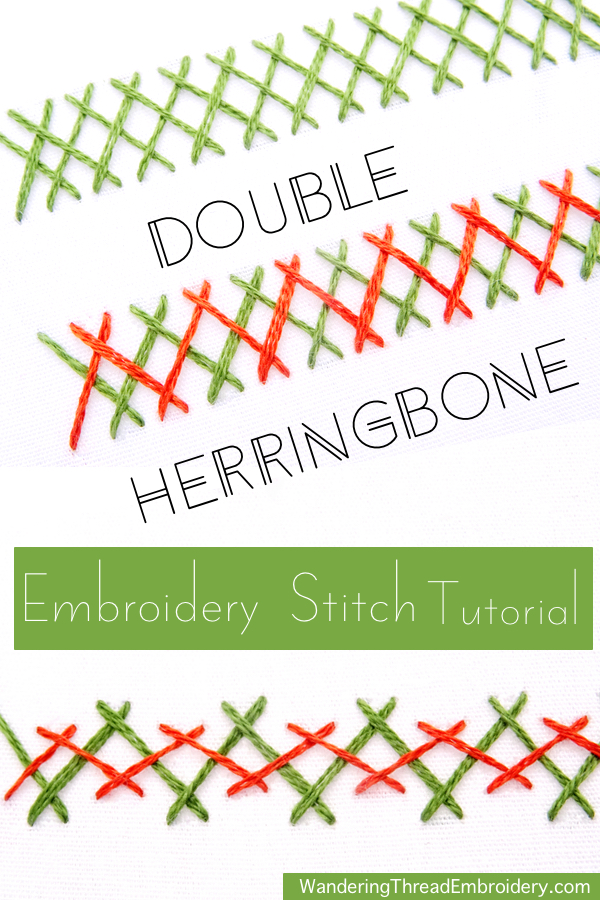
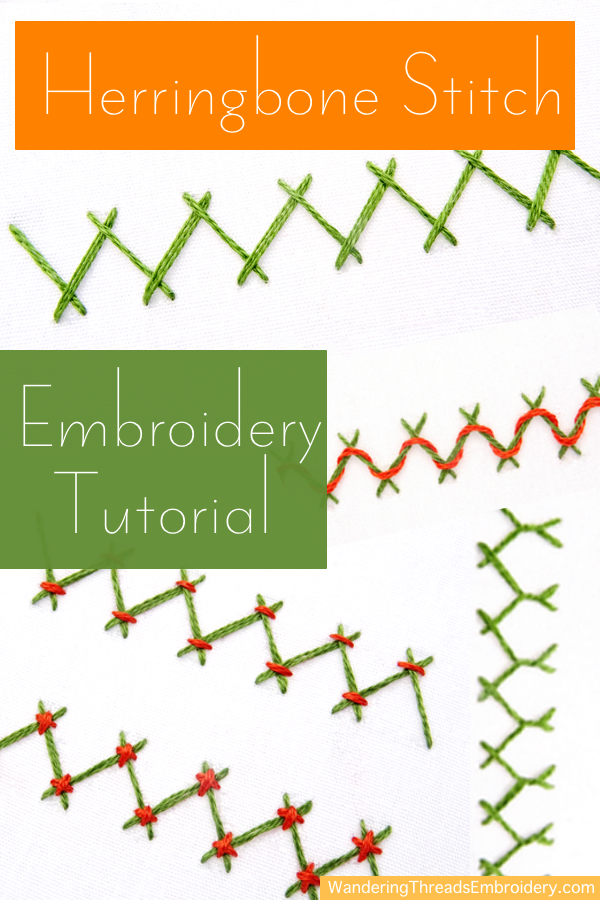
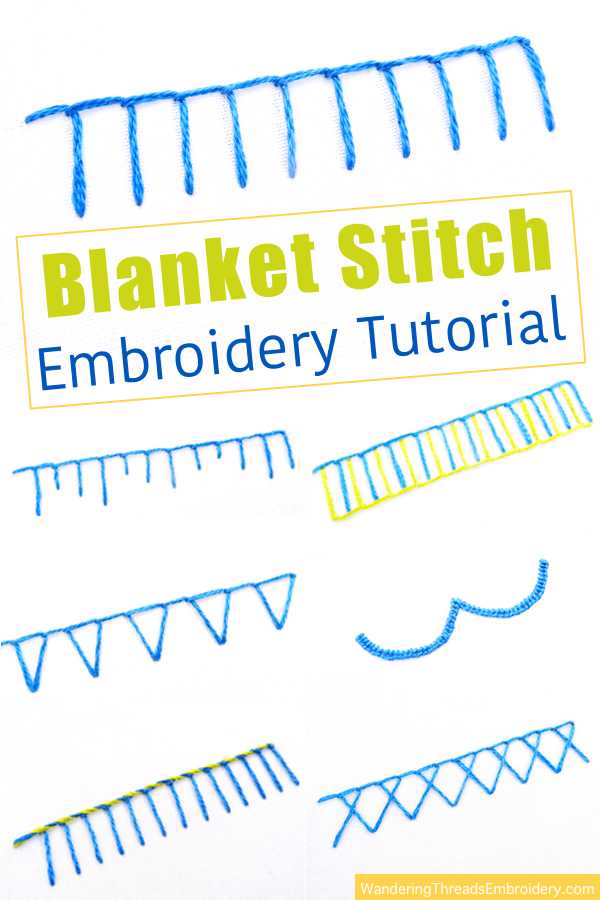
Blanket Stitch Embroidery Tutorial + 6 Variations
Blanket stitch may have traditionally been used to finish the edge of blankets, but the truth is that it’s useful for so much more! From hems to borders to applique to decorative shapes and textures, this is one of the most versatile embroidery stitches.
Blanket Stitch can be worked in straight rows, around curves, doubled up, crossed, twisted, and on and on. This tutorial covers the steps for blanket stitch along with six variations that take the basic stitch to the next level.
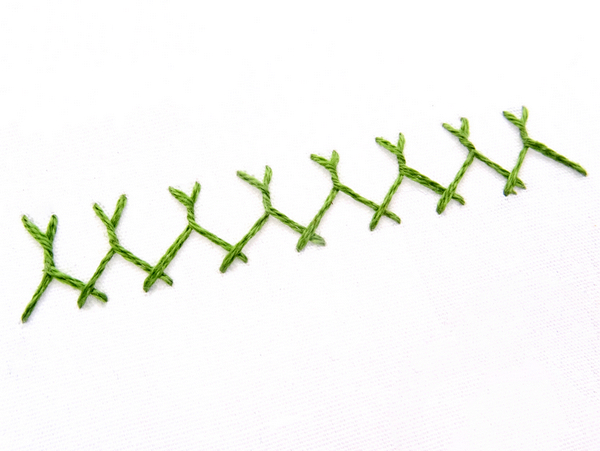
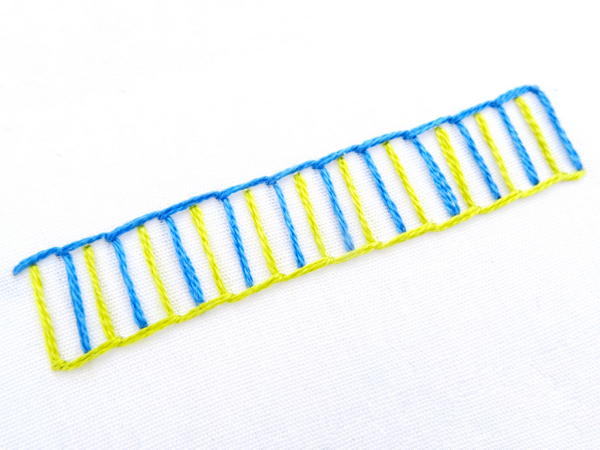
Blanket Stitch Step-By-Step
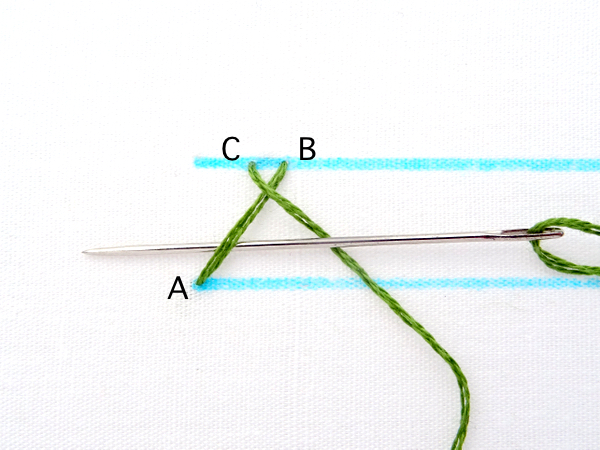
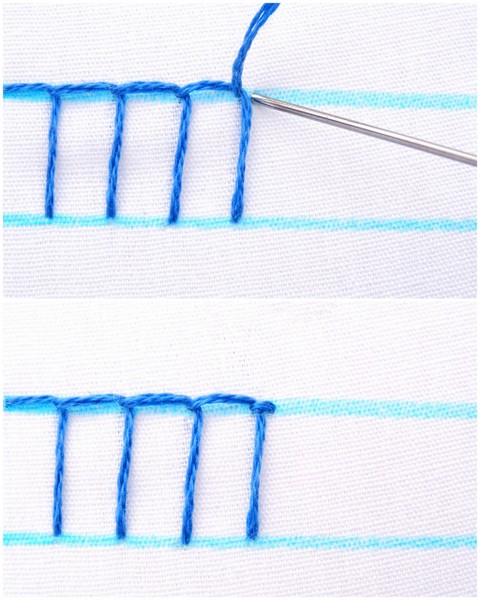
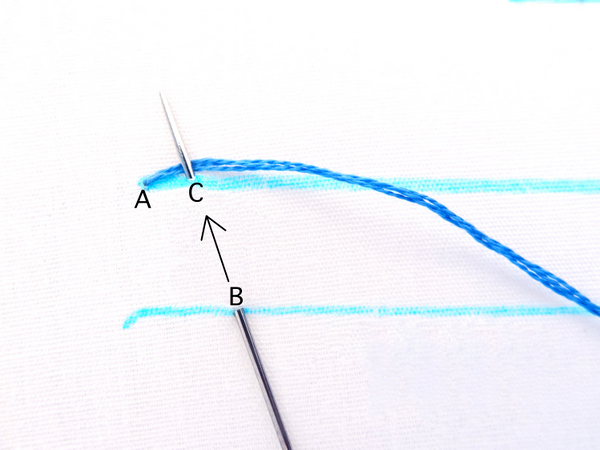
Blanket stitch can be worked in any direction. For this tutorial, we will be working from left to right using two horizontal lines as a guide. Start by bringing the needle out at the far side of the top line (Point A). Move over one stitch length and take the needle in on the bottom line (Point B) and back out on the top line (Point C). Keep the working thread looped behind the needle.
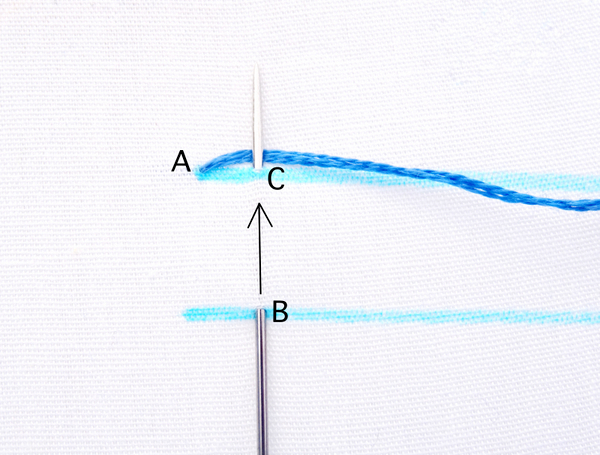
Pull the needle through to complete the first stitch. I find it helpful to keep a finger on the working thread as I pull the needle through so it remains in place while staying taught.
* A quick note on the “sewing” vs. “stabbing” method *
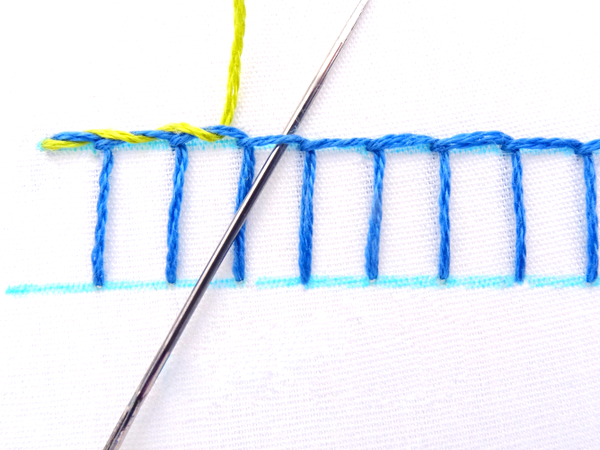
The method demonstrated above is the “sewing” method where the needle is woven in and out of the fabric. You can just as easily make this stitch using the “stabbing” method by putting the needle in at point B, pulling it all the way through, and then bringing it back out at point C. I often find the stabbing method easier when working on a project where the fabric is pulled tight in an embroidery hoop.
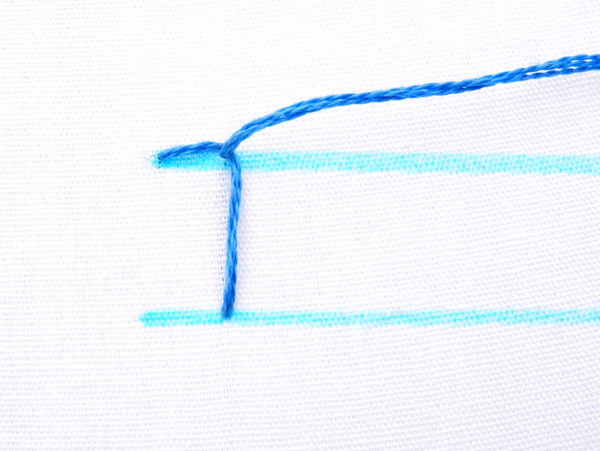
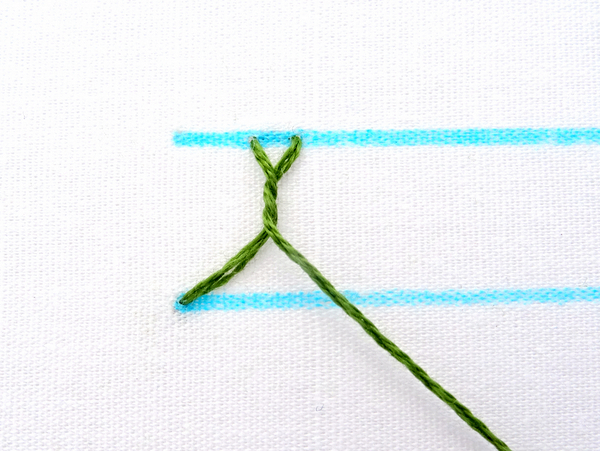
Use the same steps to make the second stitch. Move one stitch length away and insert the needle in at point D and out at point E. Always remember to keep the working thread under the needle before completing the stitch.
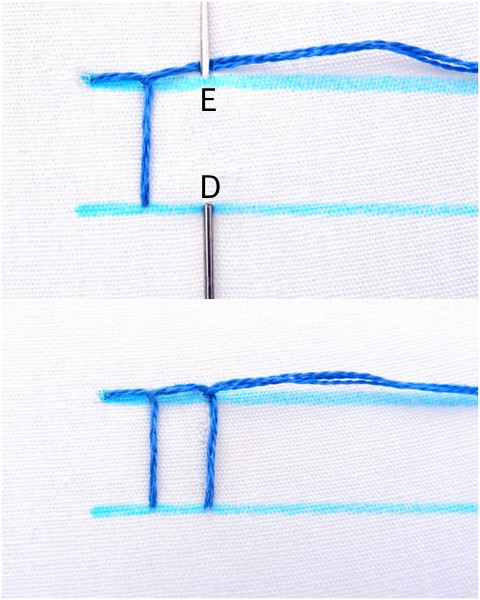
Continue stitching until you reach the desired length. End the stitch by bringing the needle down and through the fabric next to the top of the last stitch.
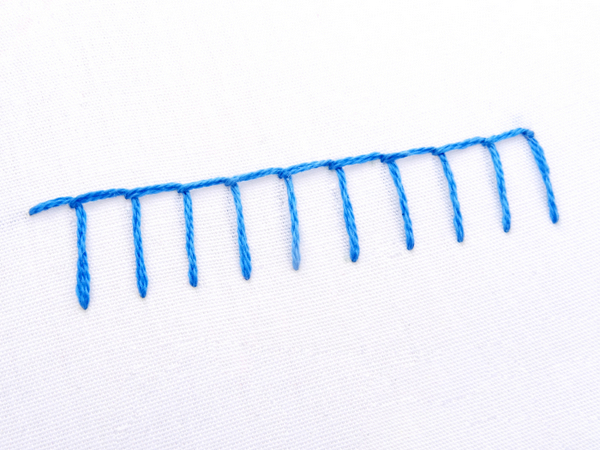
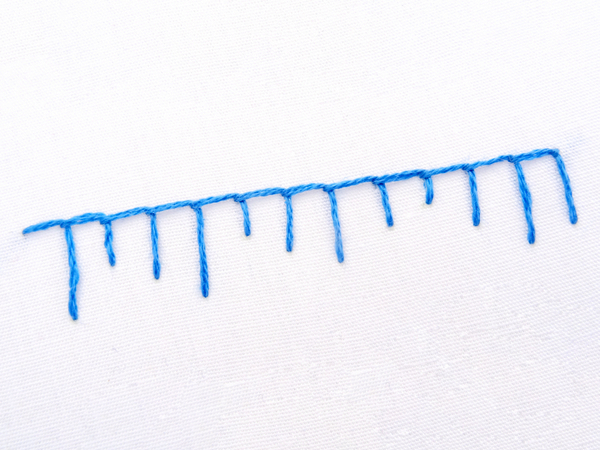
Blanket Stitch Long & Short
Perhaps the easiest of the blanket stitch variations is Long & Short. Just as it sounds, this version of the stitch features long and short stitches in varying lengths. There are no rules regarding stitch length so have fun with it and get creative! This version uses the same steps as the classic blanket except not all the stitches will reach the bottom line.
Double Blanket Stitch
Double blanket is a variation where a second row of stitching is made between the first. You can use the same color thread, or add some pizzaz with a contrasting color.
Start by making a row of blanket stitch. Next, flip the stitching upside down and start another row with the stitches placed between the previous row.
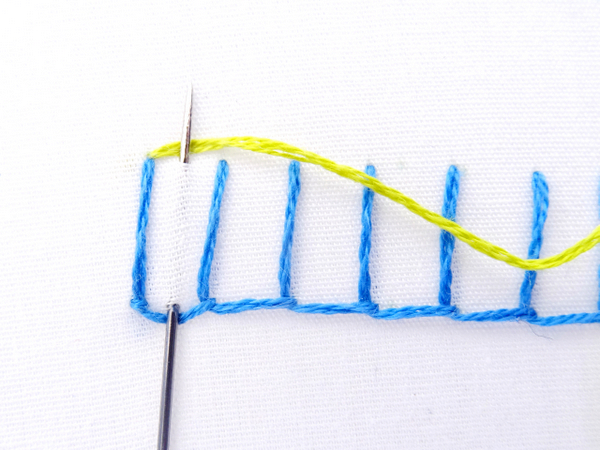
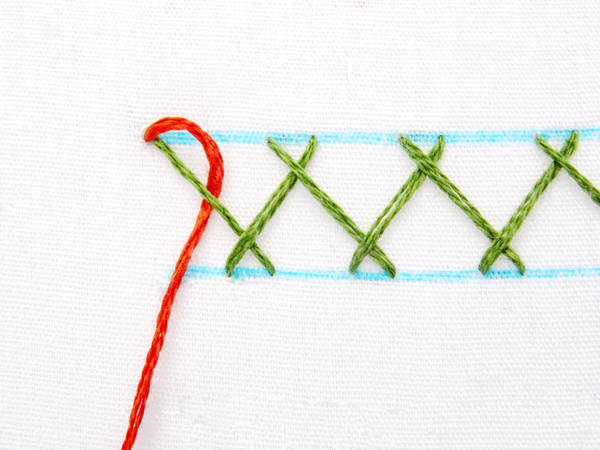
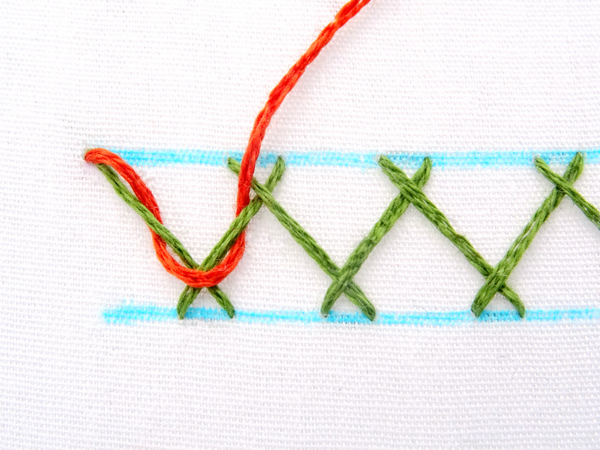
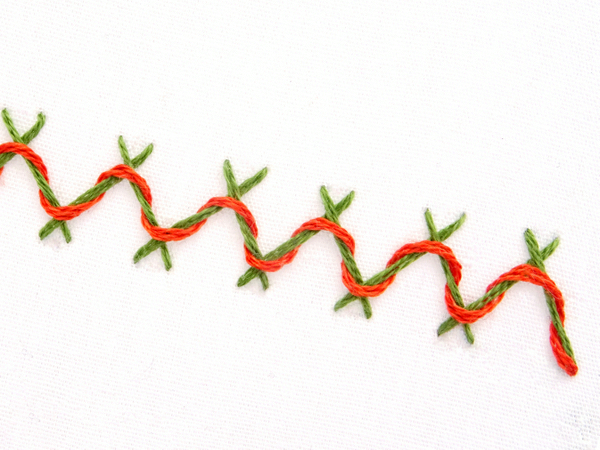
Whipped Blanket Stitch
This super-simple variation adds an extra layer of color to the basic stitch. Start with a row of blanket stitch. Choose a contrasting color thread and bring the needle up on the top left side. Without going through the fabric, weave the new color thread over and under the top line of stitching.
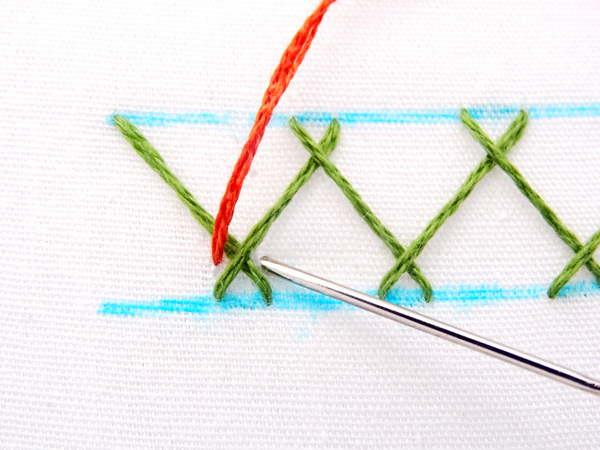
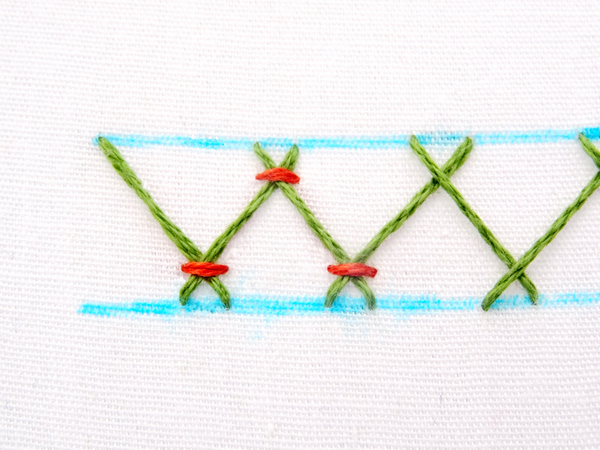
Closed Blanket Stitch
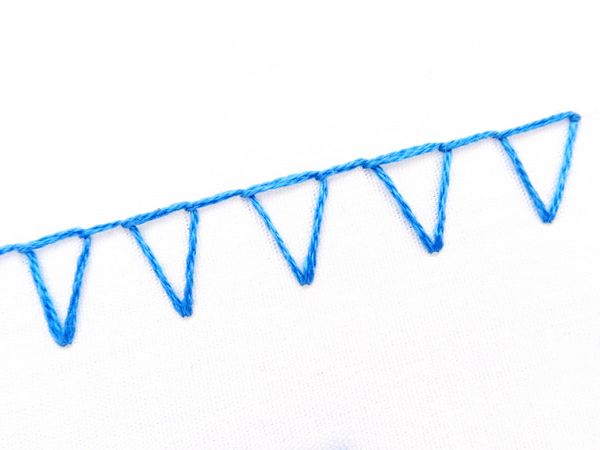
Closed blanket stitch takes the basic stitch and turns it into a row of triangles connected by a shared line.
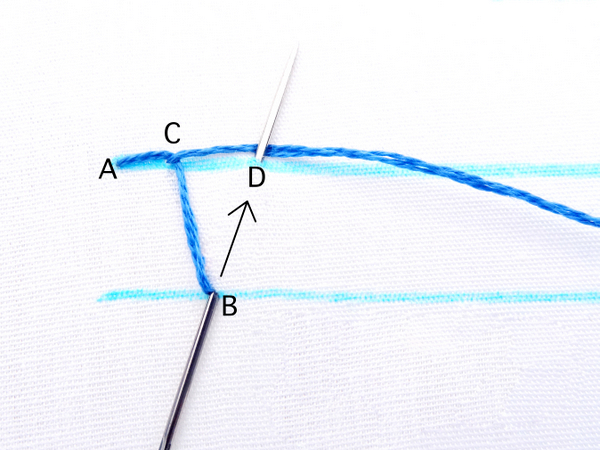
Start with two parallel lines and begin the first stitch on the left side of the top line. Follow the same format as for the basic stitch – out at point A, in at point B, and back out at point C. The key difference from the classic stitch is that the line between B and C is diagonal instead of straight. Complete the first step by looping the working thread behind the needle and pulling it all the way through.
Begin the second stitch at point B and bring the needle back out at point D. Again, make the line between B and D diagonal.
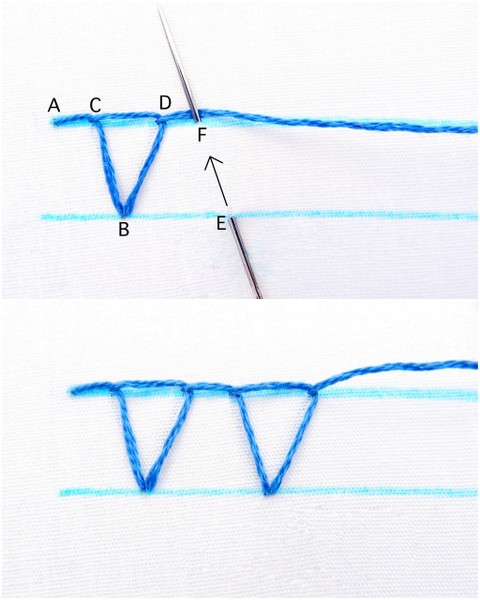
You have now closed the stitch and created your first triangle shape. Start the next closed stitch with another diagonal stitch from point E to point F. The idea is to mirror the angle of the stitch from B to C as closely as possible. This ensures that the row of triangles are similar in shape. Next, close this series of stitches by inserting the needle back in through point E and creating another diagonal line. Keep stitching in this manner until you reach the desired length.
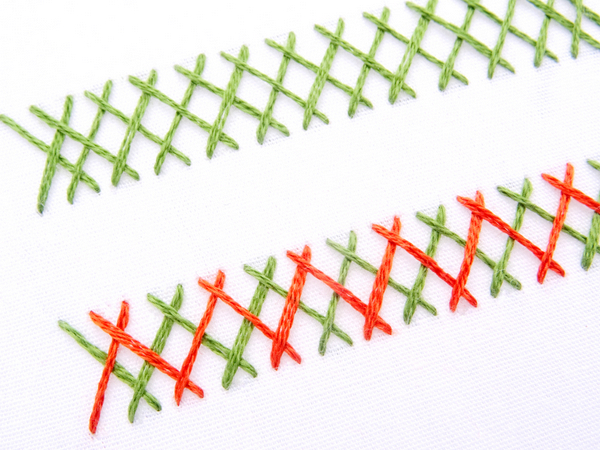
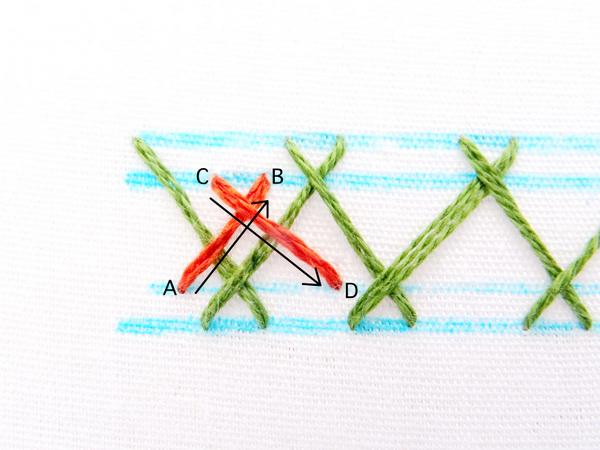
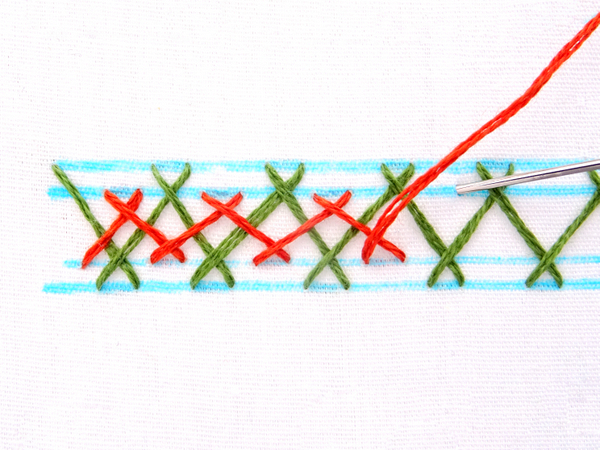
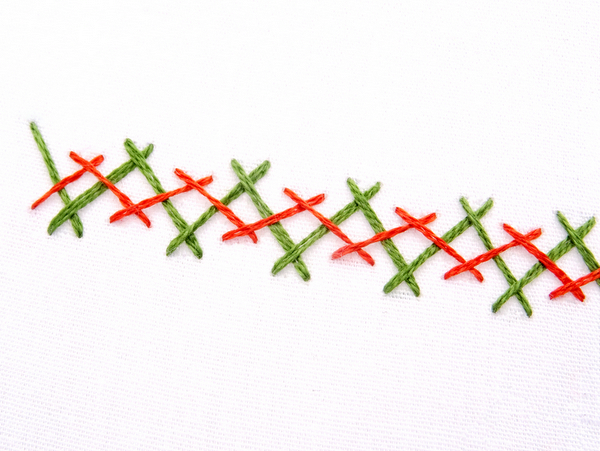
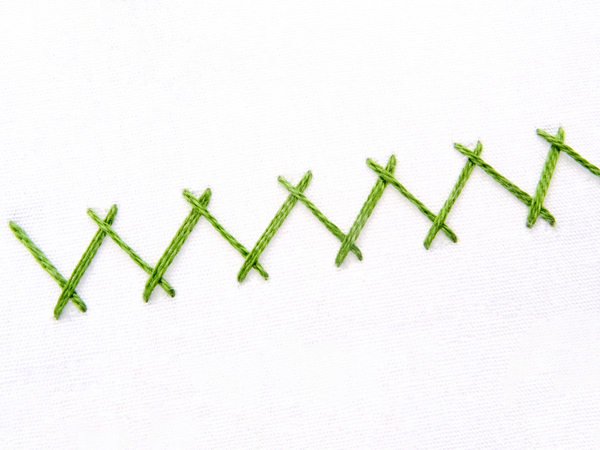
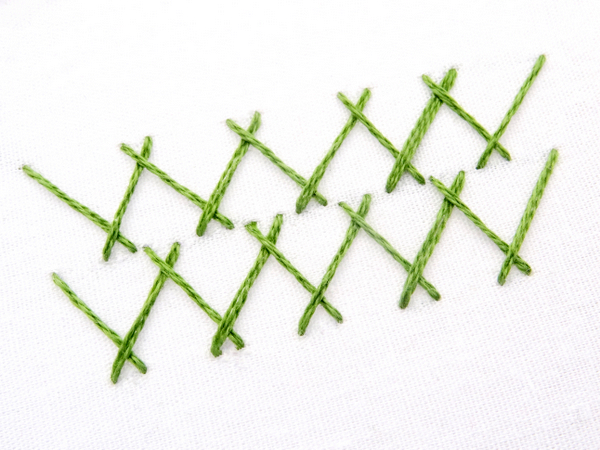
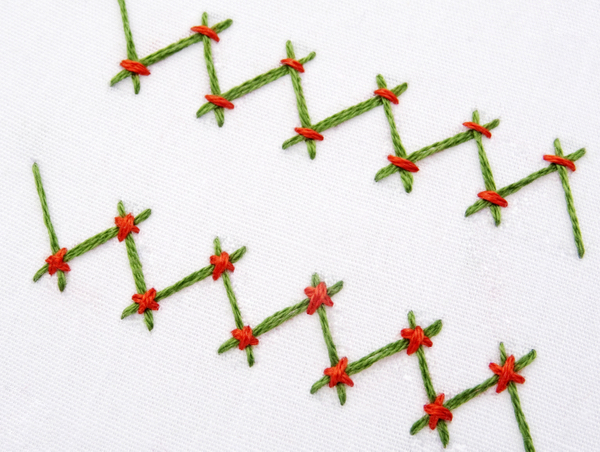
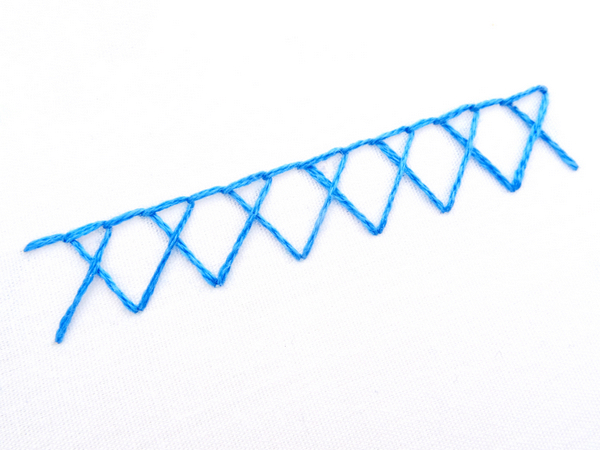
Crossed Blanket Stitch
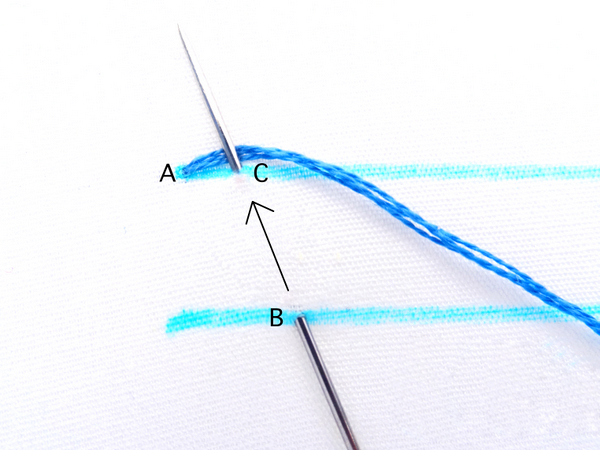
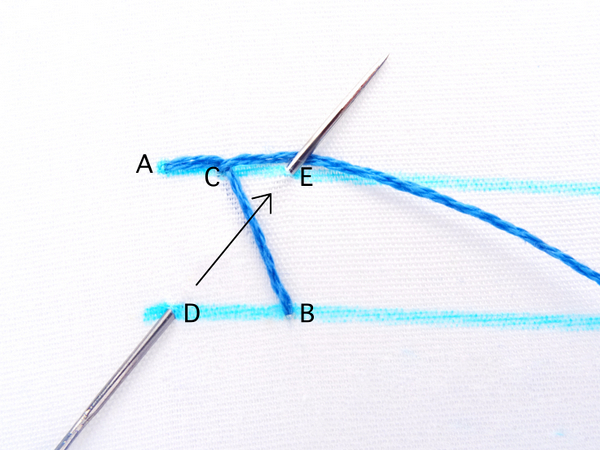
This is another variation that uses diagonal stitches to create an interesting pattern. This time, instead of closing the stitches, we will be crossing them to form a series of connected diamonds. The first stitch follows the same steps as for closed blanket. Start at point A, come out at point B, and go back in at point C. The line between B and C is diagonal.
Next, move the needle to the left side of point B and make another diagonal stitch up to point E. This stitch will cross over the previous stitch.
Start the third stitch at point F and make a diagonal stitch up to point G. Just like with the closed blanket stitch, try to keep the angle of the diagonal stitches similar to give the crosses a uniform appearance.
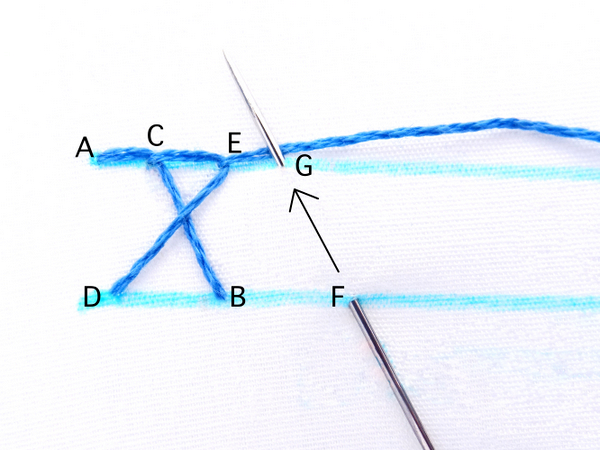
Finish this pair of crossed stitches by moving the needle back to point B and making a diagonal stitch from there up to point H.
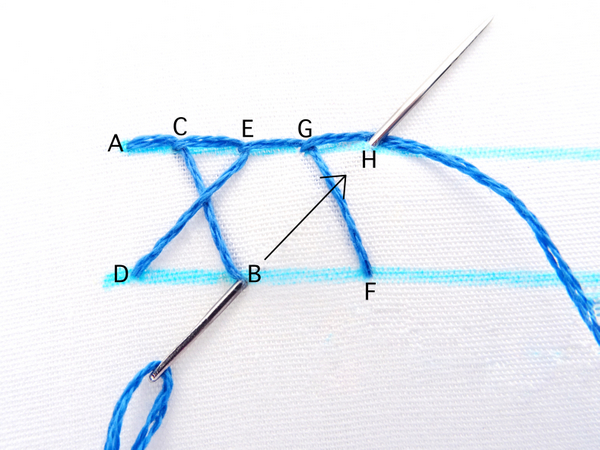
Start a new pair of crossed stitches by moving to the left of point F and making a diagonal stitch up to the top line. Continue this series of stitches until you reach the desired length.
Blanket Scallop Stitch
Finally, we come to the last blanket stitch variation in this tutorial. At first glance, blanket scallops appear to have little in common with the rest of the blanket family, but upon closer inspection, you will see that this decorative edging or outline stitch is actually composed of tiny blanket stitches.
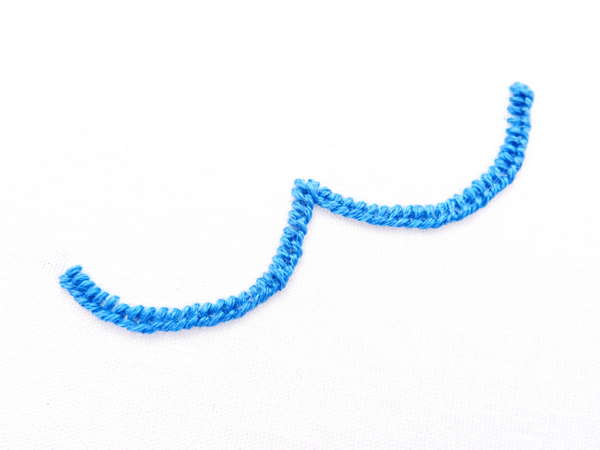
This stitch requires knowledge of running stitch which you will find in the Basic Line Stitches Tutorial. Start by making a series of scallop shapes with running stitch.
Next, starting at one end of the running stitch, make a row of blanket stitch over the top. Keep the stitches short so they lie just on either side of the running stitch.
Follow the curves closely and keep the stitches close together. Note that you can make this stitch in any direction, but the solid line (top of the blanket stitches) will always lie at the top. Depending on if you want the line on the top or bottom of the scallops, you may want to rotate the running stitch before stitching over it. For this example, I wanted the top line to be on the outer curved edge of the scallops so I flipped it and started my stitching with the scallops in the correct direction.
Despite the name, the blanket scallops are suitable for more than just scallop shapes. Use this stitch as a border for any curved shape, including a circle.

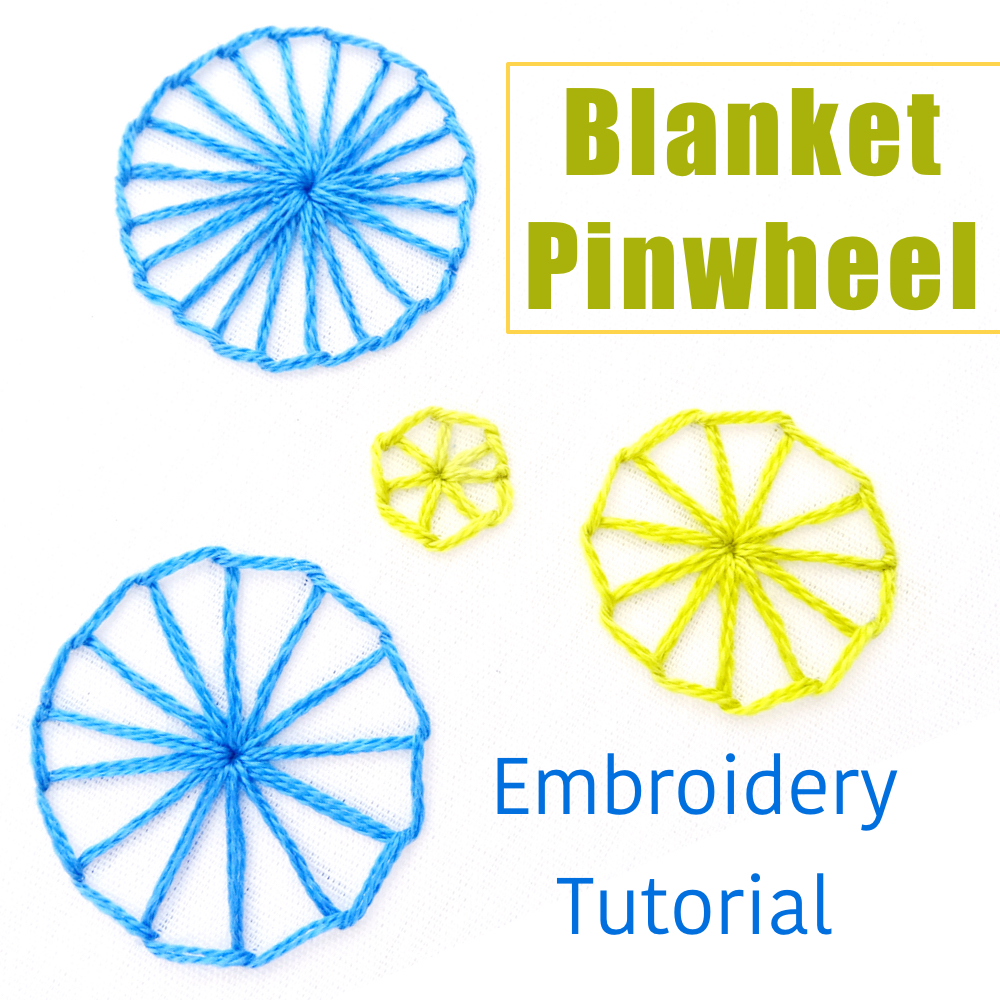
Blanket Stitch Pinwheel Tutorial
Want to learn more blanket stitch variations? How about these cool pinwheels?
Blanket Pinwheel Embroidery Tutorial
Blanket Stitch Embroidery Patterns
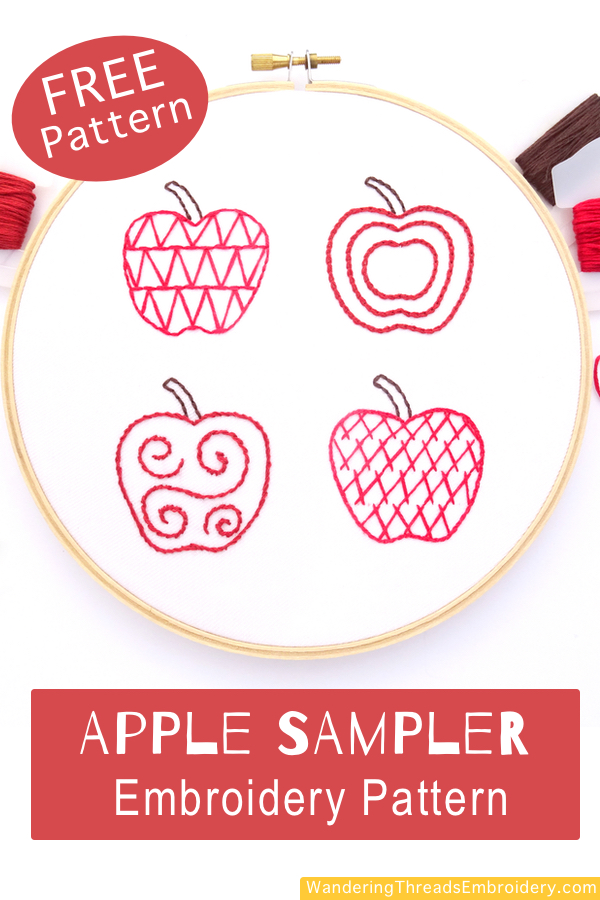
Put your new stitching skills to use with this bright and colorful fall pattern:
Pumpkins & Leaves Hand Embroidery Pattern