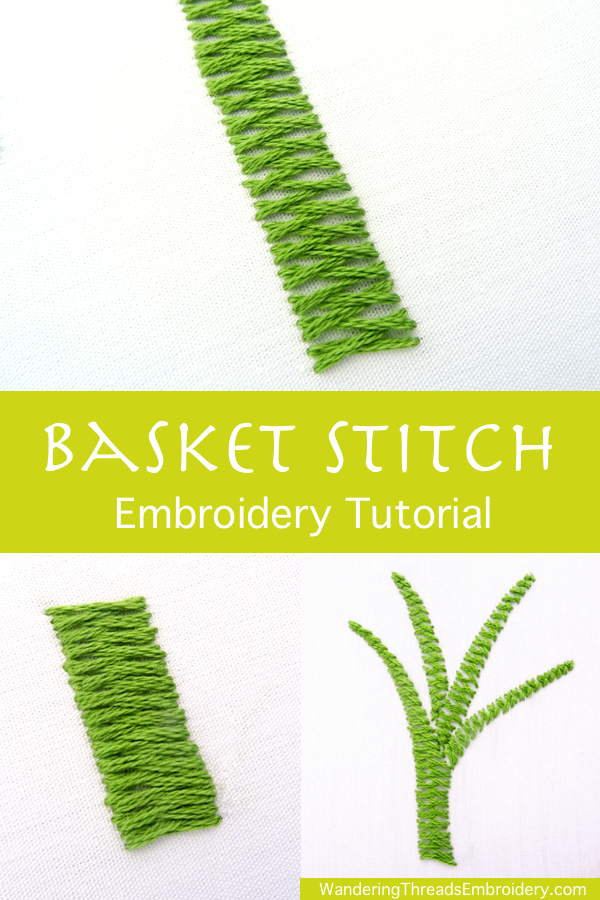
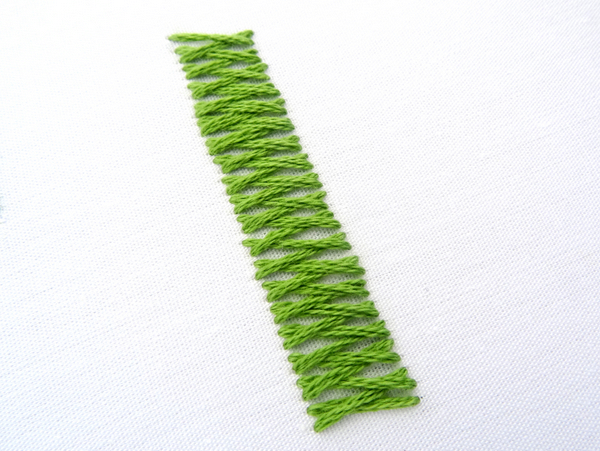
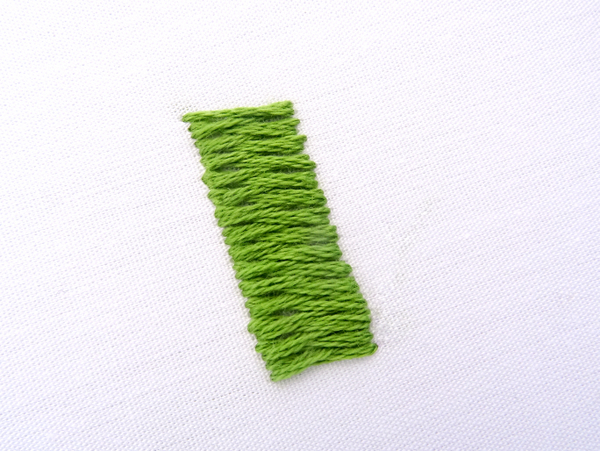
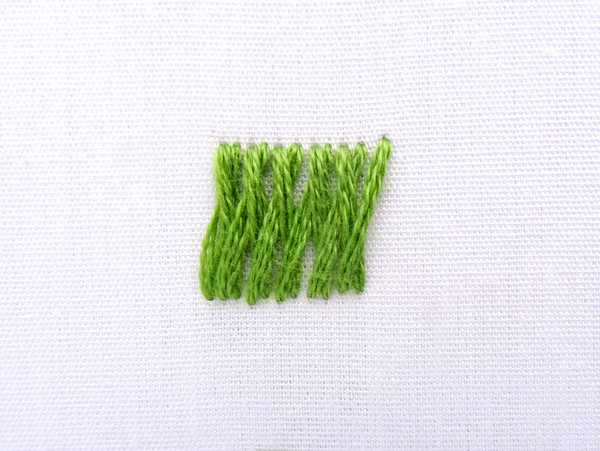
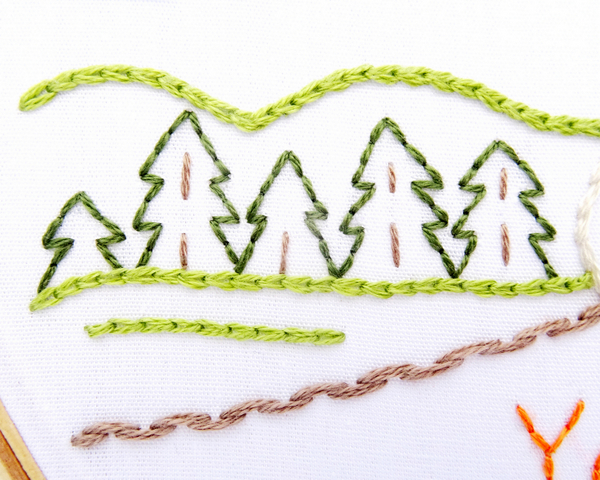
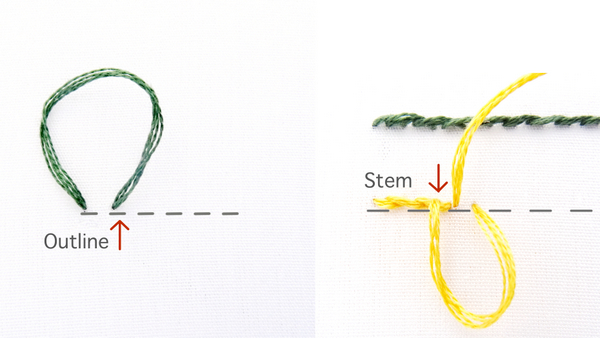
This is a beautiful stitch that creates a basket-like woven texture. It can be worked in an open fashion to show off the individual stitches, or close together to create texture. I love using this stitch for tree branches, wide stems or a thick border.
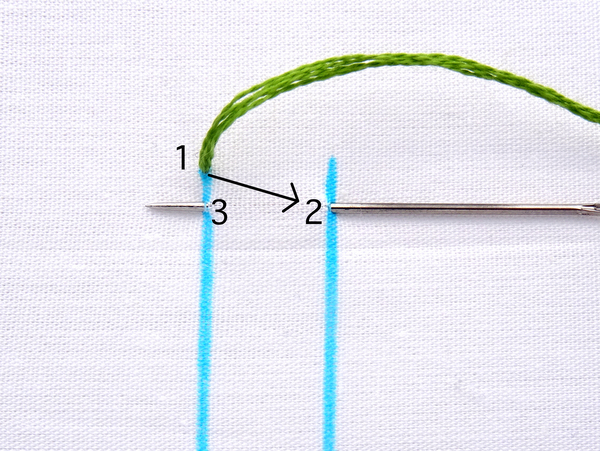
To begin, draw two parallel lines in a vertical orientation. I find it easier to work basket stitch vertically, but you can certainly work it from left to right if you prefer.
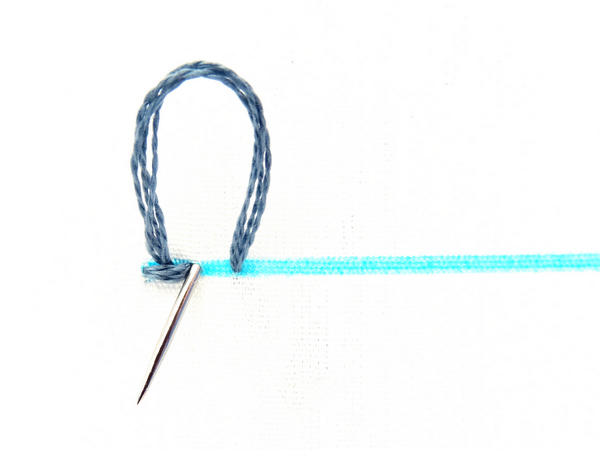
Take your needle up through the fabric at the top of the left line (1) and bring it down through on the right side (2). Note that point 2 is diagonal from point 1. Slide the needle behind the fabric and out at point 3 which is straight across from point 2.
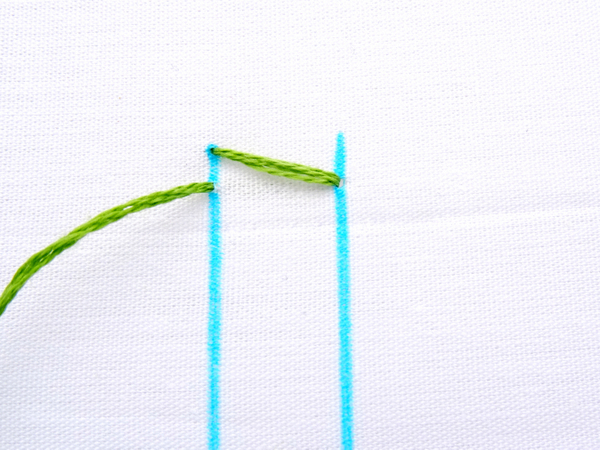
Pull the thread through. You now have a single diagonal stitch.
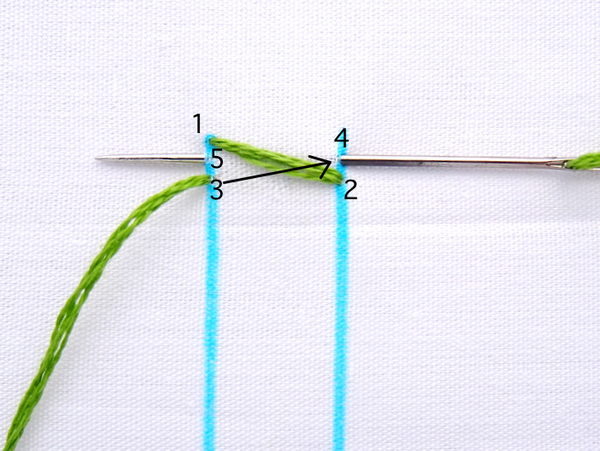
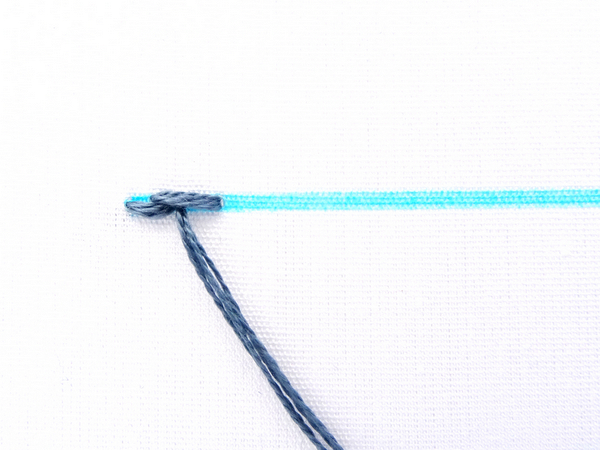
Next, bring the thread over to point 4, insert the needle, slide it behind the fabric, and then out at point 5. Just like for the last stitch, 3 and 4 are diagonal from each other, and 4 and 5 are straight across.
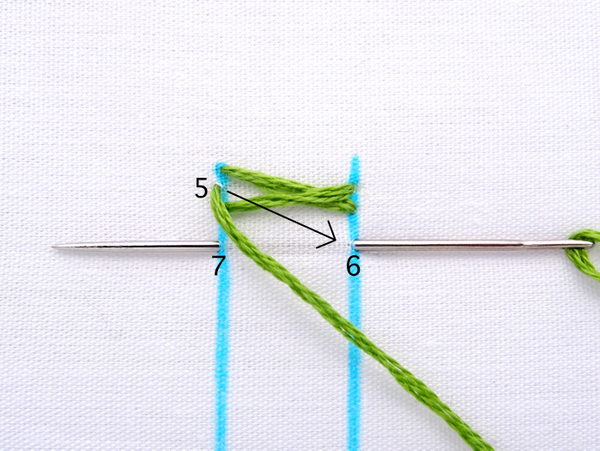
From here, simply repeat the actions of step one. Take the thread from point 5, go diagonally down to point 6, insert the needle, and come out at point 7.
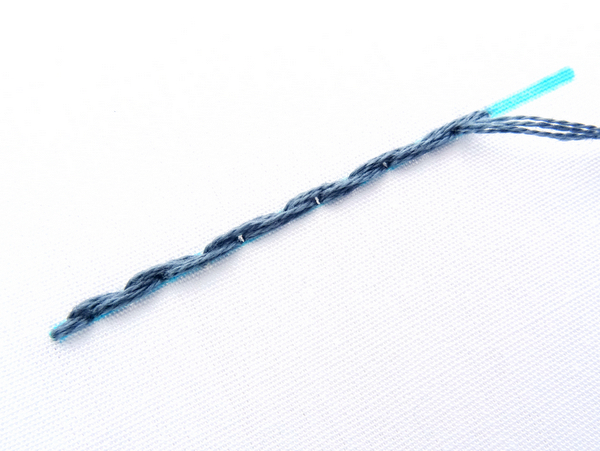
Keep repeating the pattern above: diagonal down, straight across, diagonal up, straight across. The final result is a row of woven stitches!
Basket Stitch Variations
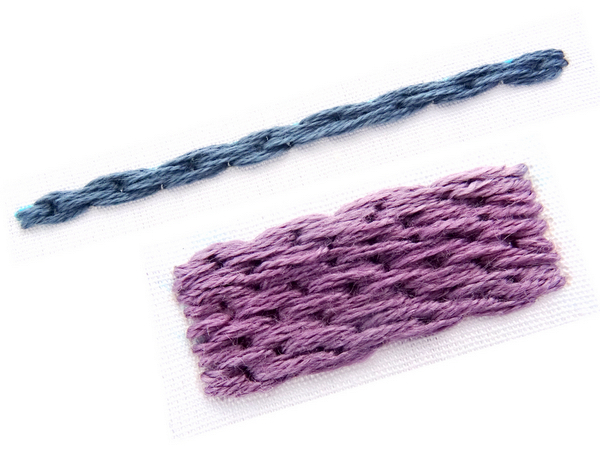
There are several ways to modify this stitch. First, you can work the stitches close together to create a more textured woven look.
Second, you can work this stitch horizontally from left to right. While this doesn’t really result in a different look, it can be more intuitive for some stitchers.
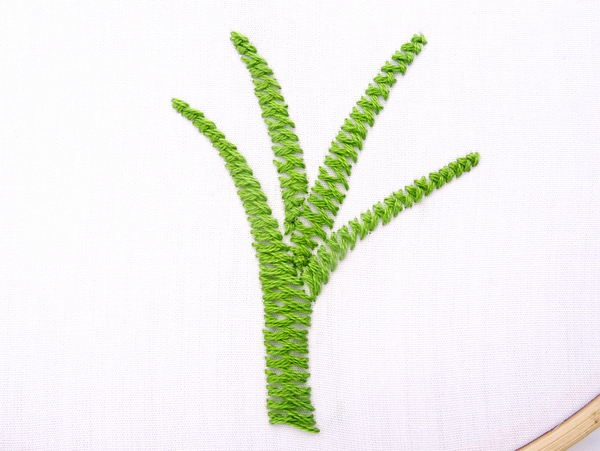
Finally, basket stitch can be used to create gentle curves. I am using the word “gentle” because trying to make this stitch work around sharp curves is not easy or advisable (trust me on this one). In the example below, you can see you how nicely the stitch flows around the soft curves of the tree trunk.
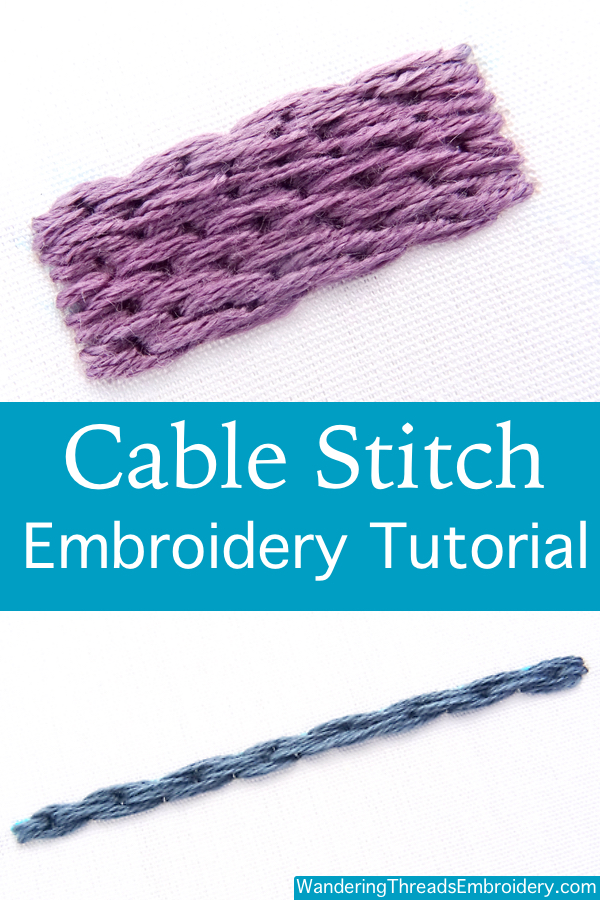
Cable Stitch (also known as side to side stem stitch) is a simple stitch that alternates stem and outline stitch to create a brick-like texture. It is commonly used to outline objects, make borders, or worked together in rows to fill a space with an interesting texture.
Single Cable Stitch
If you are already familiar with stem and outline stitch, cable stitch will be a breeze. If not, it will still be a breeze because these are both simple stitches to master! For a lesson on Stem and Outline stitches, take a look at these embroidery tutorials: Basic Line Stitches (stem stitch tutorial) Outline Stitch Tutorial
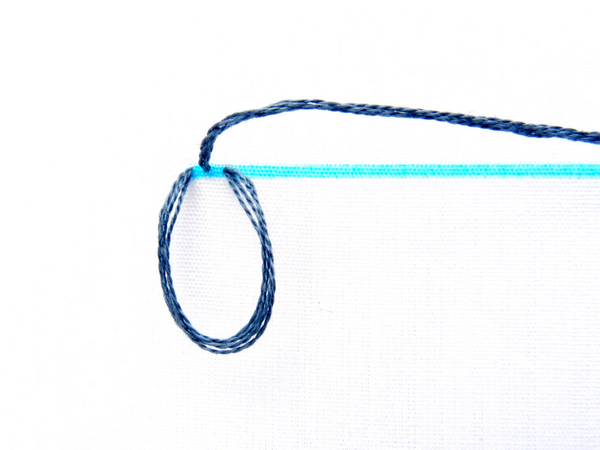
Begin by drawing a line and making a single stem stitch. You will be working from left to right. Remember, the key to stem stitch is to keep the working thread UNDER the line.
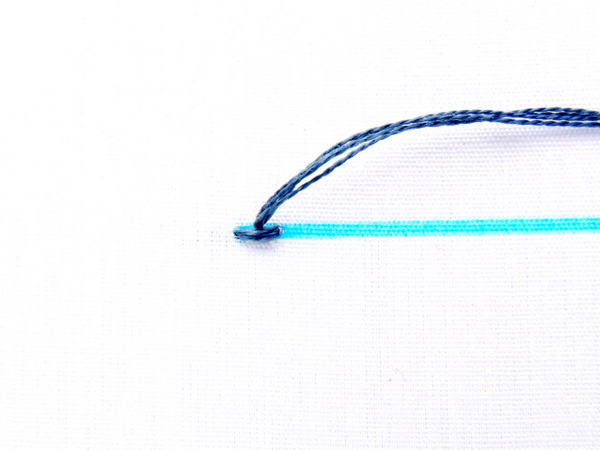
Once you have completed the first stem stitch, bring the thread back up in the same hole where the first stitch ended. This time, keep the working thread ABOVE the line, making a single outline stitch.
Continue working in this fashion alternating stem and outline stitch until you reach the end of the line. I like to keep track of my stitches by chanting in my head, “stem, outline, stem, outline”. But if you lose your place simply look back at the last stitch to determine if the loop is on top or below the line.
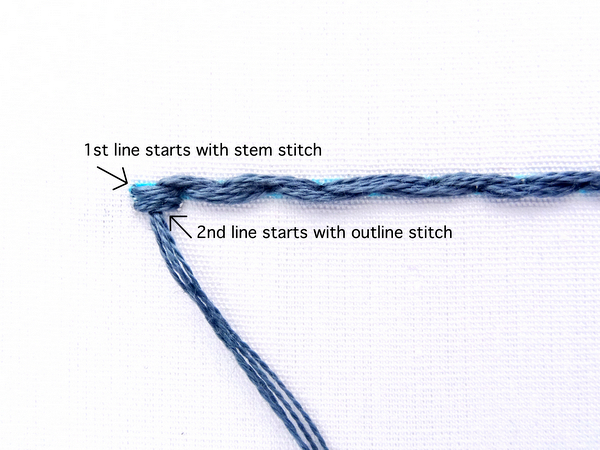
Cable Stitch Worked in Rows
While cable stitch makes a great outline or border stitch, the beauty of this stitch really comes through when worked in rows. I like to use cable stitch as a filler for geometric shapes or stitched in tight rows to create thick bands of texture.
There are a few things to keep in mind when using the stitch in this manner. First, to create a brick-like texture the order of the stitches in each row needs to alternate. The easiest way to achieve this is by bringing your thread back to the starting point and creating the second row directly underneath. I simply flip my work over, weave the thread through the back without going through the fabric) and then pop the needle back up at the start of the line.
Second, take a look at the first stitch in the line above and determine if it was a stem or outline. Since I started with stem stitch (thread below), the first stitch in my second line will be an outline stitch (thread above). Finally, try to keep the stitches even in length throughout the rows so the alternate stitches line up.
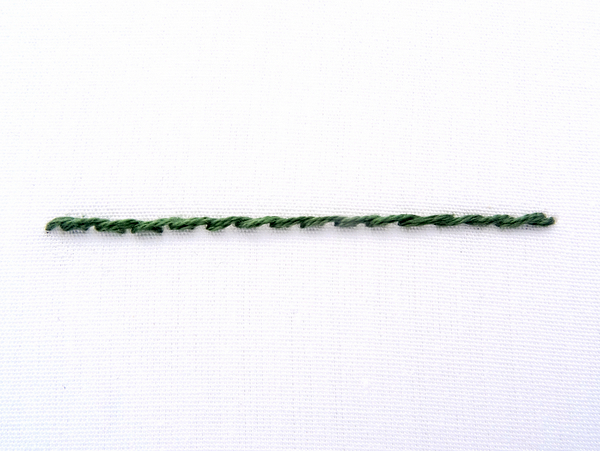
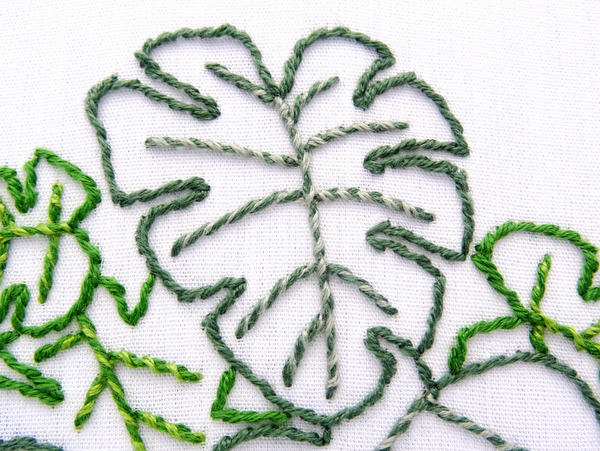
Outline Stitch is a basic embroidery stitch that is commonly used – as you might have guessed – for outlining objects. This simple stitch creates a smooth, twisted rope-like line perfect for curves, circles, or any shape that you want to highlight with an outline.
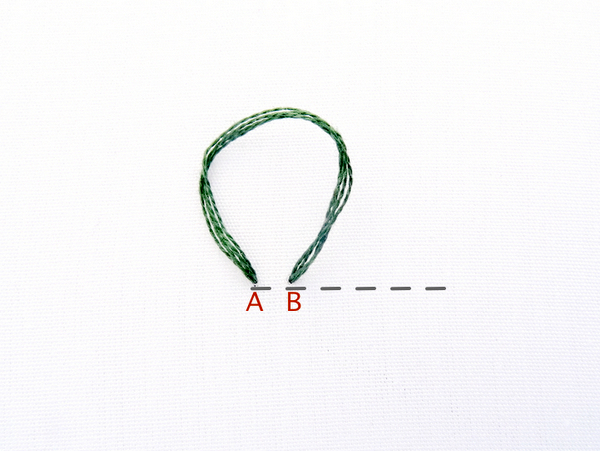
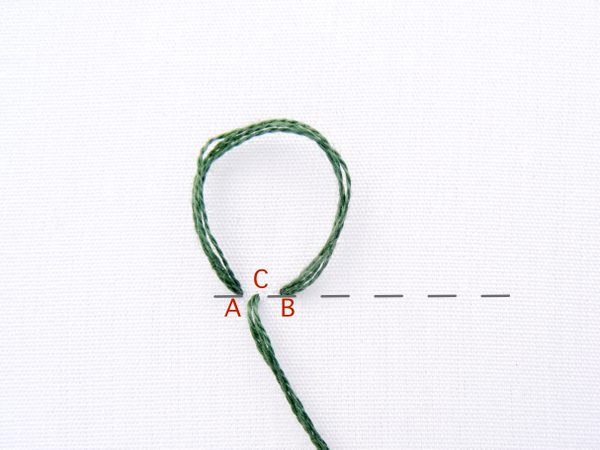
Start your outline stitch by bringing the thread up at the beginning of the line(point A). For this example, we are stitching from left to right. Pull the thread all the way through and insert it again one stitch length away (point B). This time, don’t pull the thread all the way through, leaving a small loop.
With the loop positioned above your stitching line, bring the needle and thread back up halfway between points A & B (point C). Pull it all the way through to create a stitch. For those following the diagram: Bring the thread up at point A, move one stitch length and bring it down at point B. Next, come back up again at point C while making sure the working thread is ABOVE the line.
As you continue stitching in this fashion, a twisted line will form.
Curved Outline Stitch
When using outline stitch to create a curved line, reduce your stitch length to ensure a smooth curve.
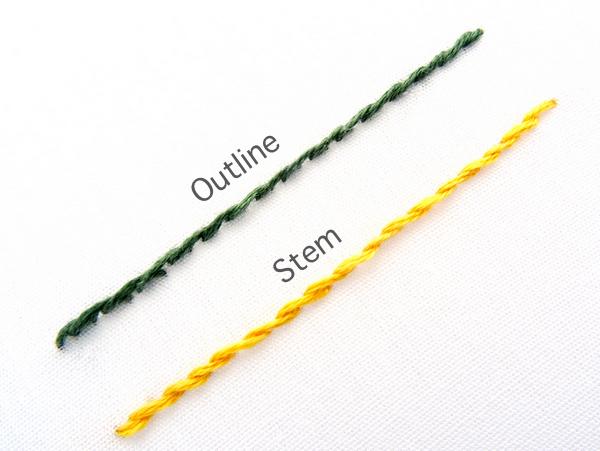
Outline Vs. Stem Stitch
Outline and Stem Stitch are very similar. So similar, in fact, that many people get them confused. While both stitches create a twisted line, the direction of the twist is opposite and, therefore, some patterns look better when using Outline while some look better when using Stem. Often, it boils down to personal preference.
When stitching, the key to remembering the difference is simple. For outline, the loop of working thread stays on the top, and for stem stitch, the loop of working thread stays on the bottom.
Like all of the basic line stitches, Outline stitch can be worked in rows to fill in objects or create a thick band of stitches. Simply position the lines of stitches in close rows to create this look.
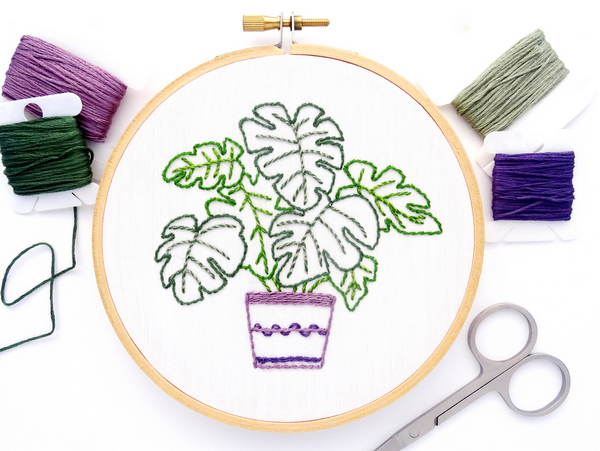
FREE Digital Pattern!
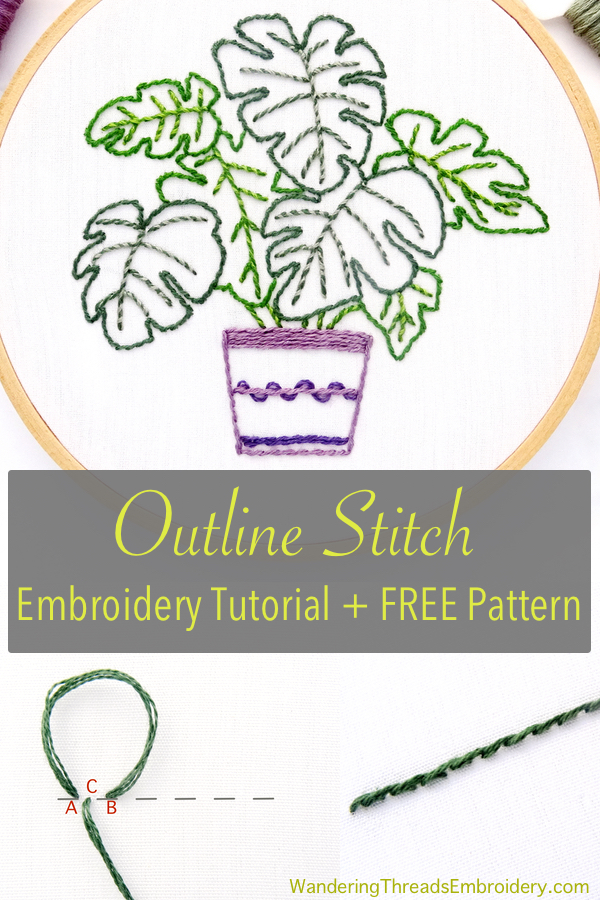
Want to practice your new stitching skills? You are in luck! I have created an entire pattern using only Outline stitch and its variations. This simple Philodendron plant pattern features curved and straight lines, lines worked in rows to create a thick band, and lines woven with a second color for a variegated look.
To download your free pattern, including a material list, tutorial for transferring the pattern, stitching instructions, and thread color suggestions, simply click on the link below. FREE Philodendron Pattern
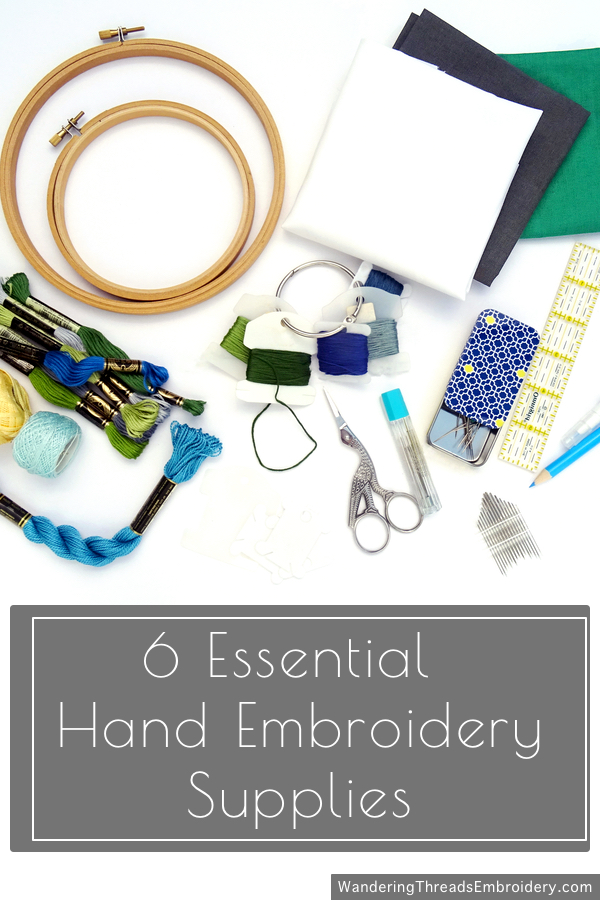
A few essential hand embroidery supplies are all you need to get started stitching and creating works of art.
Fabric
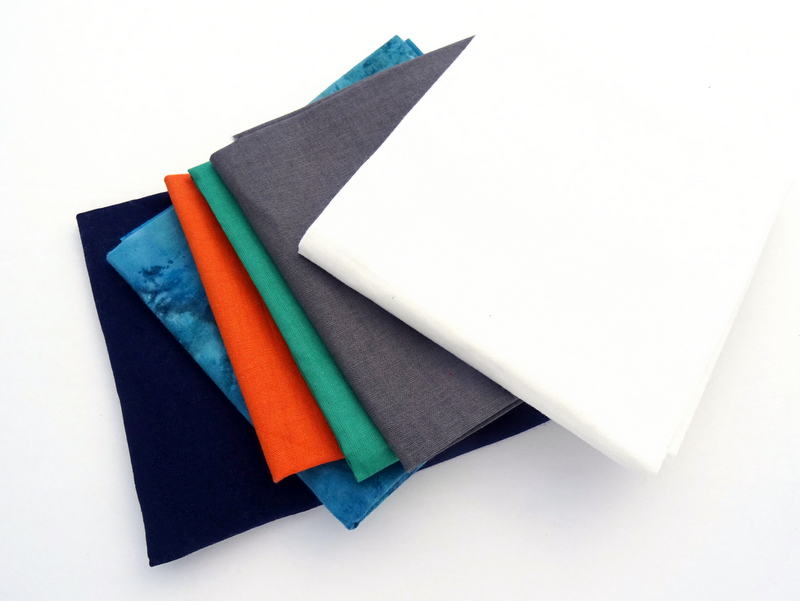
In general, you can embroider on any fabric. Cotton, wool, linen, felt, or even denim and leather, can be used as a canvas for creating beautiful embroidery. However, keep in mind that thicker fabrics require sturdier needles, and thinner fabrics have a tendency to pucker when stitching bold embroidery letters or filled in shapes. When in doubt, stick with cotton or linen-cotton blend fabrics with a medium weave.
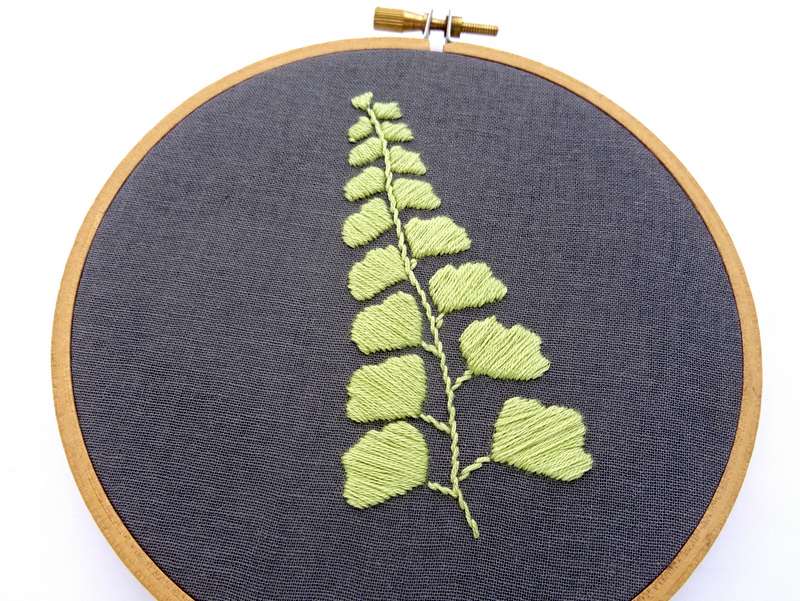
Colored fabrics are great for embroidery. Don’t be afraid to experiment by stitching dark fabrics with light or bright colored floss. I love this fern pattern on white fabric, but I love it even more stitched on dark grey linen!
Embroidery Floss
Stranded Cotton By far the most common embroidery thread is stranded cotton floss made by DMC. It comes in skeins with 6 strands that you can use either all together as a thicker floss or split into a smaller number of strands for varying embroidery effects. DMC floss comes in a multitude of colors — each with their own unique assigned number. All of the hand embroidery patterns here on Wandering Threads Embroidery include a list of recommended DMC cotton floss colors. DMC floss is sold at most sewing and craft stores.
Pearl Cotton Another popular option is two-stranded pearl cotton floss. Consisting of two threads twisted together, this floss is intended to be used as one piece and produces a result that is thicker and shinier than stranded cotton. The most common brands of pearl cotton are DMC and Anchor.
Wool, Silk, Sewing Thread & More In theory, you can use any kind of thread for embroidery. Don’t be afraid to experiment. Wool embroidery thread is commonly used in Crewelwork while silk thread can be found in Japanese Embroidery.
Needles
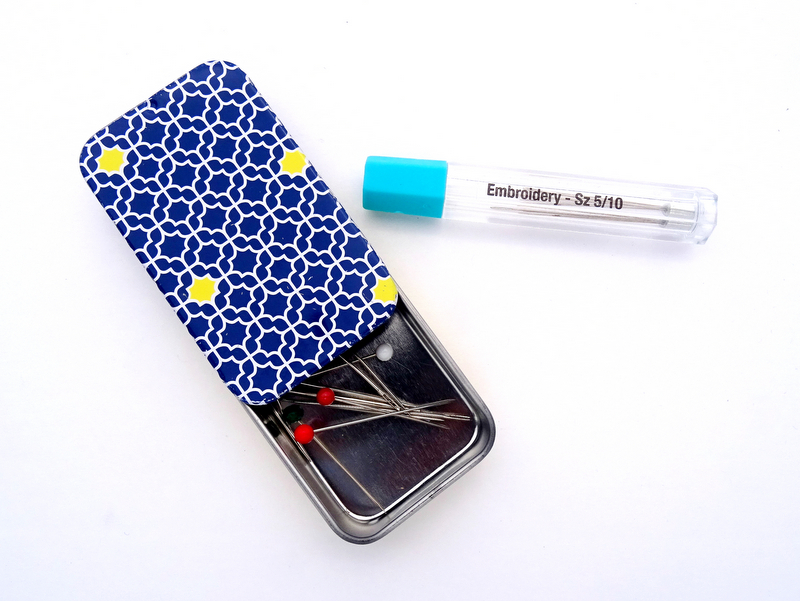
Embroidery or Crewel Needles This type of needle has a medium-sized eye slightly larger than the shaft of the needle. They come in sizes 1-12 with 12 being the smallest. The idea is to choose a needle large enough for your thread choice to fit through the eye, but not so large that it leaves an unsightly hole in the fabric. I tend to choose a size 3 or 4 when using all 6 strands of DMC floss (or pearl cotton) and a size 8 or 9 needle for almost everything else. Embroidery needles often come in packages containing multiple sizes which makes it easy to try out different needles.
Needle Storage Since no one wants loose needles floating around, using some type of needle storage is key. Magnetic Needle Box: These boxes are made of metal or plastic and contain a magnet inside to hold the needles. I like this option for storing all the needles I am using for my current project. Needle Storage Tubes: Another small and simple storage solution. These tubes are great for long term needle storage. Each plastic tube has a magnet at the bottom that holds the needles in place. Simply flip the tube upside down and the needles slide out in a fan shape while staying attached to the magnet. I have labels on my storage tubes so I know what size needles are in each one. Needle Minder: Since I am constantly finding my needles on the floor, on the couch, and in even in my clothing(!), using a needle minder is a must. This super simple product is basically just two strong magnets stuck together on either side of your project, creating the perfect spot to hold your needle. No more needles on the couch!
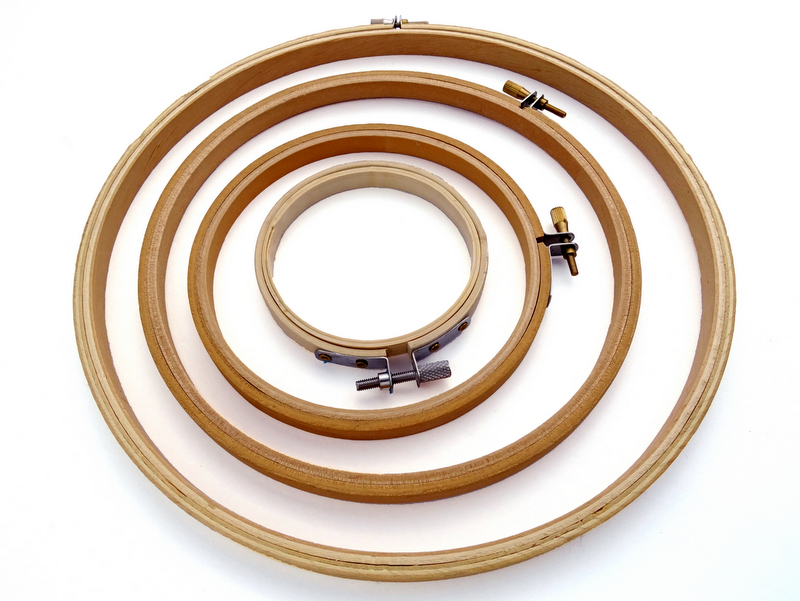
Embroidery Hoops
Embroidery hoops stretch the fabric tight so it’s easier to embroider while preventing wrinkles or puckering. While, technically, you can embroidery without them, I consider hoops to be essential on any list of hand embroidery supplies.
They come in a wide variety of sizes, shapes, and materials with the most common being round hoops made from wood. You can purchase them at nearly any craft store, or on Amazon in quantities or sets of sizes. Wooden hoops are also perfect for framing inside the hoop or making cute little wooden framed ornaments. How to Finish an Embroidery Hoop
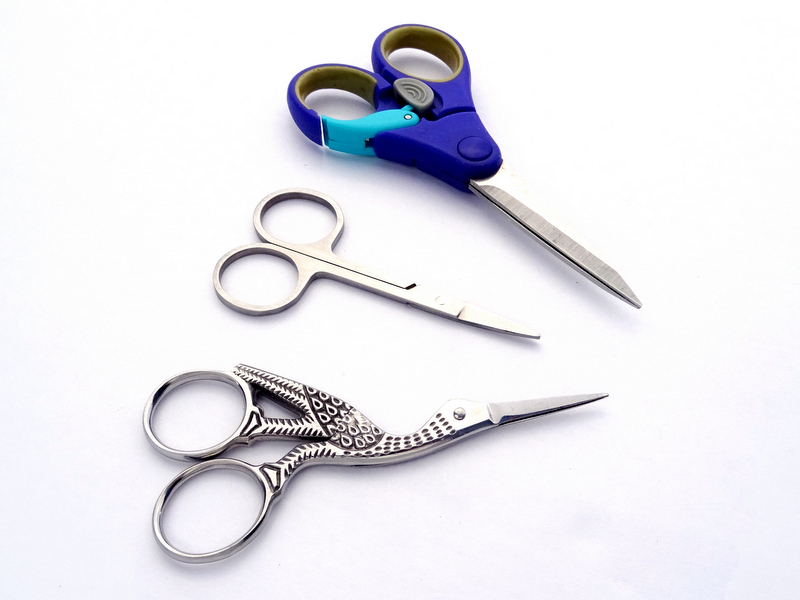
Scissors
The truth is that you don’t need embroidery scissors for embroidery. But you do need scissors to cut your thread ends, trim the fabric around your hoop, and occasionally, snip out a mistake stitch or two. For these purposes, it’s handy to have a pair of scissors with small blades and wide comfortable handles. Look for those with narrow blades between 1-2 inches long. It can also be useful to keep a pair of larger dressmaker scissors for cutting fabric on hand.
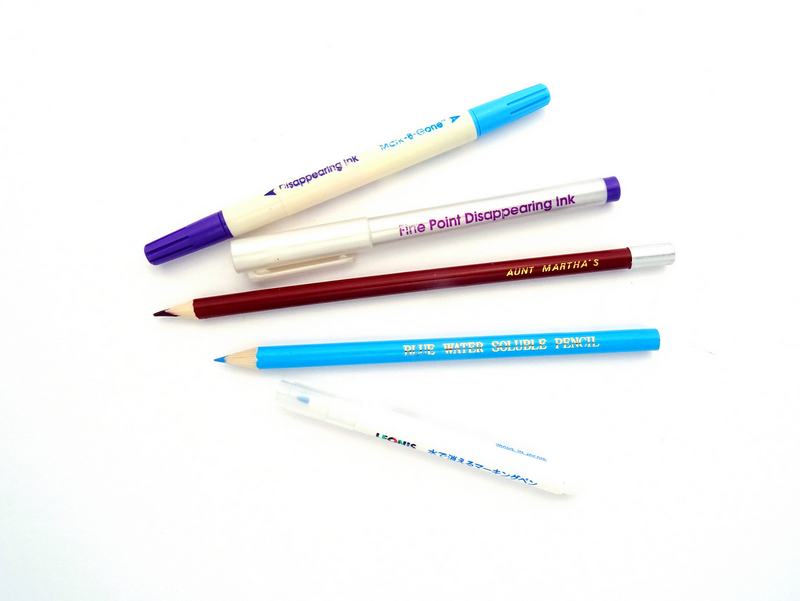
Fabric Marking Pens
Fabric marking pens and pencils are available in an array of options. There are air-erasable pens and pencils that disappear over time, water-erasable pens and pencils that disappear with a dab of water, and even a special pencil used for iron-on transfer.
In general, I prefer pens over pencils for marking fabric. They tend to make sharper lines and are far easier to erase than pencils. In terms of air-erasable vs. water-erasable, because I sometimes spend up to a week working on one project, I have found that the air-erasable options disappear too fast for my needs. My very favorite marking pens are the Leonis Water Erasable Pens. They have a nice sharp tip, each pen lasts for a long time, and the ink is easy to wash away with just a bit of water.
You can successfully embroider almost anything with the supplies listed above, but here are a few more optional items:
Floss Organizer: As your collection of embroidery floss grows you may find that an organizer box is a handy tool. You can buy a set of floss bobbins and use any type of box (a fishing tackle box works great). Or, you can purchase a special floss organizer that comes with bobbins and stickers to mark the floss numbers. Floss Rings: These are actually bookbinder rings, but they work well in tandem with floss bobbins for organizing floss. Since I am often embroidering more than one project at a time, I use these rings to keep my chosen floss for each project in one place. Project Notebook or Spreadsheet: I like to have a designated place to record notes regarding all my embroidery projects. I make notes on floss colors, stitch choices, and any changes I would make if I were to repeat the project. Good Lighting: Proper lighting is key for all embroidery projects. While a nice sunny window or an outside spot under a shade tree is ideal for embroidery, it’s not always possible to use natural light. If you find yourself straining to see your stitches you may want to consider a small sewing light to illuminate your space. You don’t have to spend a lot of money for a small sewing light. I like this small clampable desk lamp with a bendy gooseneck and an anti-glare LED bulb.
***Some of the items on this page are part of our Amazon affiliate store. Wandering Threads Embroidery is paid a small percentage if you click through and purchase an item. The prices are the same as buying directly from Amazon and the funds help cover the cost of running this site. Thanks for your support!